Creating a RocketCyber console user
This article will describe the steps required to add a new user to the RocketCyber Console.
You can configure user accounts at the provider or organization levels in the RocketCyber Console.
Creating a user at the provider level
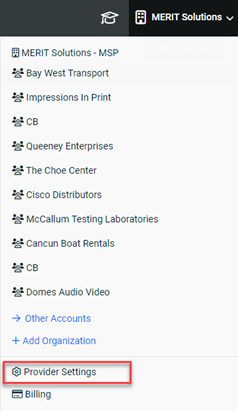
- From the Context switching menu at the upper-right of the RocketCyber Console, click Provider Settings.
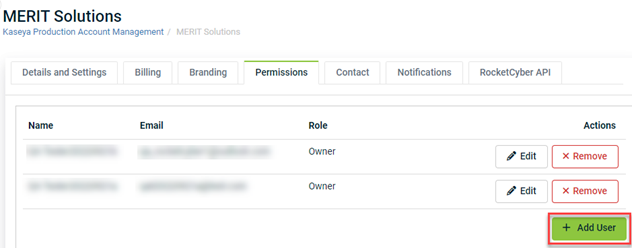
- Click the Permissions tab and click Add User.
- Enter the user details in the Add a User dialog box and click Save.
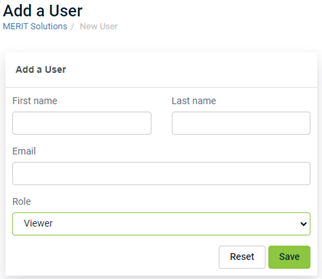
You can choose the following roles to assign to the user being created:
- Owner: Full administrator access to the Provider and all Organizations.
- Viewer: View-only permissions; cannot change configurations or modify users.
- Incident Responder: Able to view/delete Rocket App results.
Creating a user at the organization level
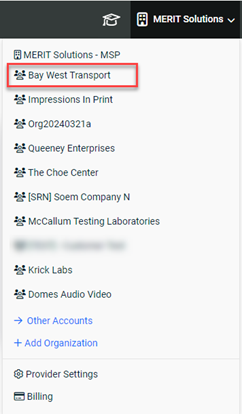
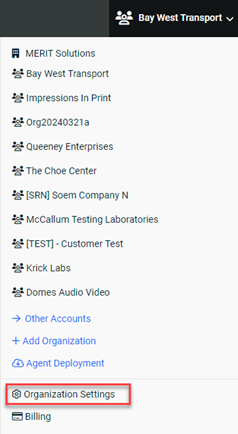
- From the Context switching menu at the top right of the RocketCyber Console, select the desired organization.
- From the Context switching menu, select Organization Settings.
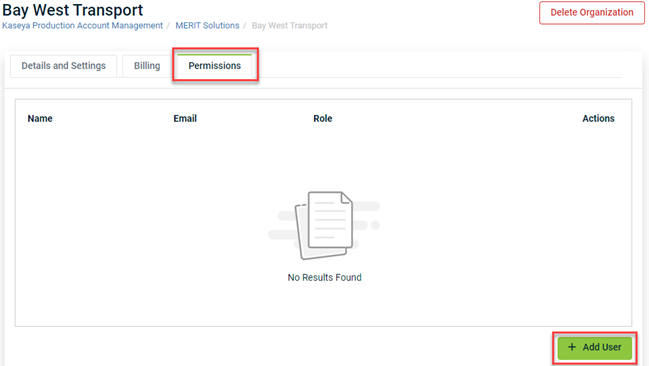
- Click the Permissions Tab and click Add User.
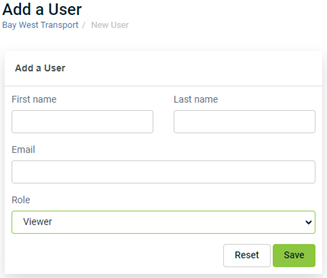
- Enter the user details in the Add a User dialog box and click Save.
You can choose the following roles to assign to the user being created:
- Owner: Full administrator access to the Organization.
- Viewer: View-only permissions; cannot change configurations or modify users.
- Incident Responder: Able to view/delete Rocket App results.


