Deploying via ConnectWise Automate
This guide will walk through using ConnectWise Automate to deploy the RocketCyber Agent.
A few notes about the deployment script:
- The console generates a LabTech expansion script that can be imported into ConnectWise Automate.
- After importing the script you will need to set the license key variable.
- The script first checks to see if the agent is already installed before performing an install.
- If the script does not detect an installed agent, it will download the agent installer package to the local machine and execute it.
Import the Expansion Script into ConnectWise Automate
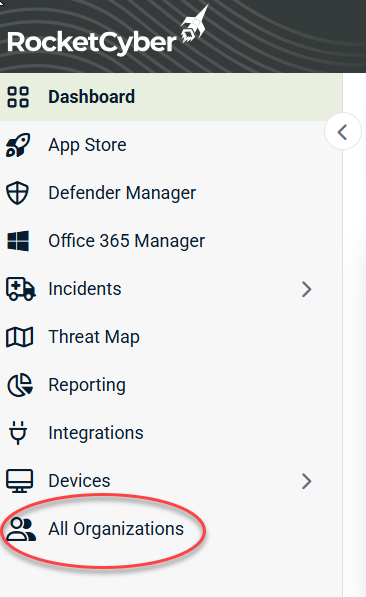
- Log in to RocketCyberand, in the navigation menu, click All Organizations.
- Click Deploy for the appropriate organization.

- Click the Download button to download the Expansion script for the desired organization.

- Log onto ConnectWise Automate and import the Expansion Script downloaded in the previous step.
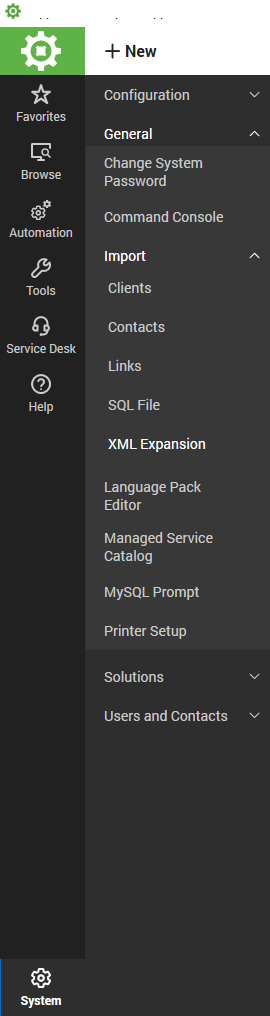
- To import the Expansion Script, go to the ConnectWise Automate Control Center.
- Click System > General > Import > XML Expansion.
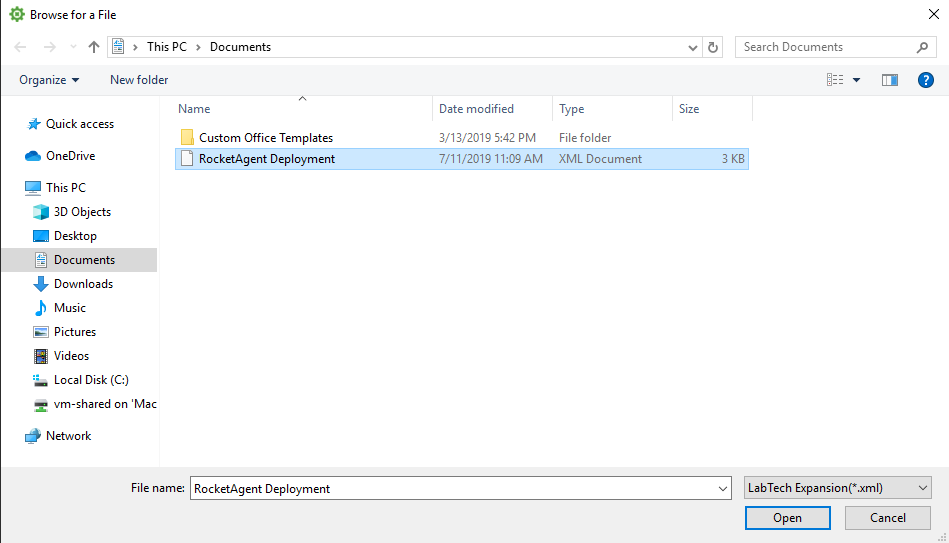
- In the Browse for a File dialog select the file that was downloaded from the RocketCyber Console and click Open.
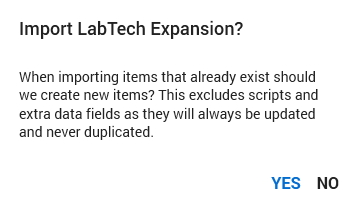
- On the import confirmation dialog, click Yes.
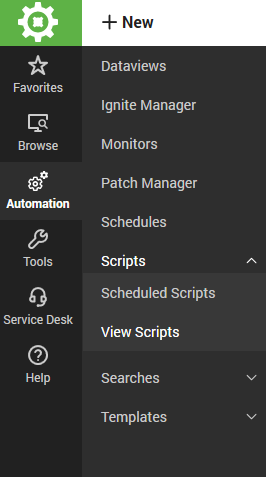
- Now navigate to the script that was just imported. From the left-hand navigation menu, click Automation > Scripts > View Scripts.
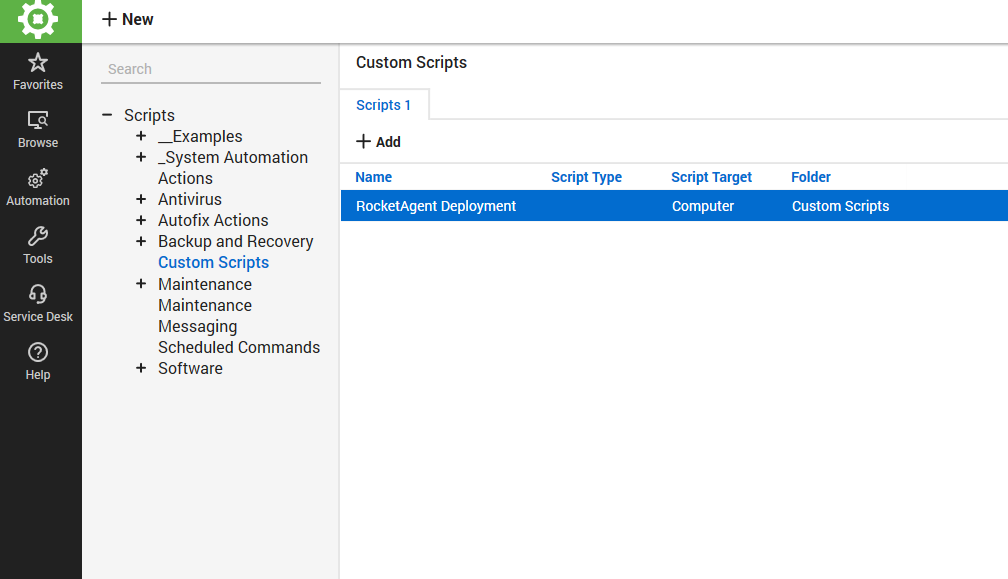
- Inside the View Scripts interface, expand the Scripts tree to Custom Scripts.
- Select Custom Scripts.
- Double-click RocketAgent Deployment.
You should now see the script editor dialog as shown above. In order for the script to properly deploy the agent, you must supply the license key to the script as a variable. - Click the Globals and Parameters tab to set the license key value.

- Click the variable @license_key@.
- In the Value field, enter the license key associated with the organization in the RocketCyber console. The license key can be found on the deployment page for the selected organization.
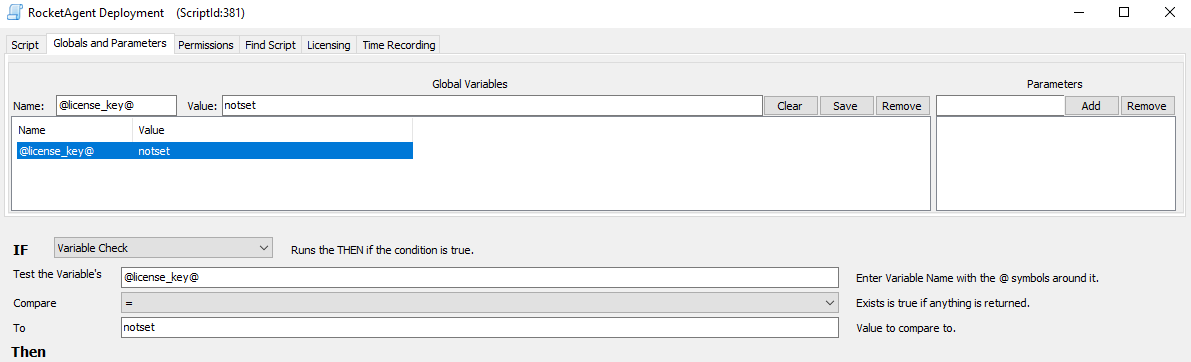
- Click Save.
Schedule the Expansion Script to Run on A Device
- Click the Browse button on the Automate Control Center left-hand navigation.
- Right-click the desired device.
- Click Scripts > Custom Scripts > RocketAgent Deployment.
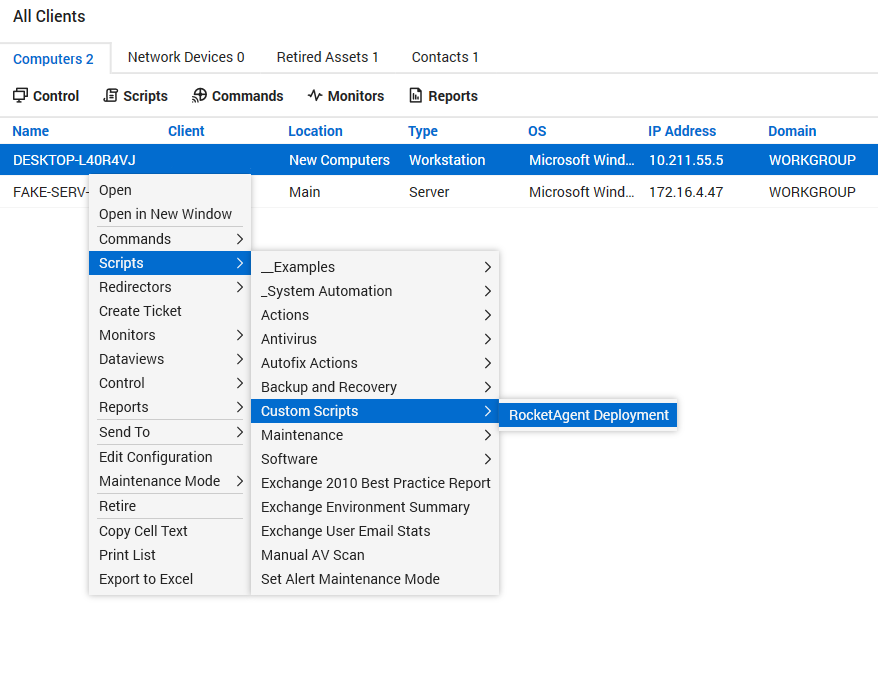
- Choose the desired schedule for the script to execute. Click OK.
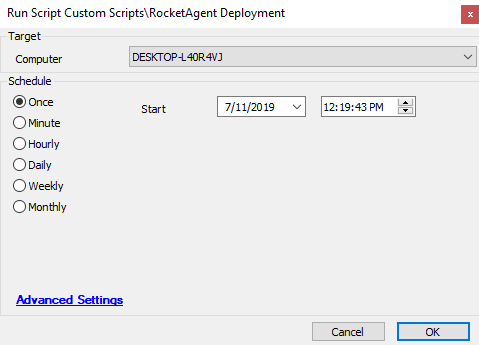
The script will be executed on the device on the schedule selected. When the agent is installed it will automatically appear in the chosen organization account on the RocketCyber Dashboard.
Schedule the Expansion Script to Run on All Devices for a Client
You can run the expansion script on all devices by:
- Right-click on the client in the Clients tab.
- Select Scripts > Computer Scripts > Custom Scripts > RocketAgent Deployment.
- Choose the desired schedule for the script to execute. Click OK.
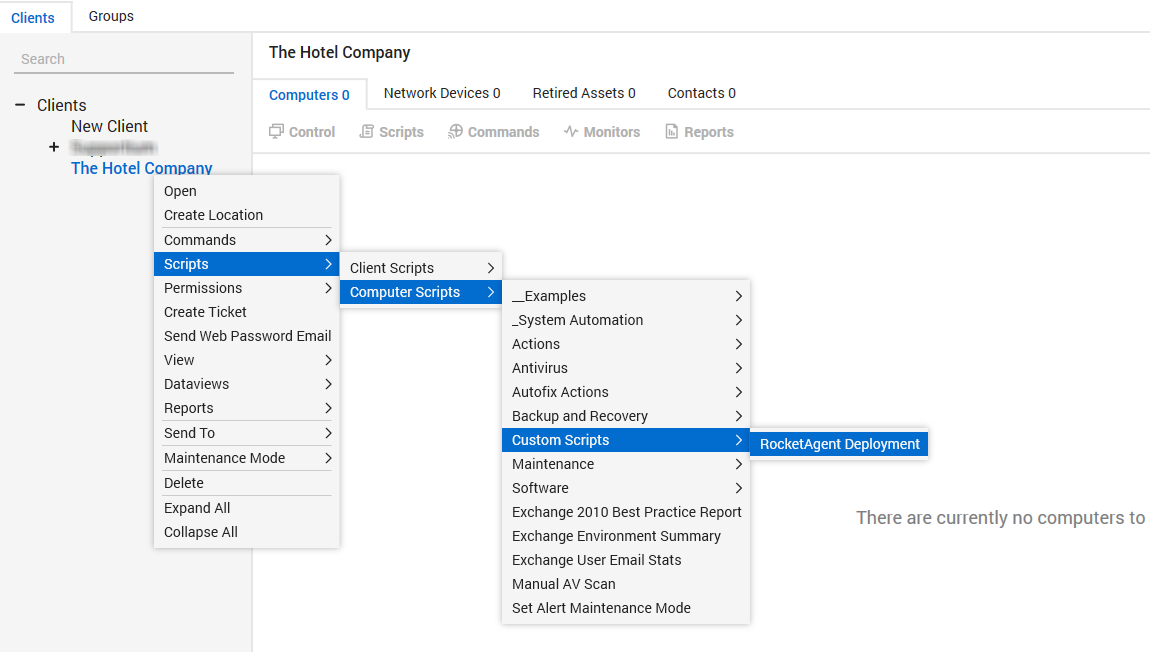
The script will be executed on the devices on the schedule selected. When the agents are installed they will automatically appear in the chosen organization account on the RocketCyber Dashboard.


