Configuring Barracuda ESS
This article provides step-by-step instructions for setting up and configuring the Barracuda ESS monitoring app.
Log in to RocketCyber and enable the Sentinel App
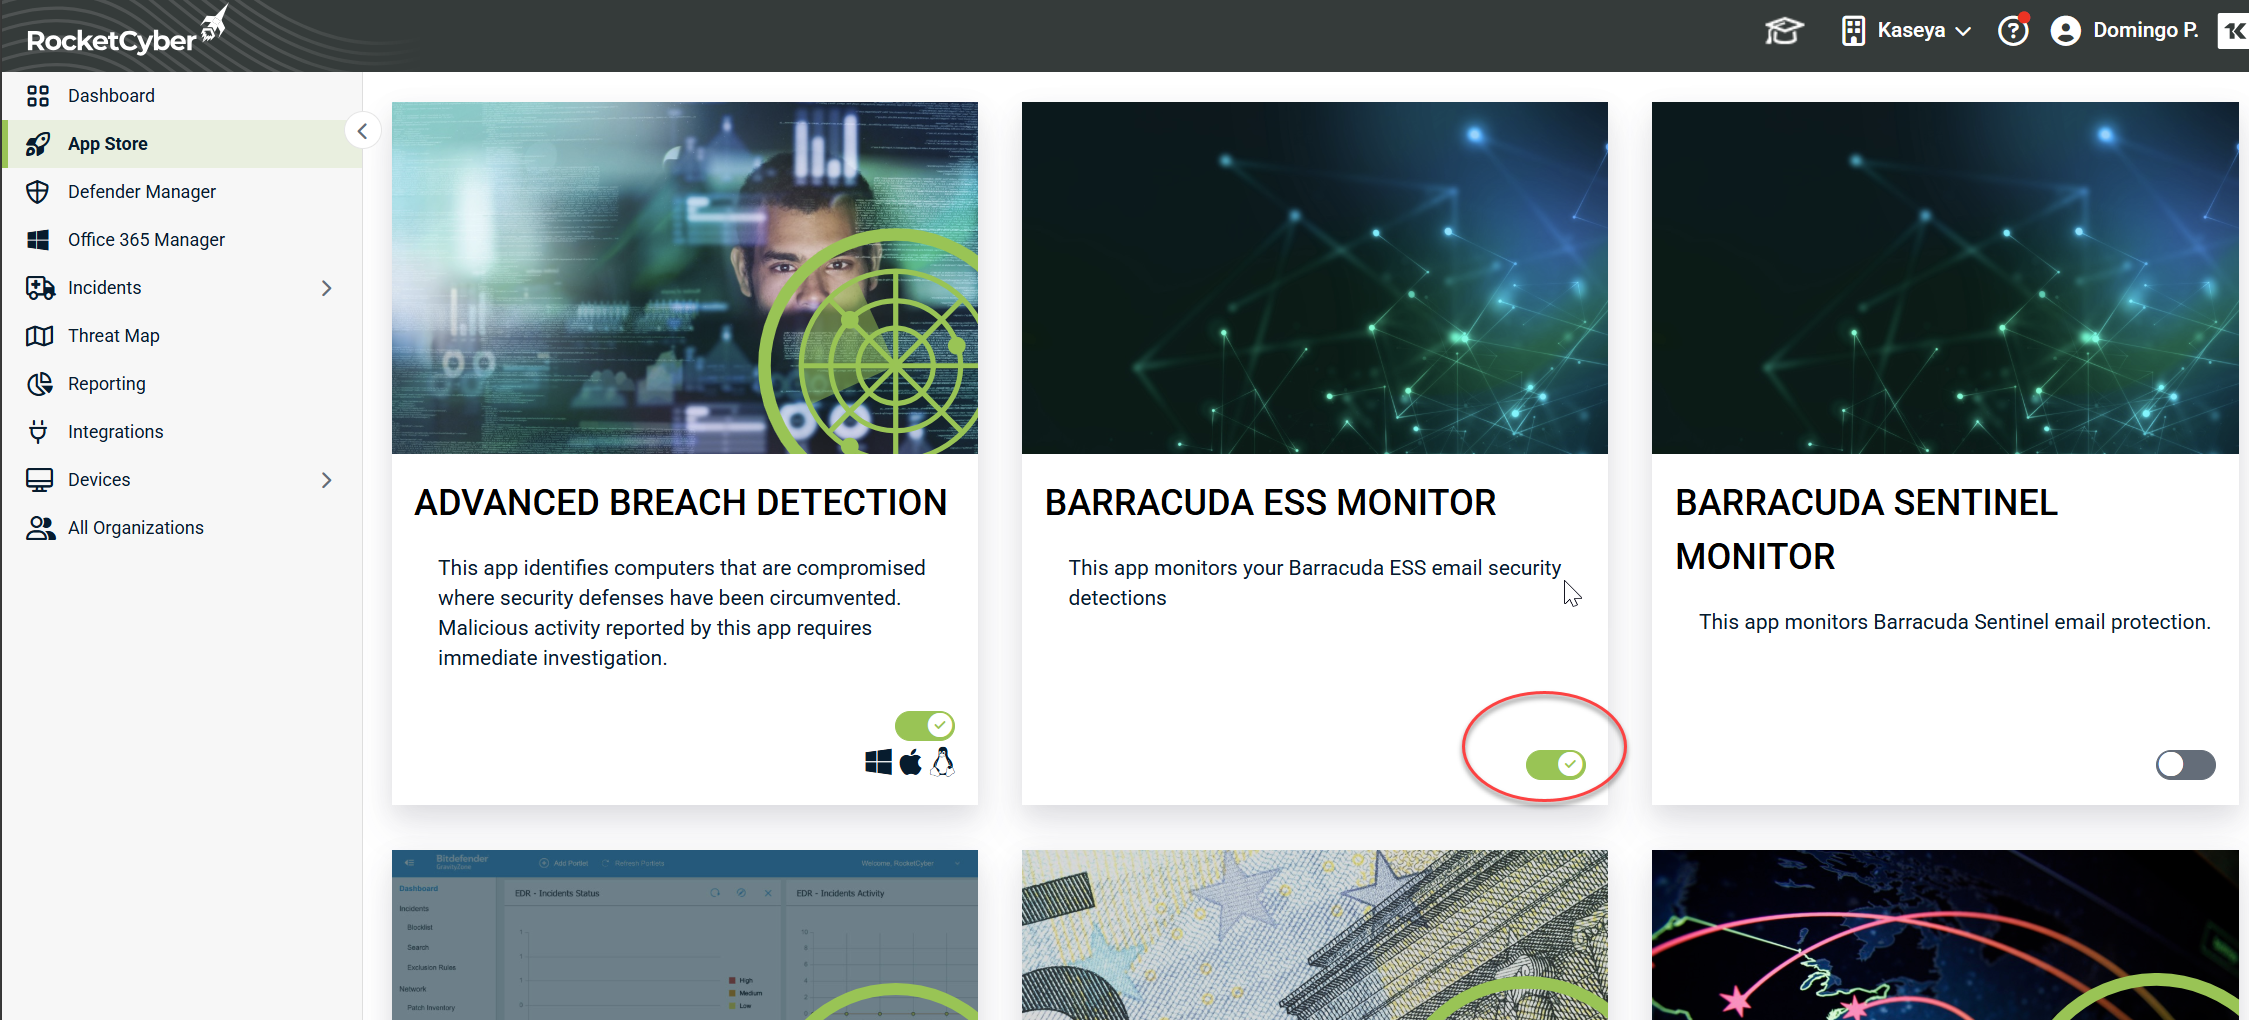
- From the left menu, click App Store.
-
Turn on the Barracuda ESS Monitor App toggle until it appears green.
- In the left menu, click Integrations.
- Select the Email Security tab and then click Barracuda Ess Monitor.
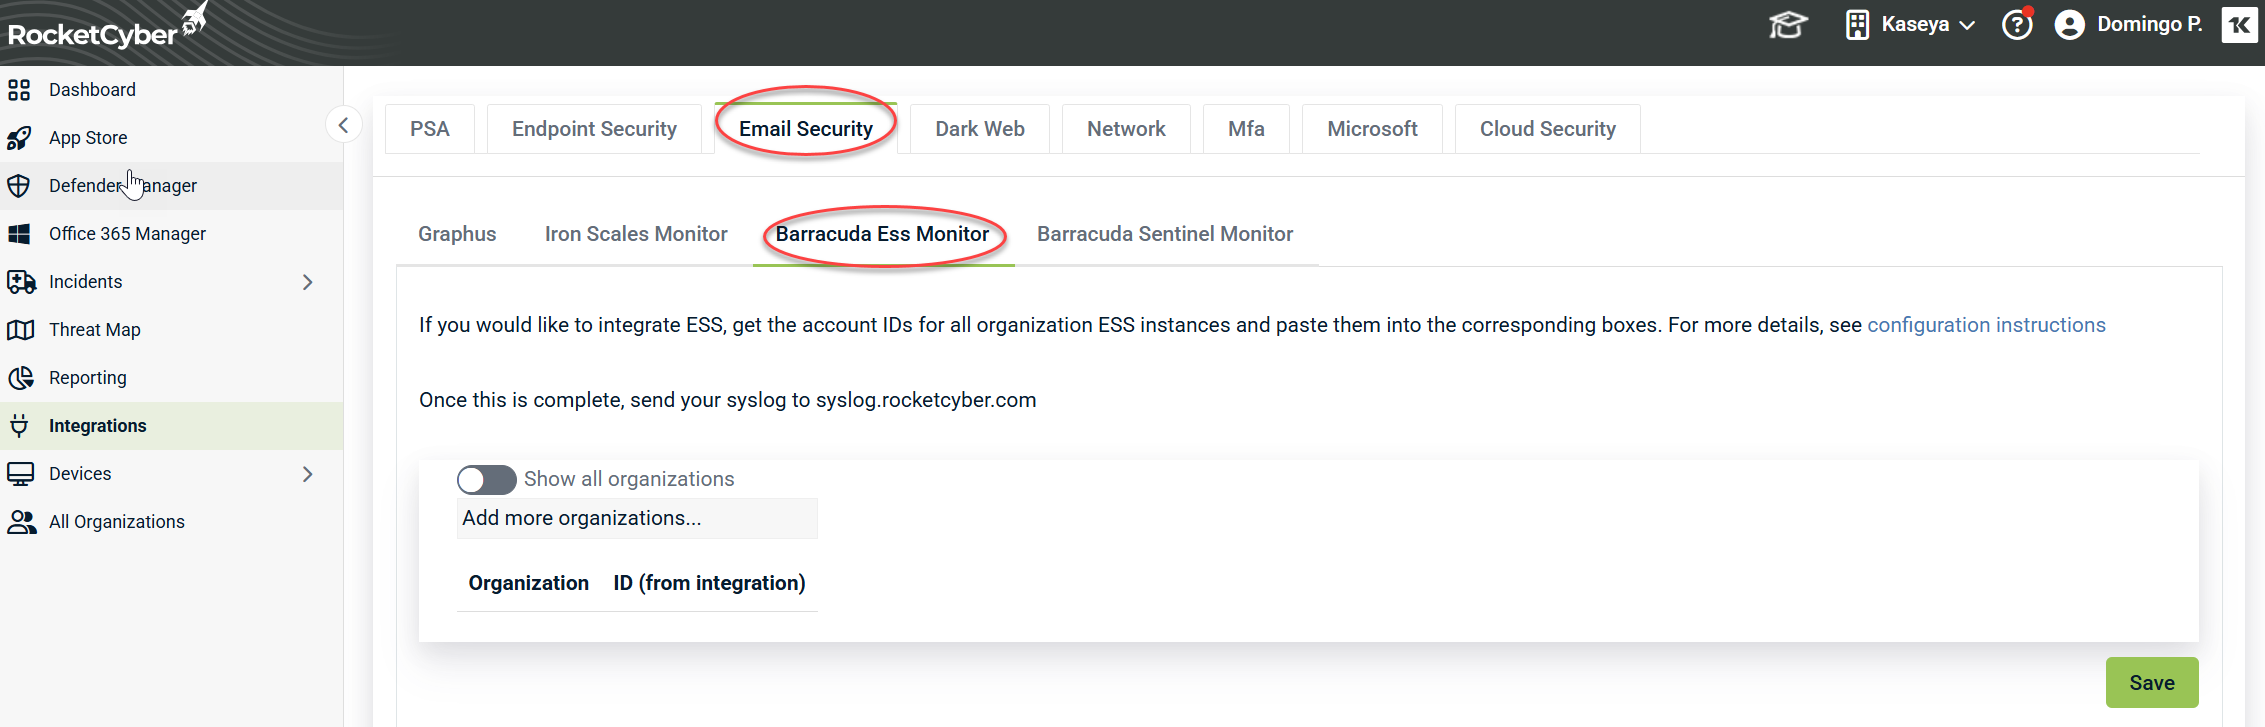
You will see a form where you can paste the Account ID from Barracuda ESS for each organization being managed.
Finding the Account ID (ID)
- Log in to the Barracuda ESS Dashboard and change context to the appropriate organization account.
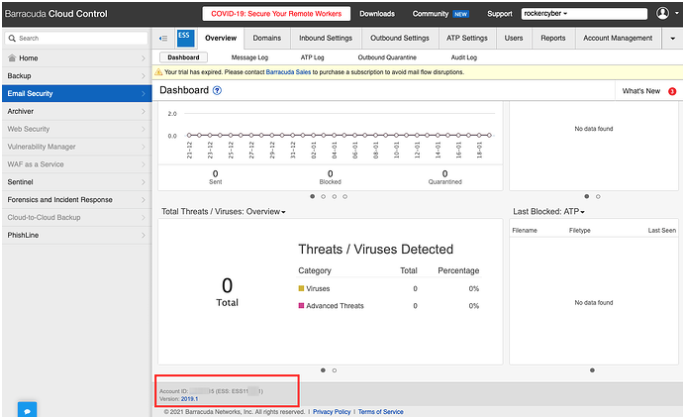
- At the bottom of the Dashboard, locate the Account ID / ESS ID.
- Copy the Account ID that begins with ESS from the Dashboard and paste it into the Integrations tab for the corresponding organization. Ensure that ESS is included as part of the ID (e.g., ESS12345).
- Repeat steps 1-3 for all organization accounts. Once finished, click Save on the Integrations tab in the RocketCyber console.
- Log in to the ESS Dashboard.
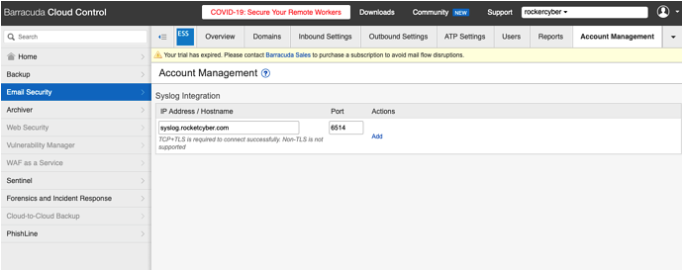
- Click theAccount Management tab.
- In the IP Address/Hostname field, type:
- US: syslog.rocketcyber.com
- EU: eu-syslog.rocketcyber.com
- Set the port to 6514.
- Click Add.
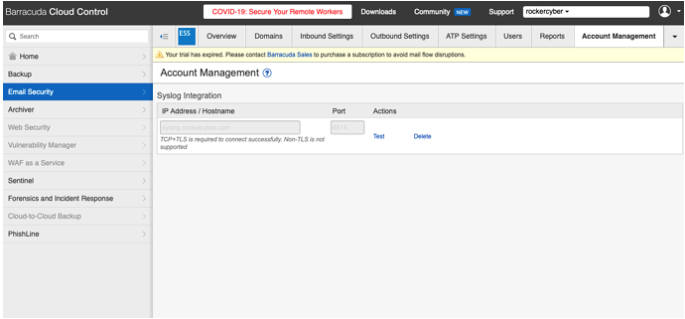
- Click the Test button to verify the connection.
Congratulations. The ESS Monitoring app should now start forwarding data to the RocketCyber Console.
NOTE The Barracuda syslog test feature may return the error Port unreachable: message failed to deliver or a similar message. This is because the syslog test server is using an unsupported version of TLS. The integration will still function correctly; this error only pertains to the test message and should not raise concerns.


