Configuring Datto EDR and Datto AV
Setup details
- Create an API token in Datto EDR/Datto AV for use by RocketCyber.
- Configure the integration in RocketCyber and map organizations.
To connect Datto EDR/Datto AV to RocketCyber, you will first need to collect the following pieces of information from your instance:
- The URL you use to access Datto EDR/Datto AV.
- An API token generated in Datto EDR/Datto AV for RocketCyber to use for the integration.
Generating an API token
To generate an API token, follow these steps:
-
Log in to your Datto EDR/Datto AV instance.
-
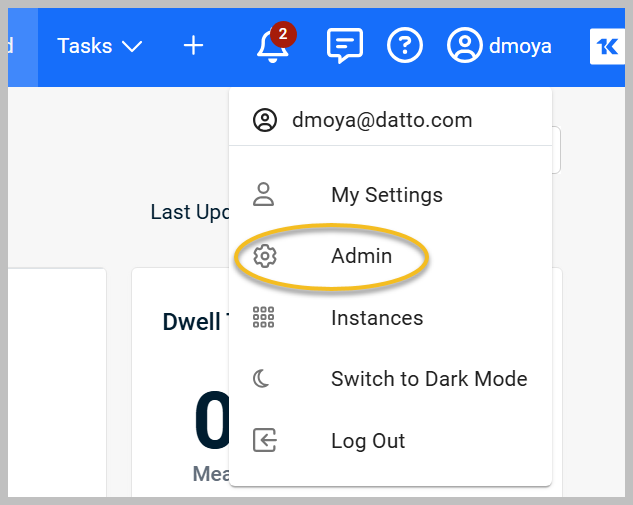
In the upper-right corner of the header, click your user icon and select Admin from the drop-down menu.
-
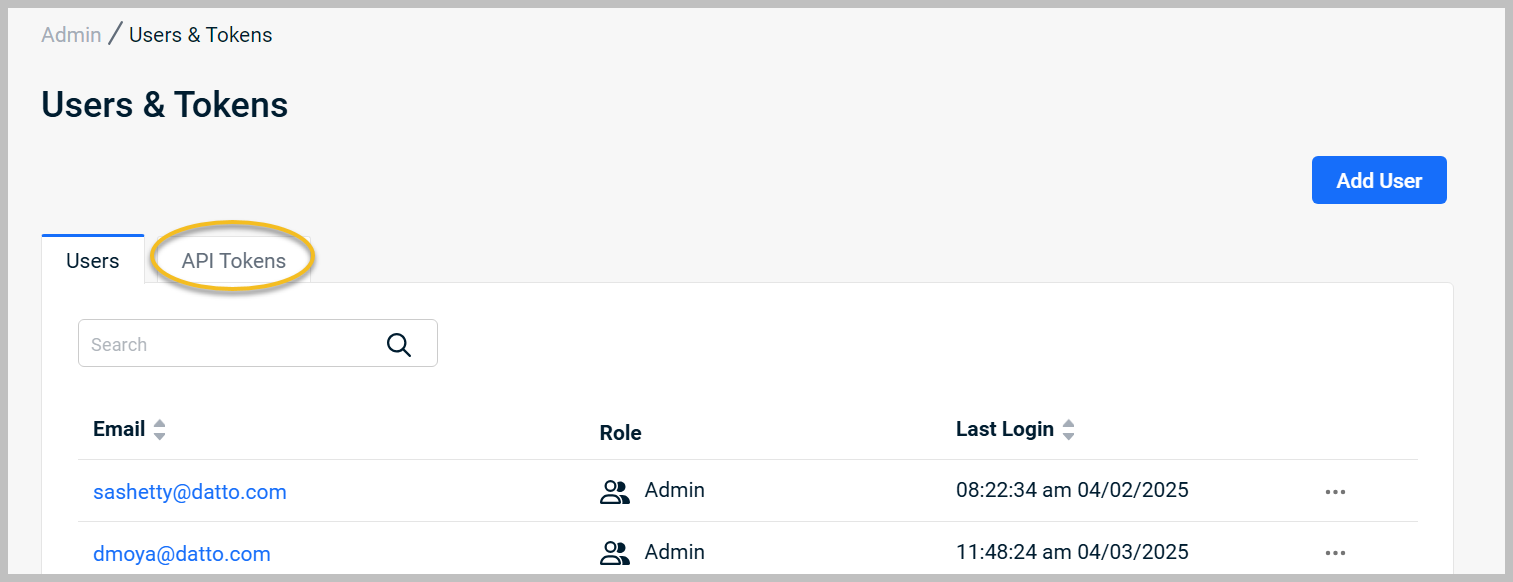
On the Users & Tokens page, click the API Tokens tab.
-
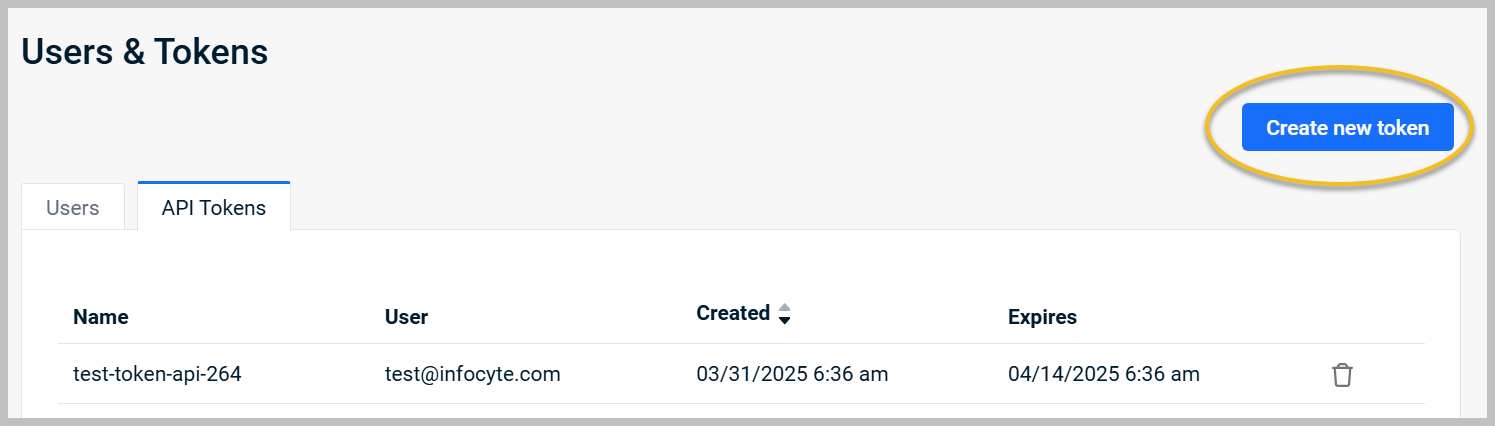
Click Create new token.
-
Enter a name for the token in the Token Description field, such as RocketCyber, so you can easily identify it later.

-
Click Create.

-
Copy the generated token for later use, and make sure you protect access to the key. You will not be able to view it in Datto EDR/Datto AV after creation.
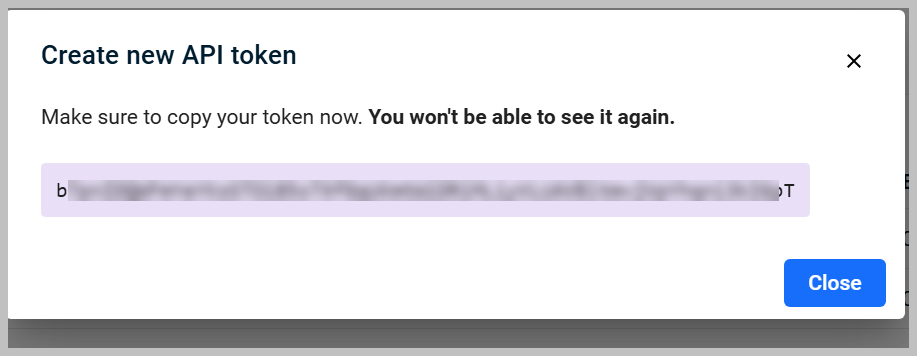
IMPORTANT The generated key expires one year after creation. You will need to refresh the key once a year to ensure continued integration. Please make a note and set a reminder to refresh the key yearly.
Configuring the integration in RocketCyber
To configure the integration in RocketCyber, follow these steps:
-
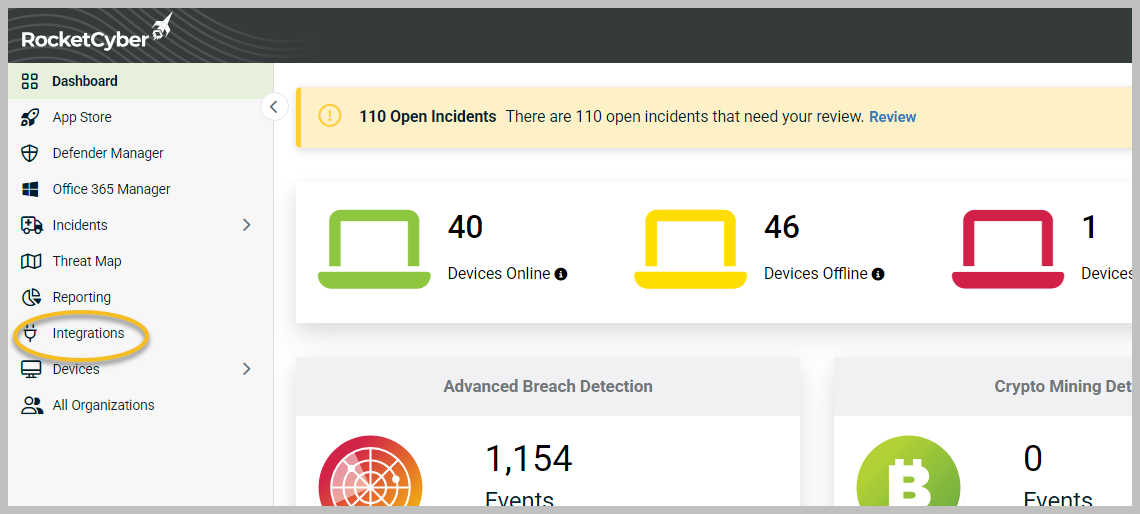
Log in to RocketCyber with provider-level access.
-
In the left menu, click Integrations.
-
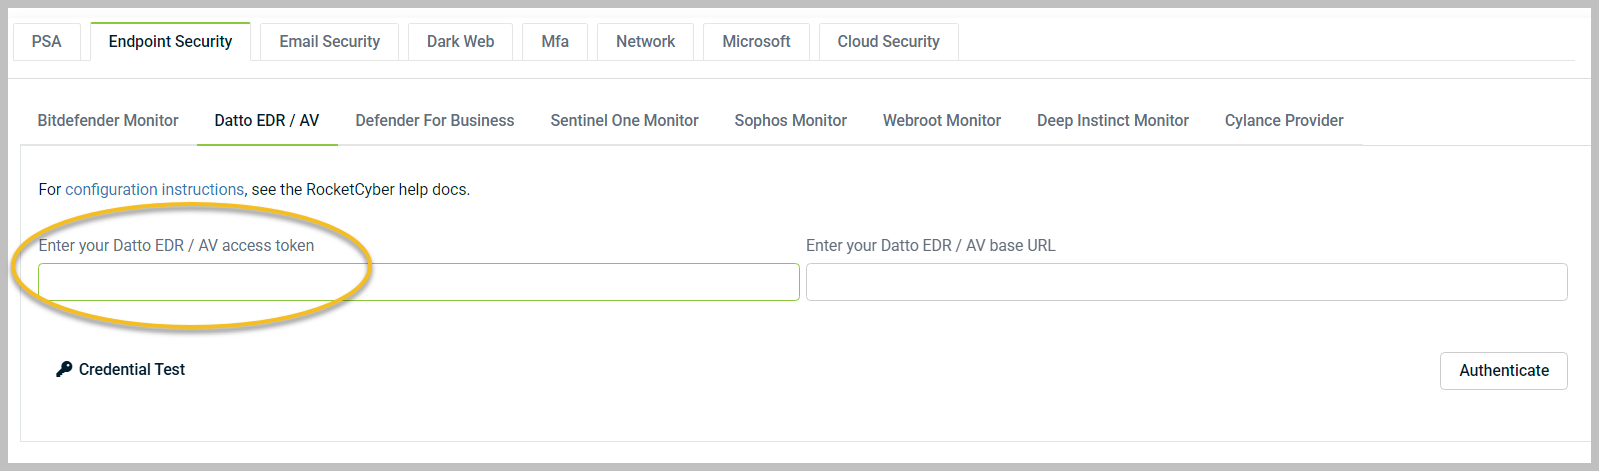
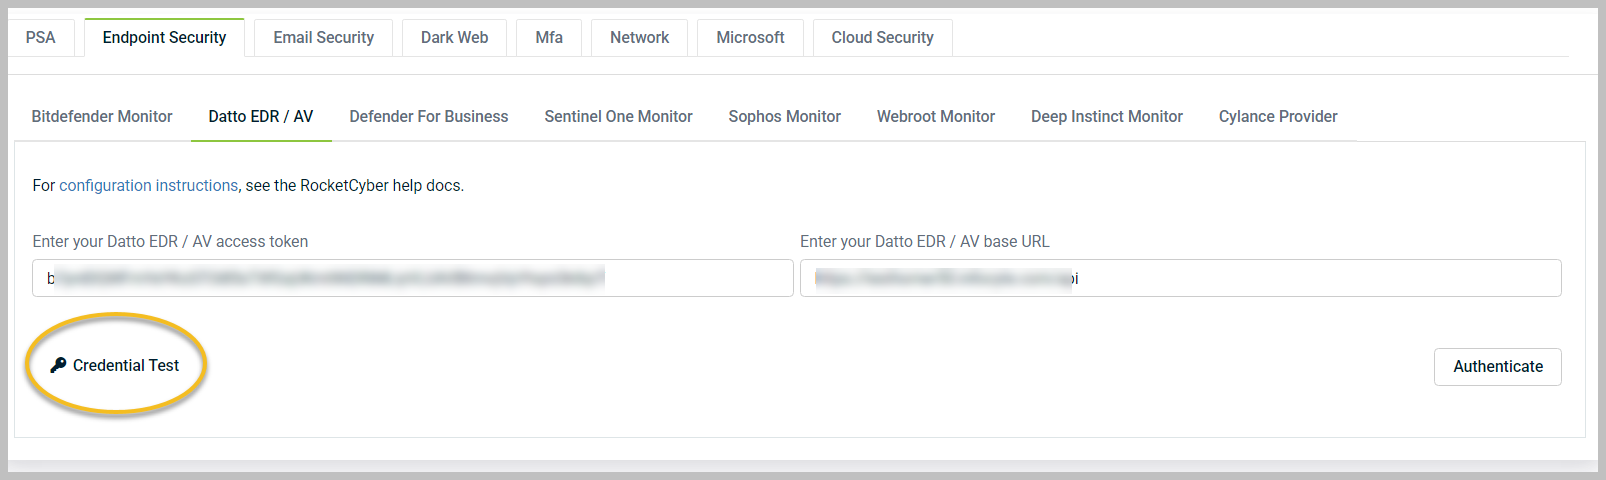
Click the Endpoint Security tab. Then, click the Datto EDR / AV tab.

-
Paste your copied API key in the Enter your Datto EDR / AV access token field.
-
Supply the URL you use to access Datto EDR/Datto AV by entering the base URL and adding /api in the Enter your Datto EDR/AV base URL field.
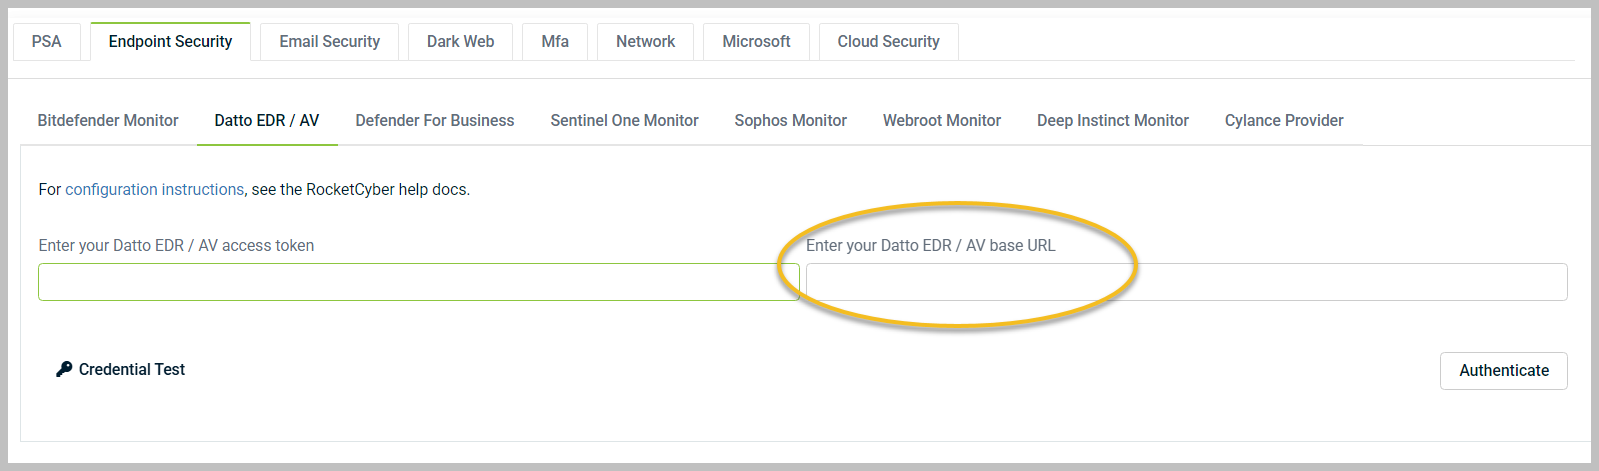
EXAMPLE https://instancename.infocyte.com/api
NOTE You must add /api to the end of the URL, or the attempt to authenticate and load companies will fail.
-
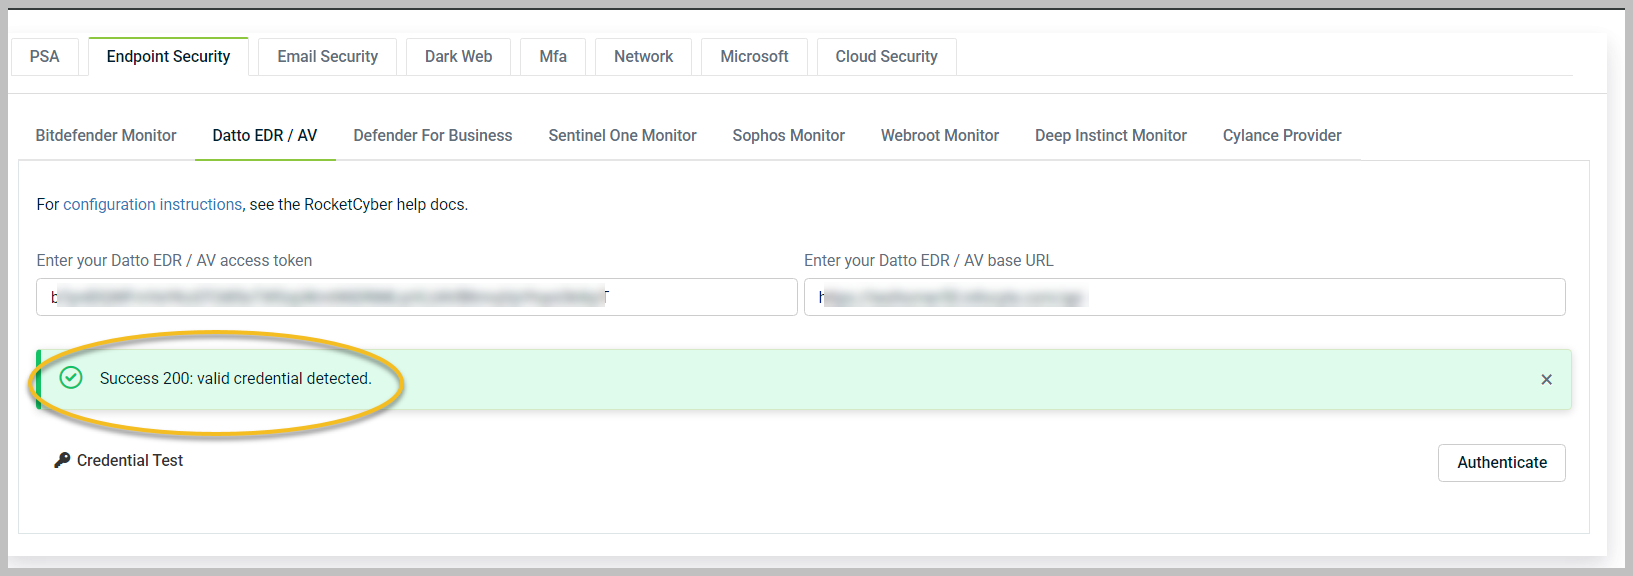
Click Credential Test to verify connection to Datto EDR/Datto AV.
-
If the credentials you entered are valid, a confirmation message will be displayed.
-
Click Authenticate.
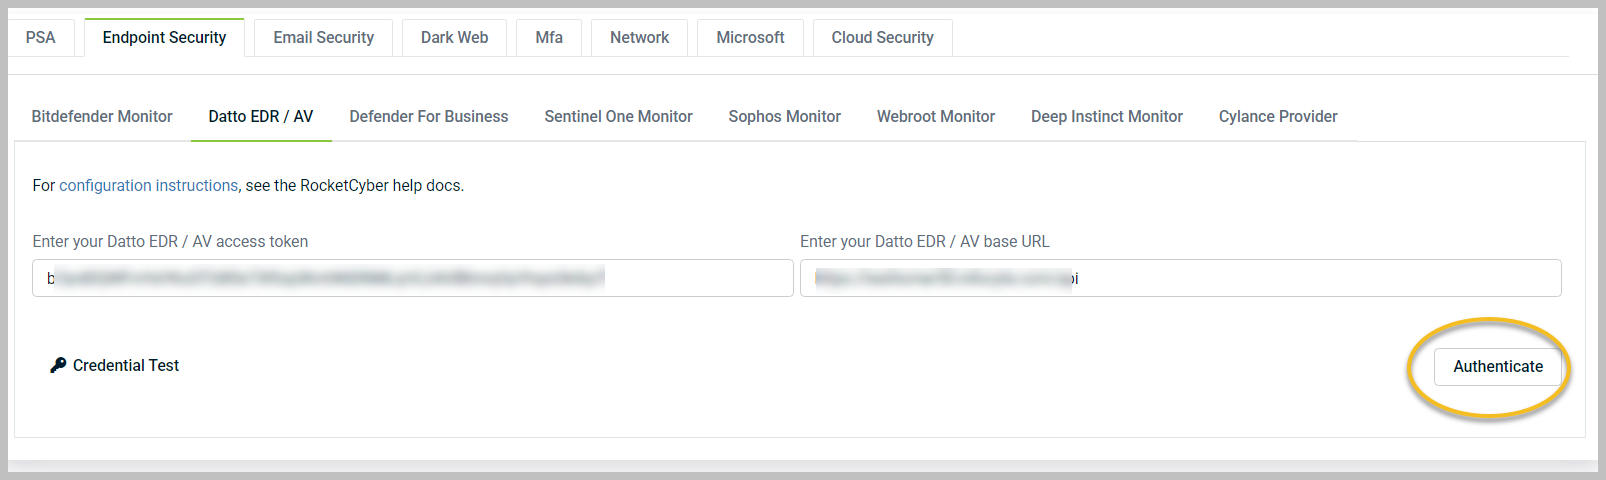
NOTE After successfully authenticating, RocketCyber will automatically create a webhook within Datto EDR / Datto AV so it can send telemetry to RocketCyber. If you configured the integration but see no data coming across (after a new event is triggered in Datto EDR/Datto AV), you may want to verify the webhook is created properly. Refer to Troubleshooting.
The organization mapping section will load, allowing you to map your Datto EDR/Datto AV sites/organizations to RocketCyber organizations.
-
Click Save Map when all organizations are mapped.
Once the setup and mapping is complete, you will see the events generated by Datto EDR / Datto AV populated in your RocketCyber dashboard within the Datto EDR / Datto AV monitor.
Now, the SOC will have visibility into Datto EDR / Datto AV events, and incidents will be created for items that require your attention.
Troubleshooting
If you see events in Datto EDR/Datto AV, but they are not populating in RocketCyber, you can check the webhook to ensure it was created properly and that no errors exist in the webhook.
Verifying the webhook that sends detection information to RocketCyber
The webhook should be automatically created by RocketCyber during the integration setup. Complete the following steps to verify the webhook is set up properly:
-
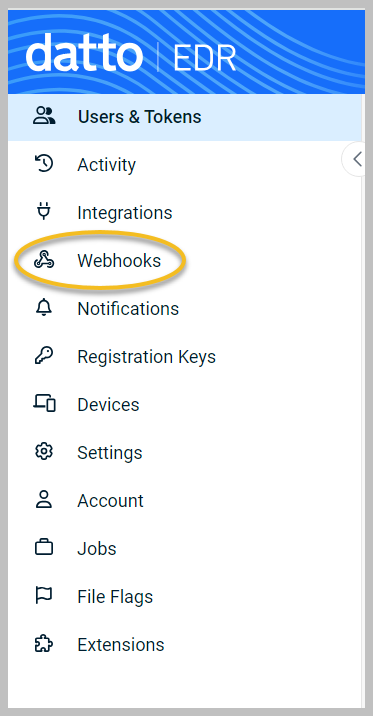
Log in to your Datto EDR/Datto AV instance.
-
In the upper-right corner of the header, click your user icon and select Admin from the drop-down menu.

-
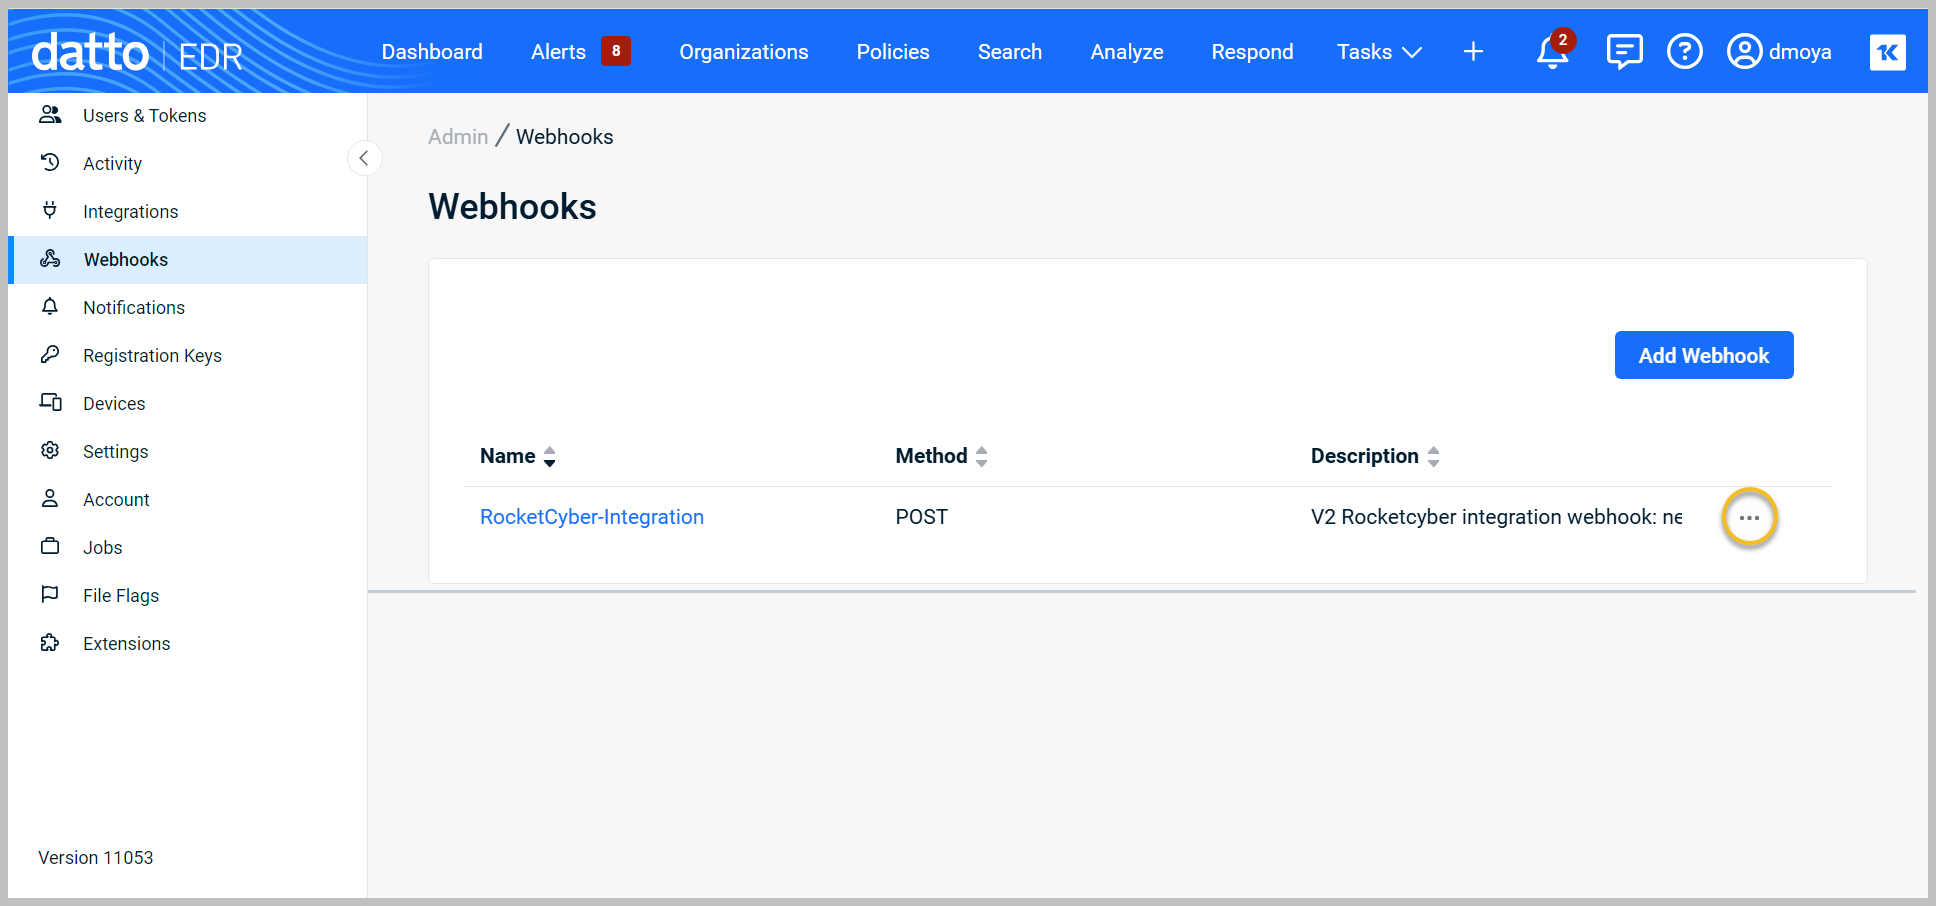
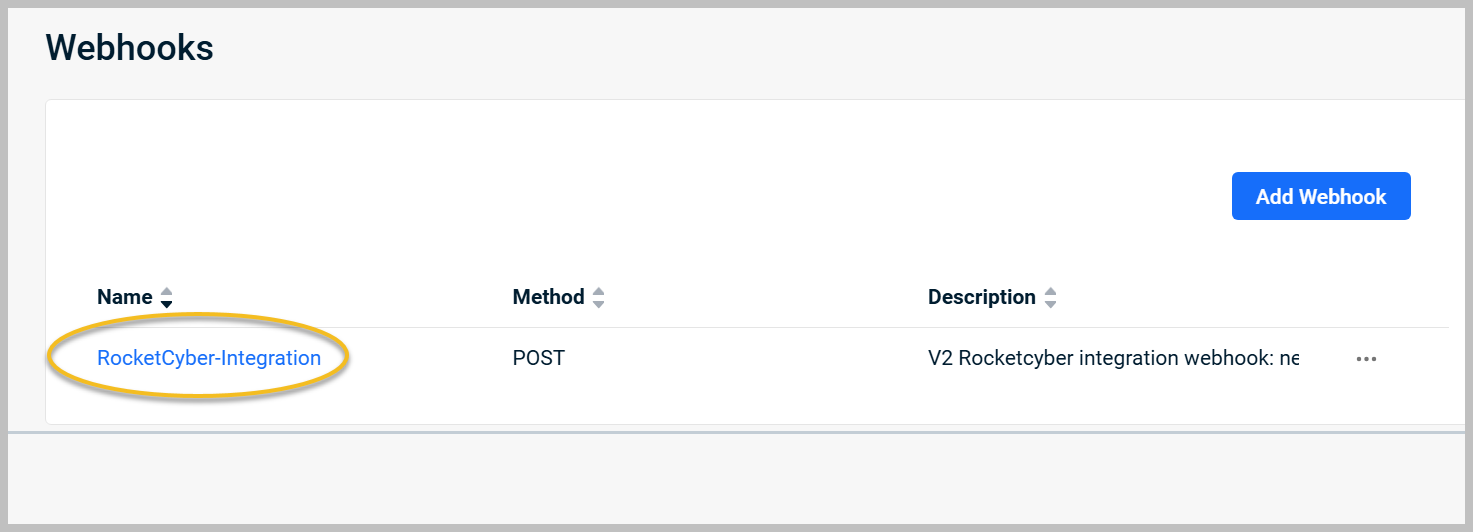
In the left menu, click Webhooks.
-
Select the RocketCyber-integration webhook.
-
Review the webhook to ensure it is configured as follows:
-
Name: RocketCyber-integration
- Description: V2 Rocketcyber integration webhook: needed to work with RocketCyber SOC
- Method: POST
- URL:
- For organizations using app.rocketcyber.com (US instance): https://web-receiver.us.rocketcyber.com/api/datto-edr
- For organizations using eu.rocketcyber.com: https://web-receiver-eu.herokuapp.com/api/datto_edr
- Headers: Content-Type=application/json
-
TIP If you are having trouble receiving events from Datto EDR / Datto AV (after configuring mapping), you can also navigate to the Webhooks section, click the ellipsis menu to the right of the webhook, and then click View Errors to see if any errors are sending data.