Configuring VulScan
This guide explains how to export VulScan notification tasks to RocketCyber. This integration allows you to view VulScan security issues directly within your RocketCyber dashboard. To use this integration, you will need an active VulScan subscription as well as a RocketCyber subscription.
Steps to set up the integration
Step 1: Enable VulScan from the RocketCyber App Store
First, you need to enable VulScan from the RocketCyber App Store:
1. Log in to your RocketCyber account and open the App Store.
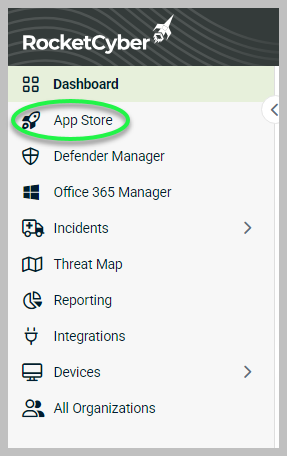
2. Apps are listed in alphabetical order, so scroll down to "V" for VulScan.
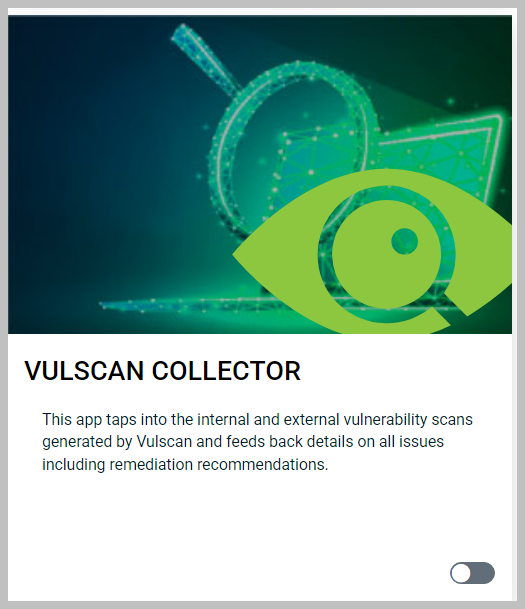
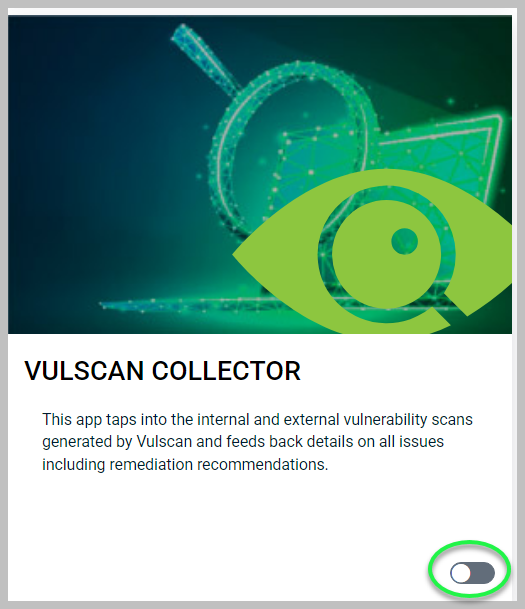
3. Turn on the toggle to enable VulScan Collector.
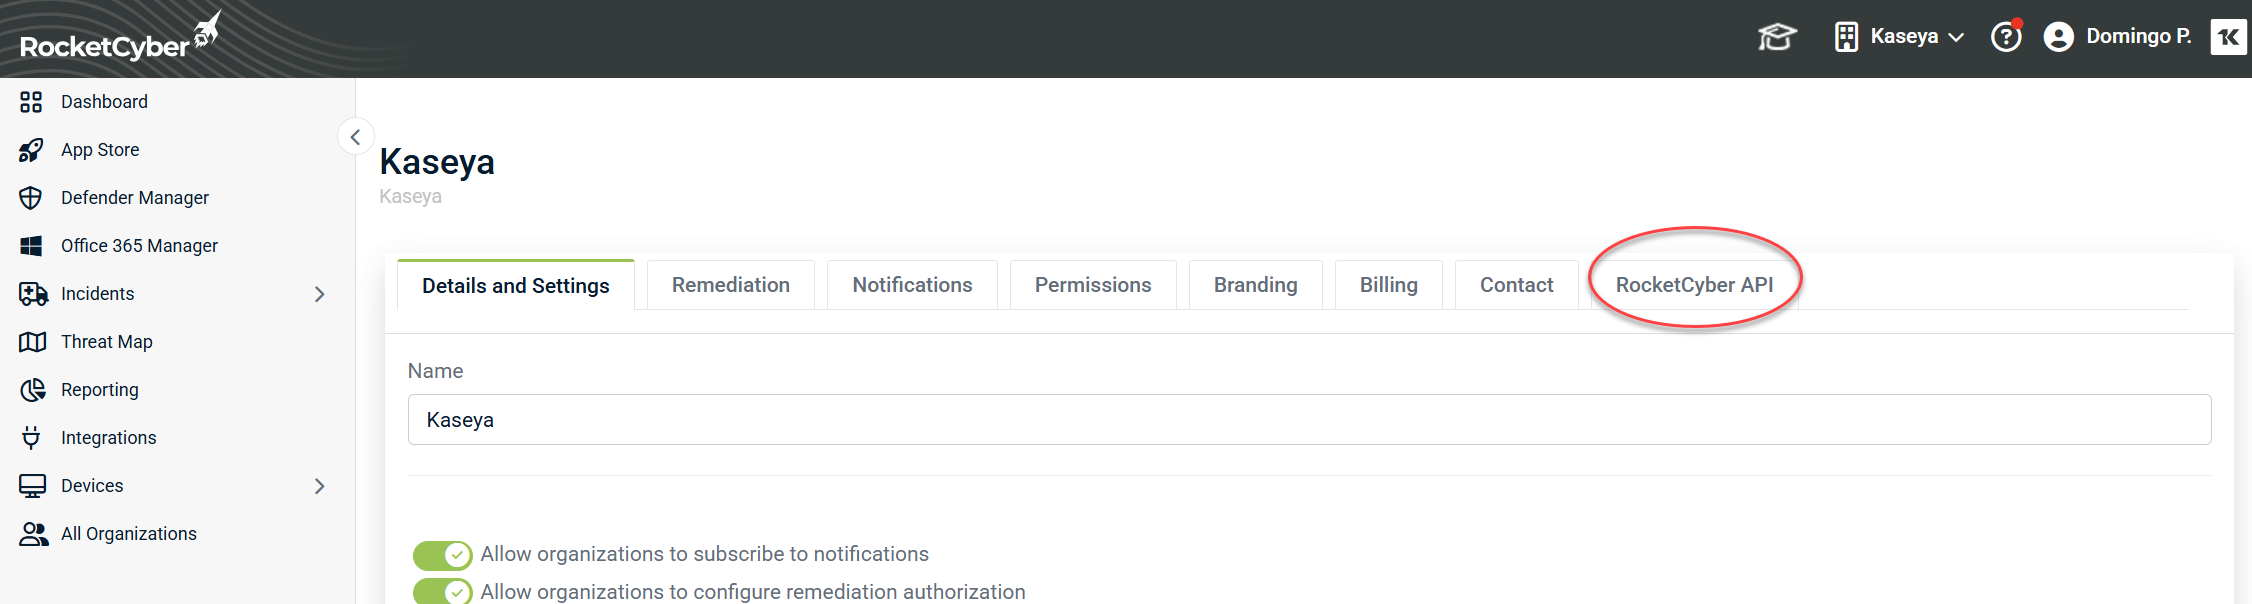
Step 2: Gather API credentials from your RocketCyber account
Next, collect two important pieces of information from your RocketCyber account to enable the integration:
1. From the top menu, select your company and then go to Provider Settings.
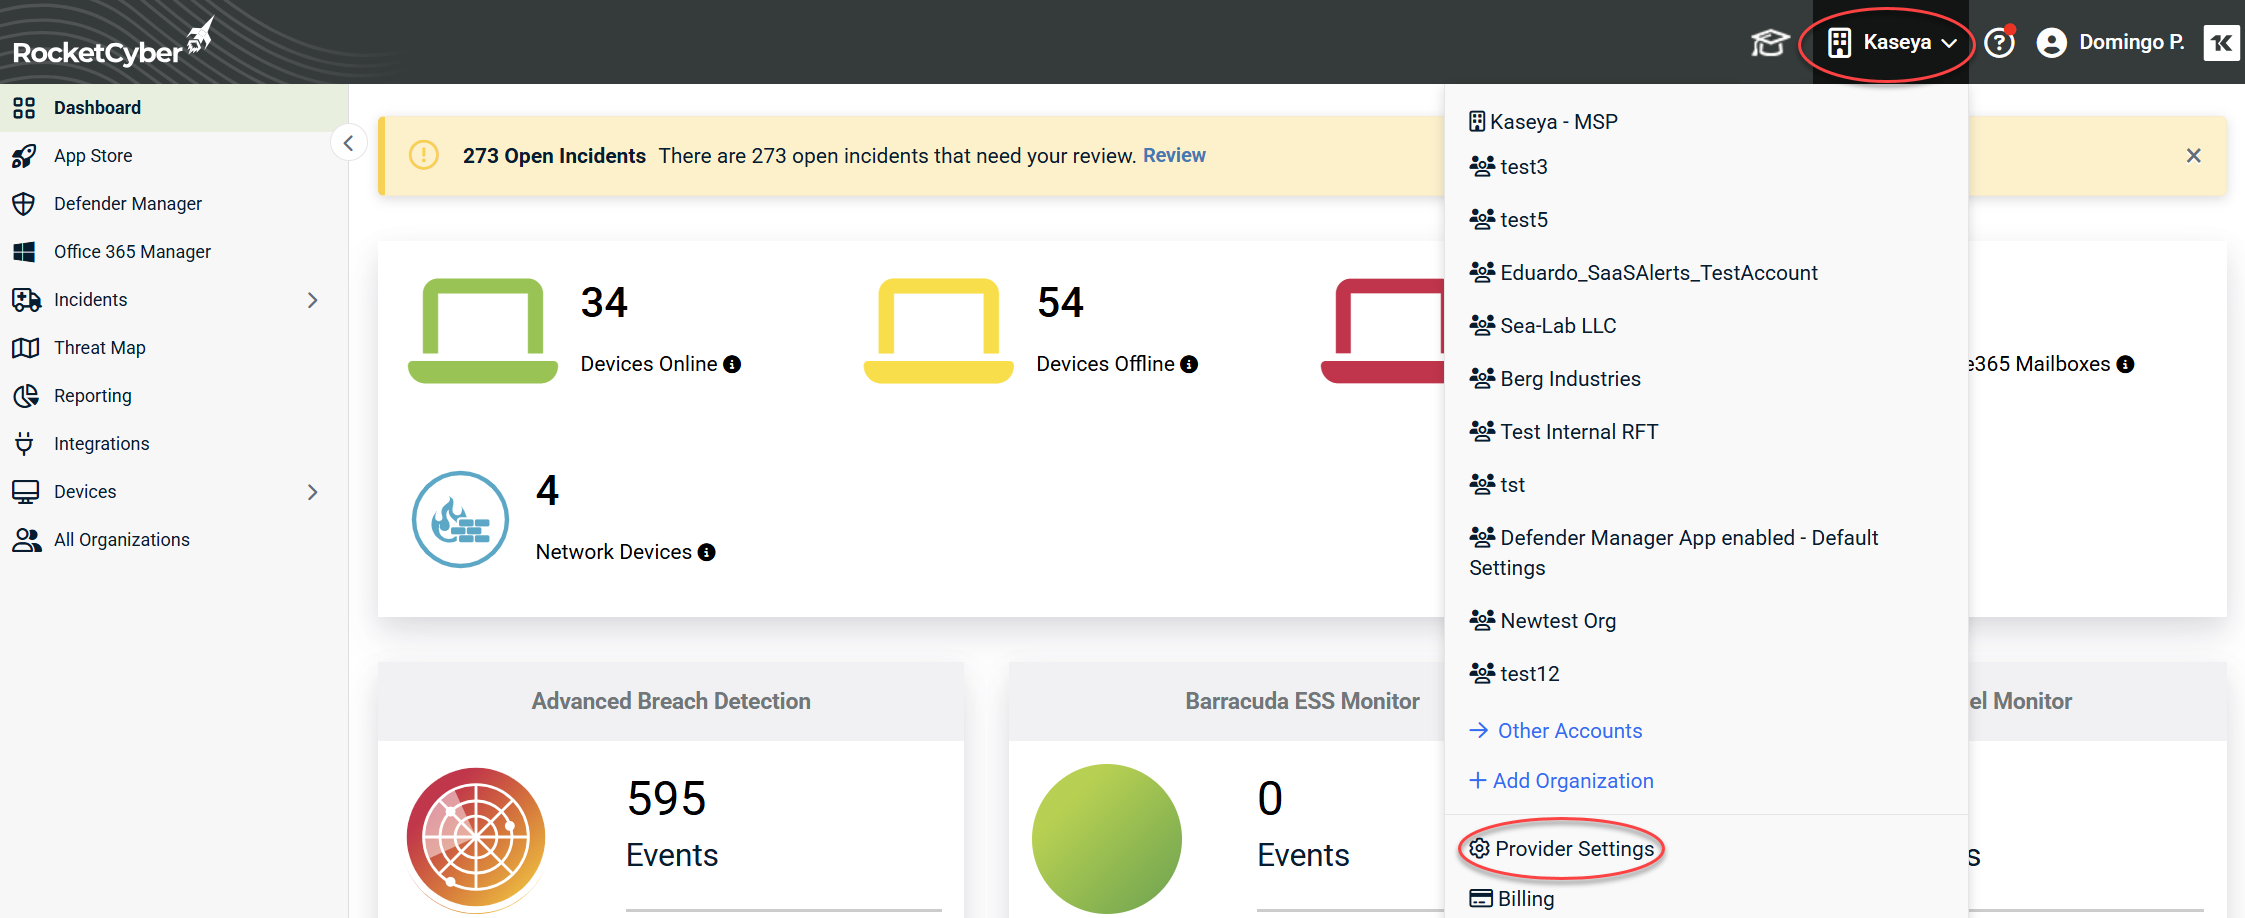
2. Select the RocketCyber API tab.
3. Copy the API Access token.
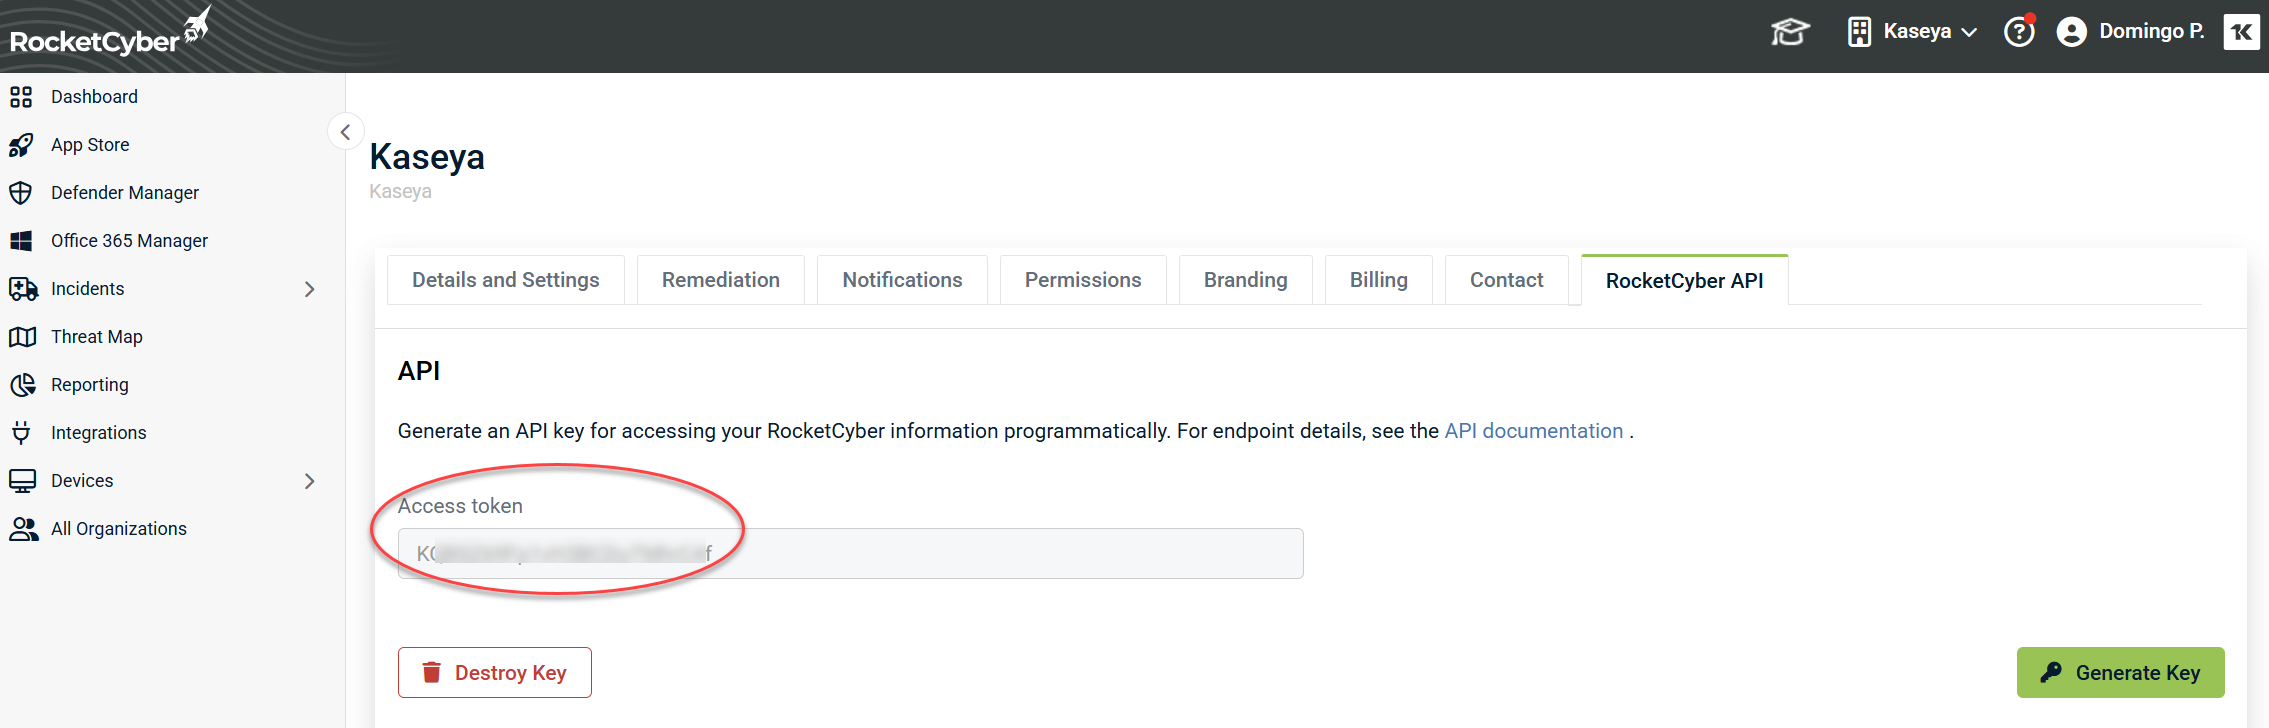
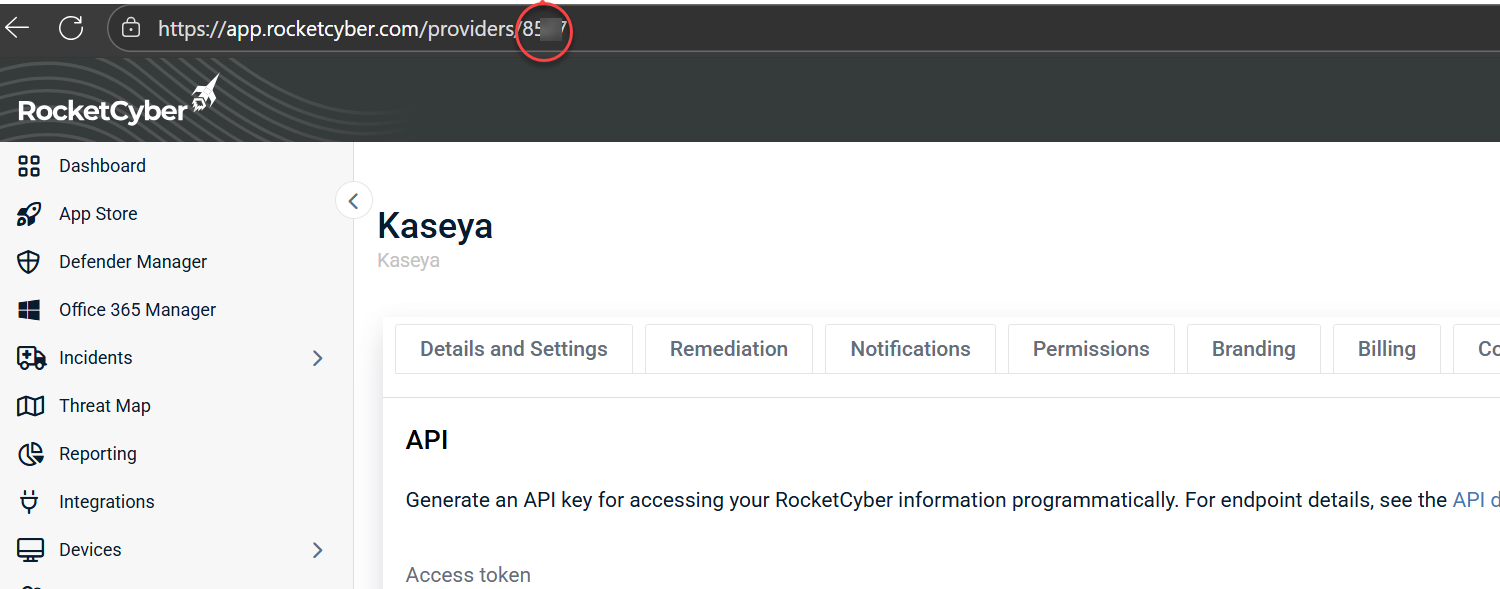
4. Also, copy the number from the end of your browser's URL for this page; this is your account number.
Step 3: Enable the RocketCyber integration in VulScan
Now, return to the RapidFire Tools portal and access your VulScan site:
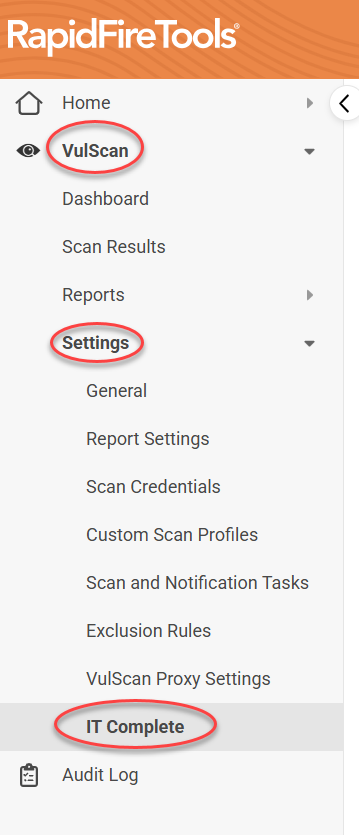
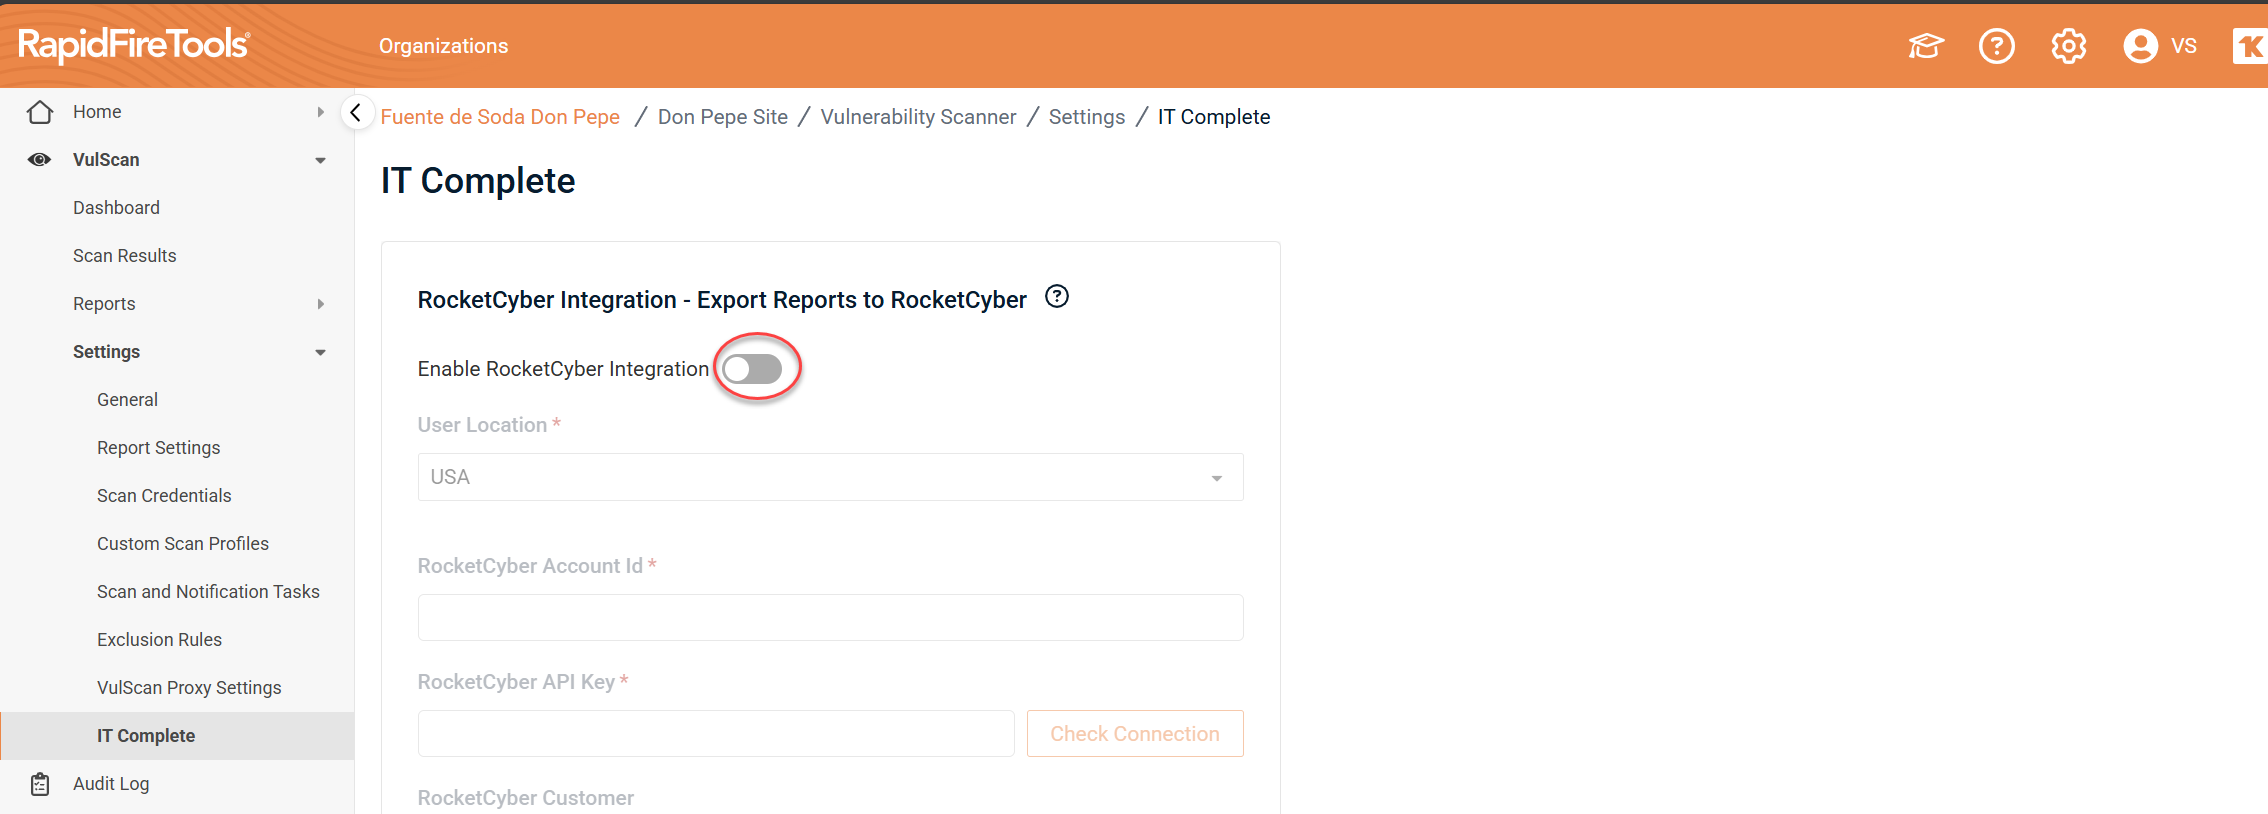
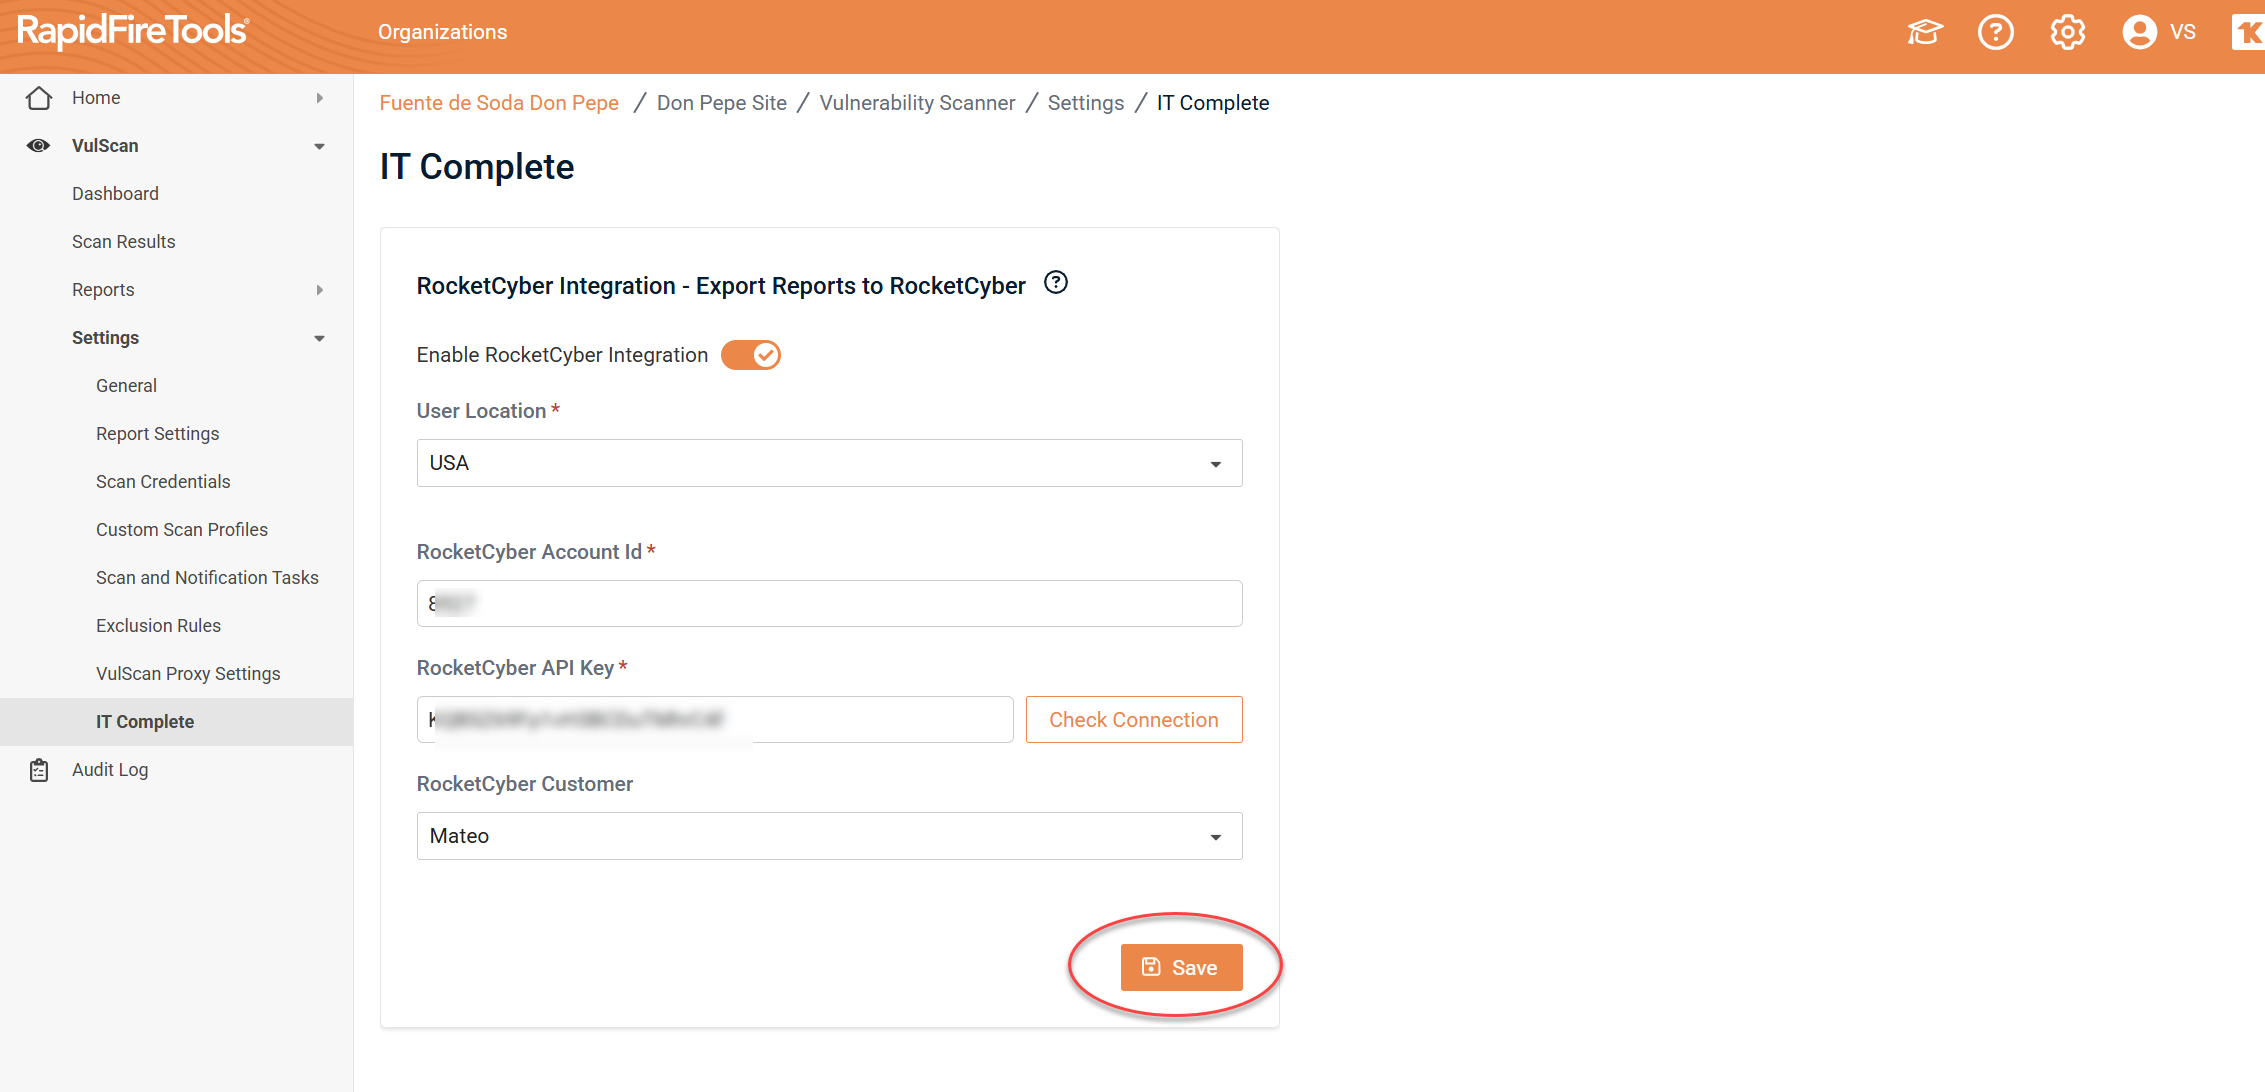
1. Navigate to VulScan > Settings > IT Complete.
2. Turn on Enable RocketCyber Integration.
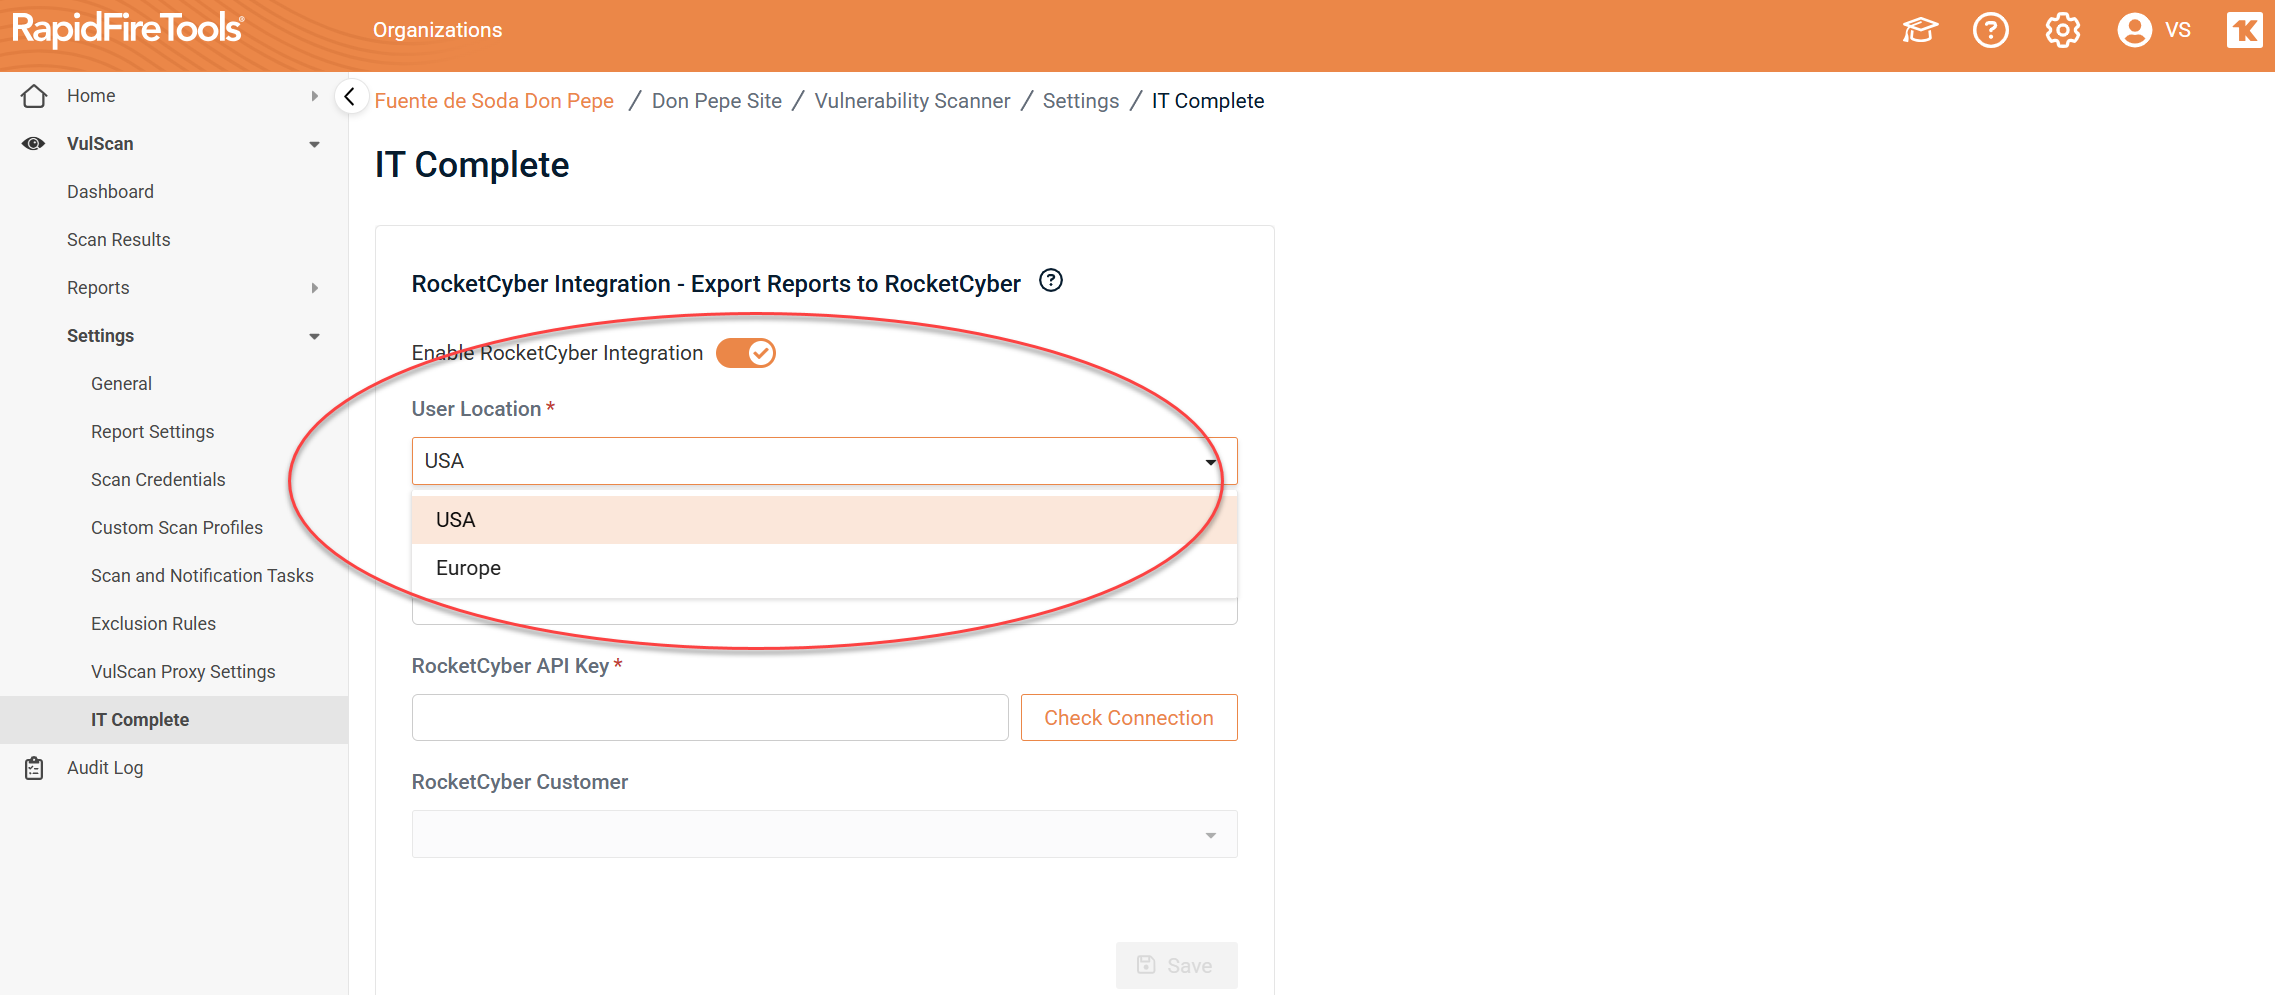
3. Select your User Location for the site: USA or Europe.
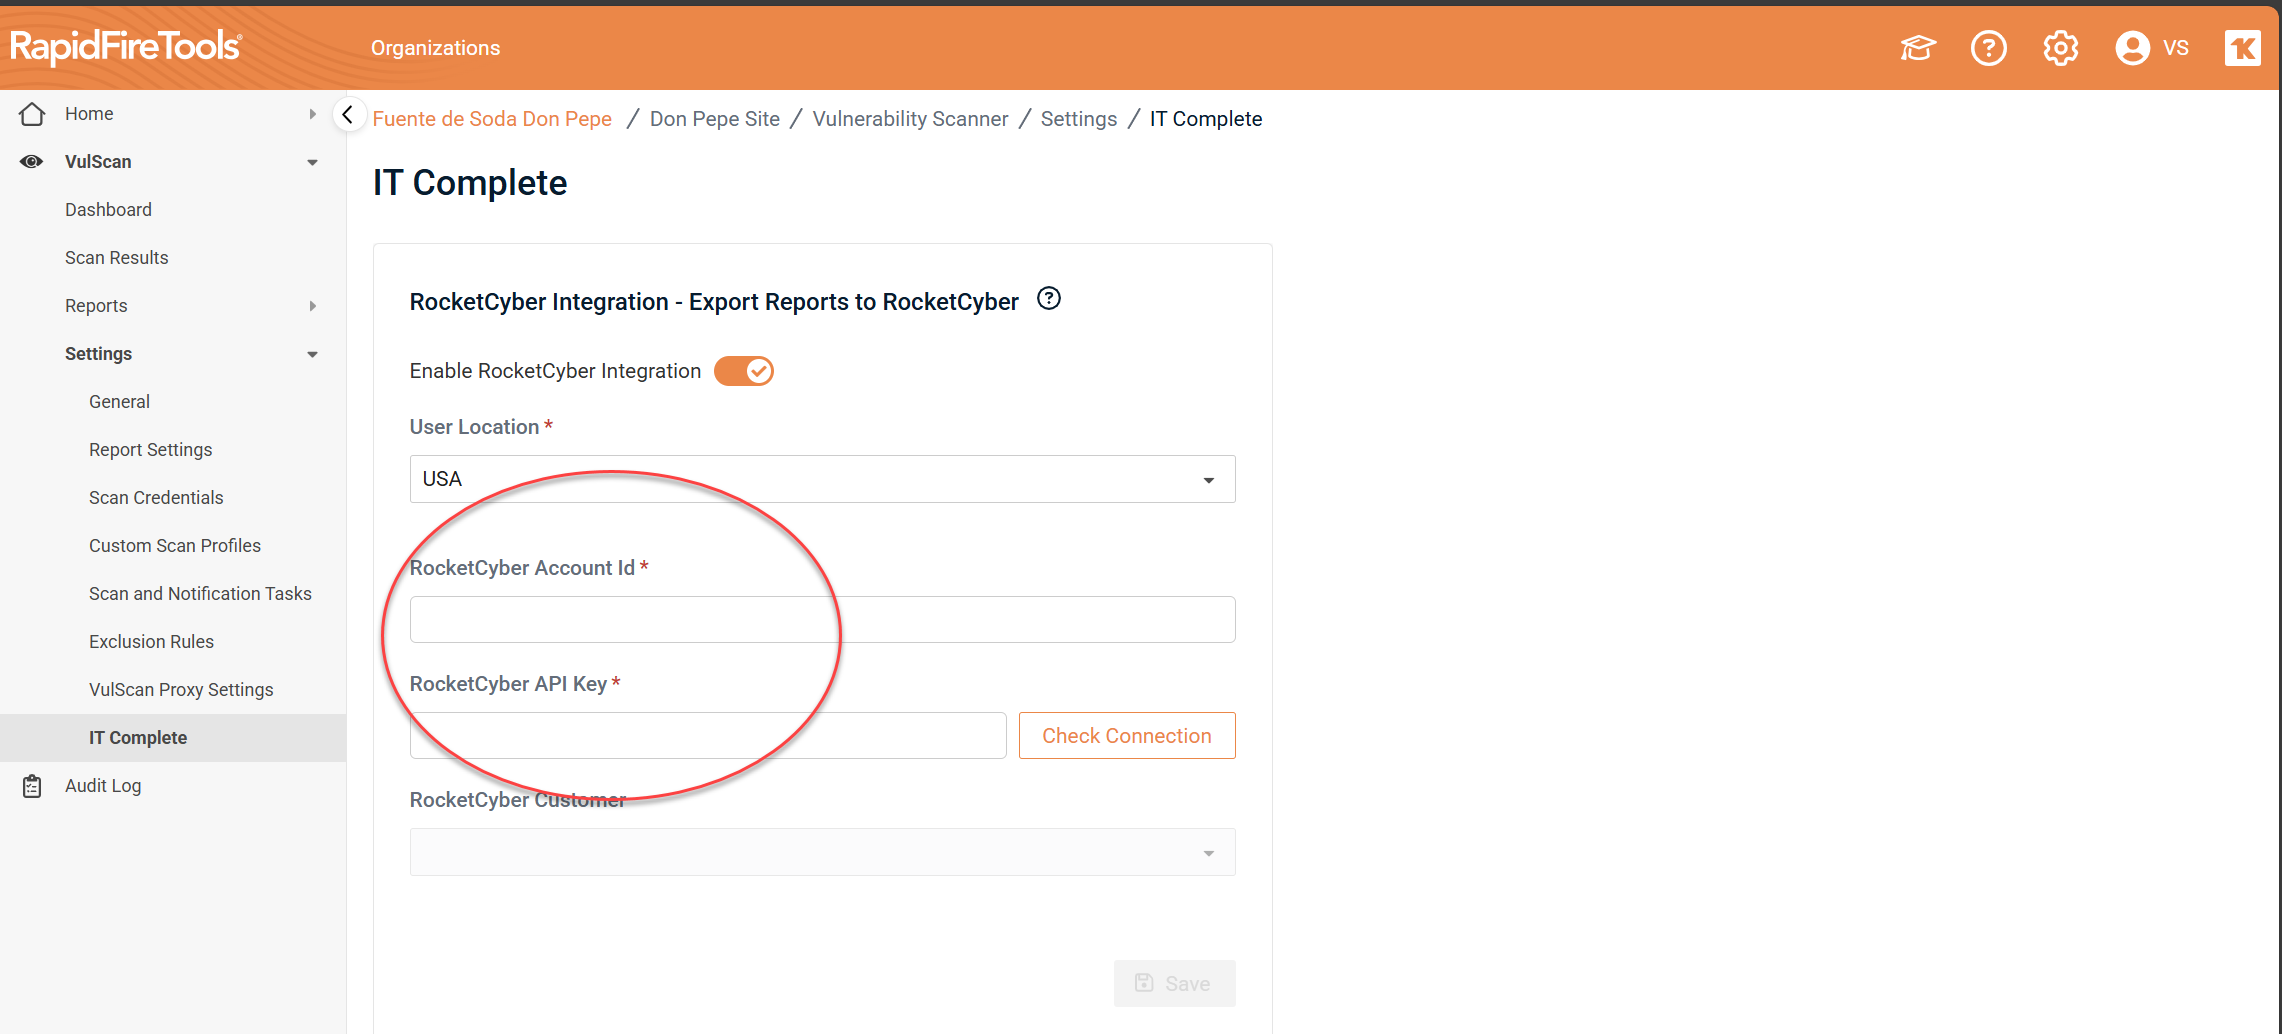
4. Enter the RocketCyber Account Id and RocketCyber API key that you gathered in Step 2.
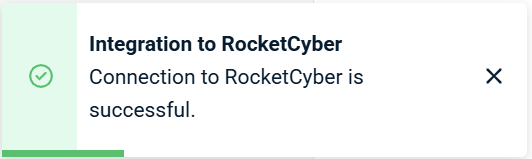
5. Click Check Connection. A modal will appear in the lower left corner confirming a successful connection.
6. From the drop-down menu, select the RocketCyber Customer for whom you want to export VulScan issues.
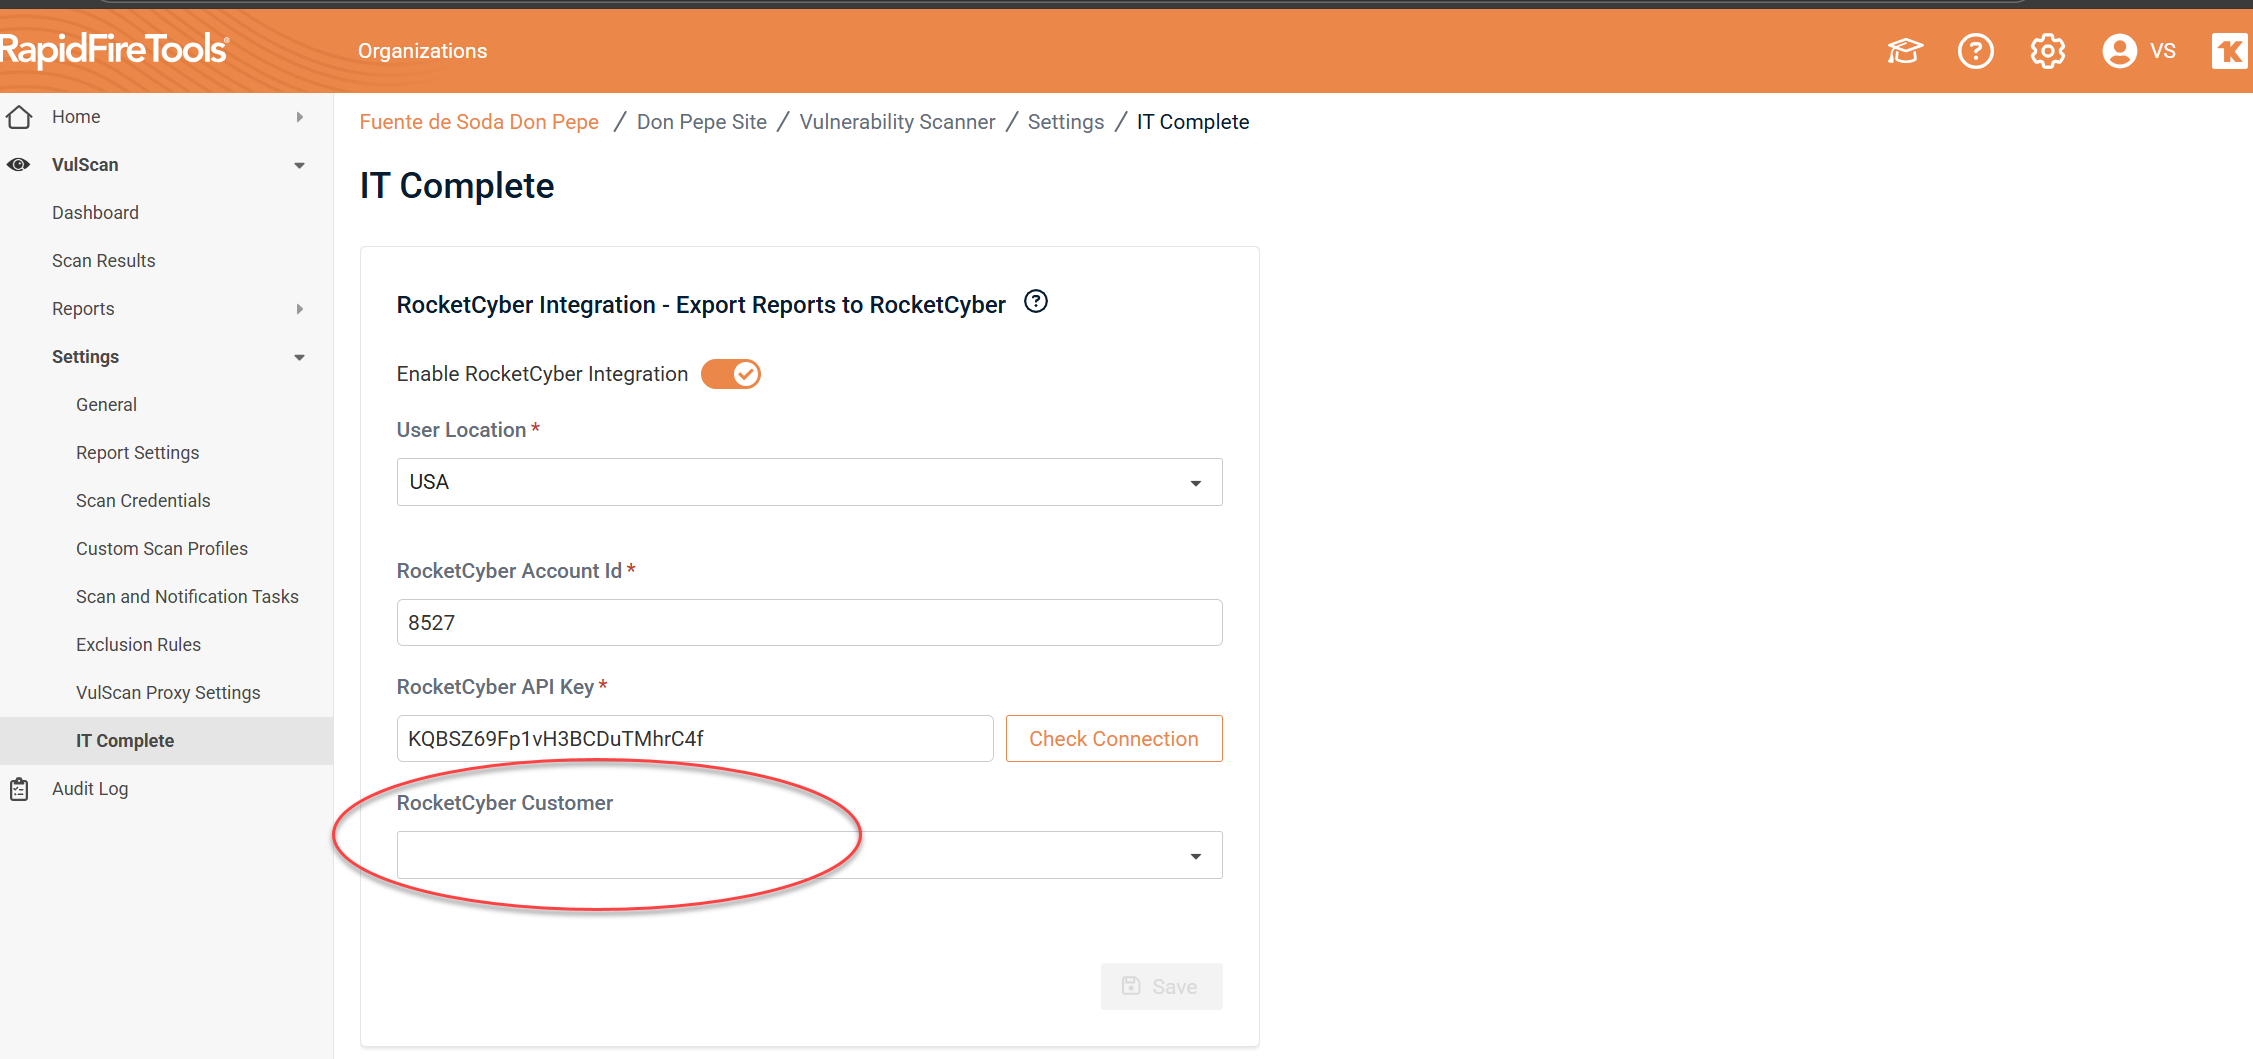
7. Once everything is set, click Save.
Step 4: Create a task for RocketCyber export
To export VulScan issues to RocketCyber, you'll need to create a new notification task:
NOTE Ensure you have already set up scan tasks to detect vulnerabilities to export. Refer to Create Internal Scan Task and/or Create External Scan Task.
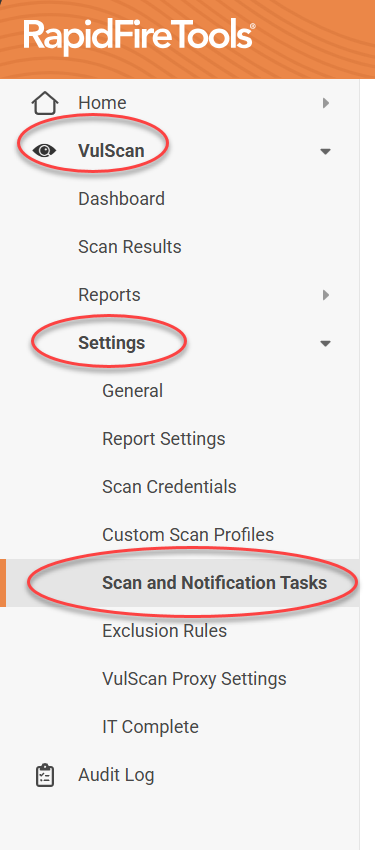
1. Navigate to VulScan > Settings > Scan and Notification Tasks.
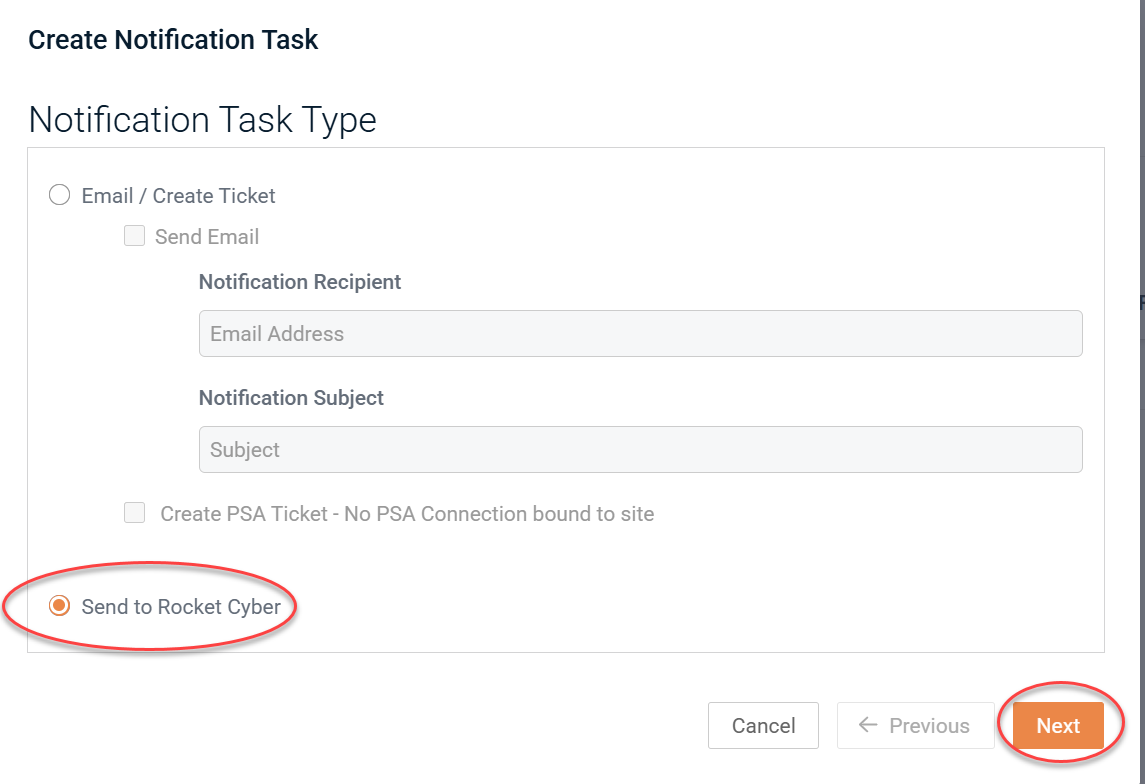
2. Open the Notifications Tasks tab and click + Create Notification Task.
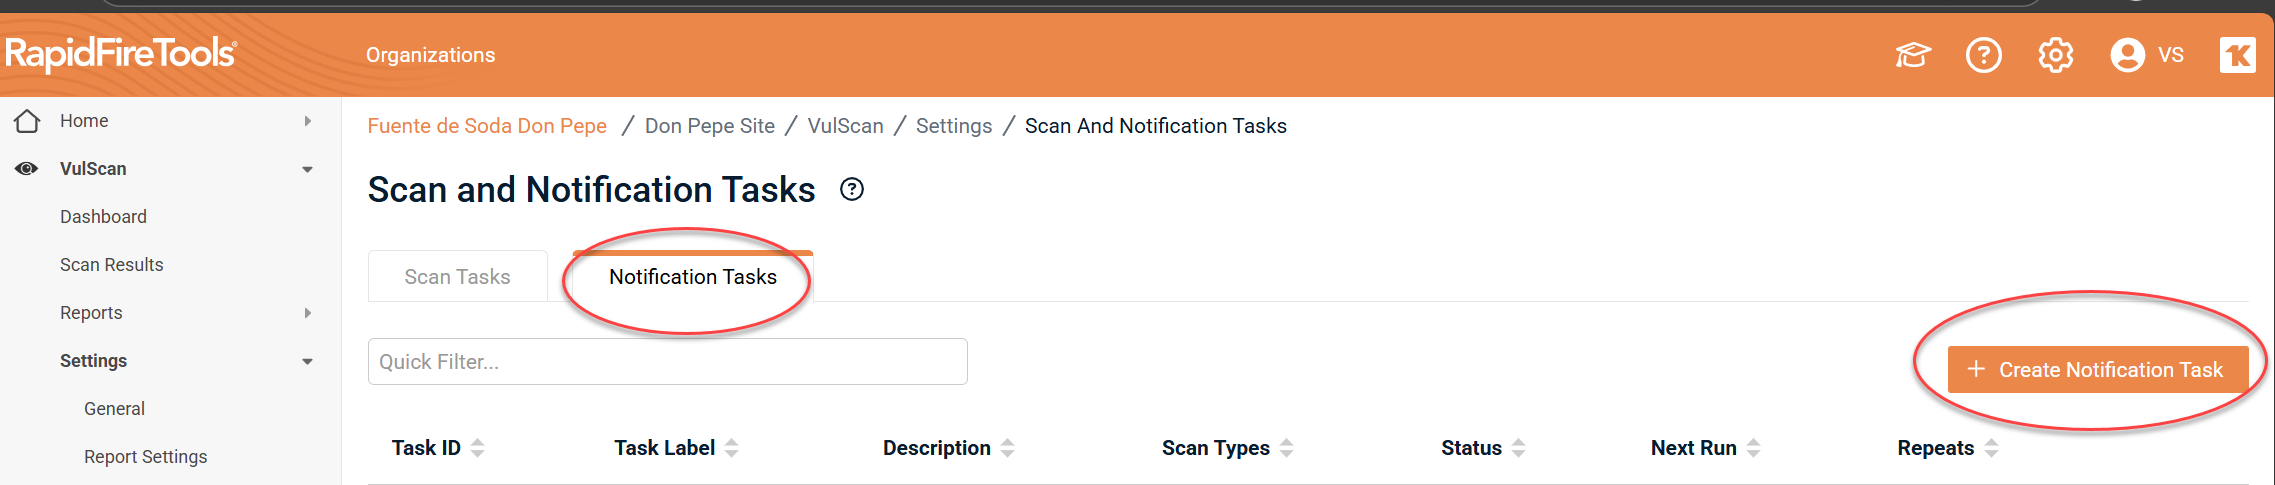
3. From the Notification Task Type page, select Send to RocketCyber and click Next.
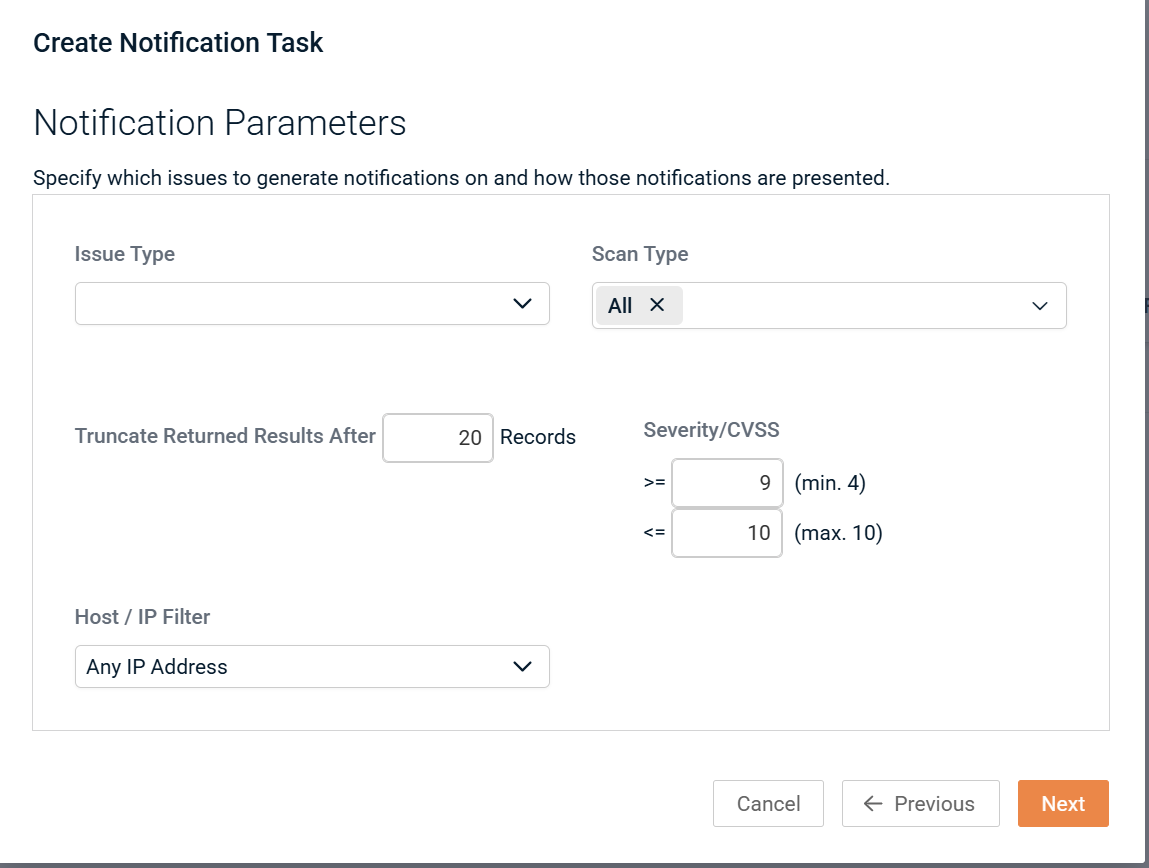
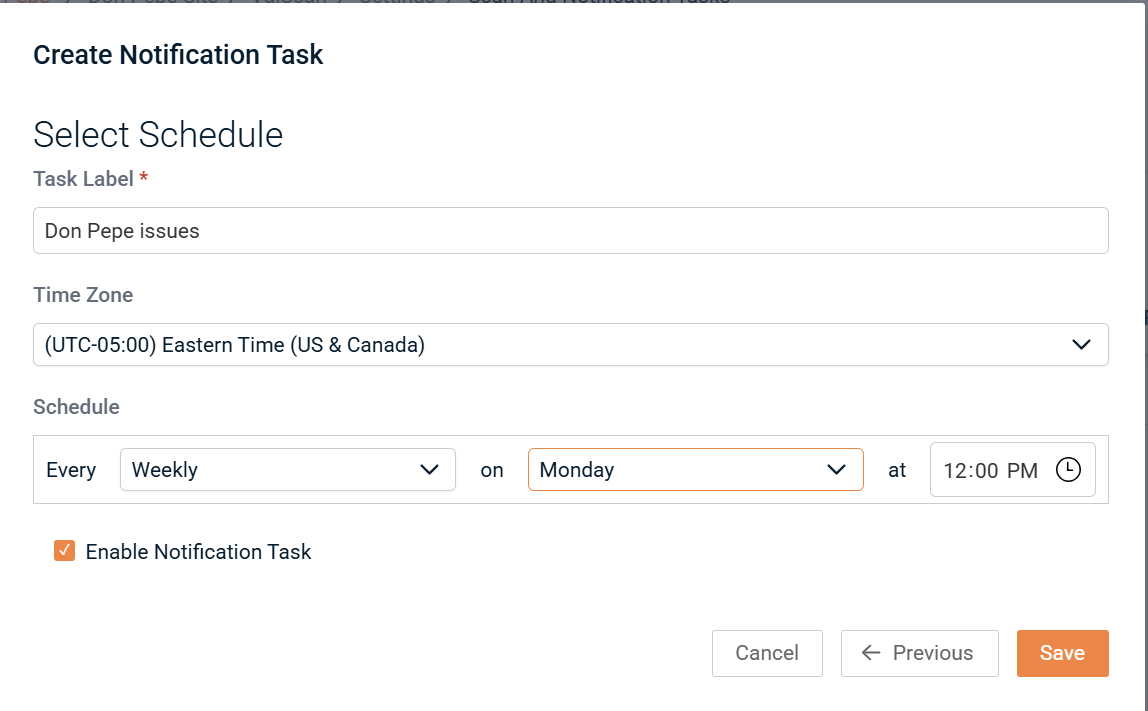
4. Configure and save the notification task as explained in Create Notification Tasks.
Step 5: Browse VulScan issues from the RocketCyber dashboard
After VulScan completes the notification task and exports the issues to RocketCyber, you can view them in the RocketCyber dashboard:
1. Open RocketCyber, and select your company and customer.
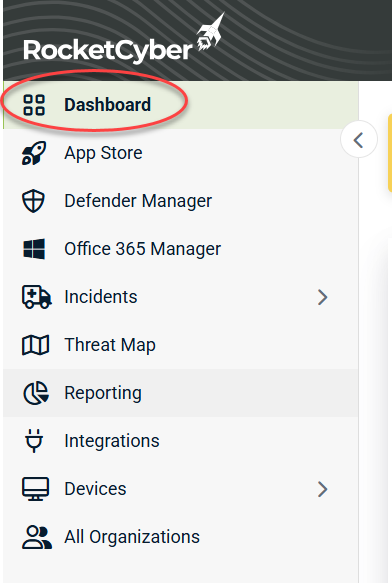
2. Click Dashboard from the left menu.
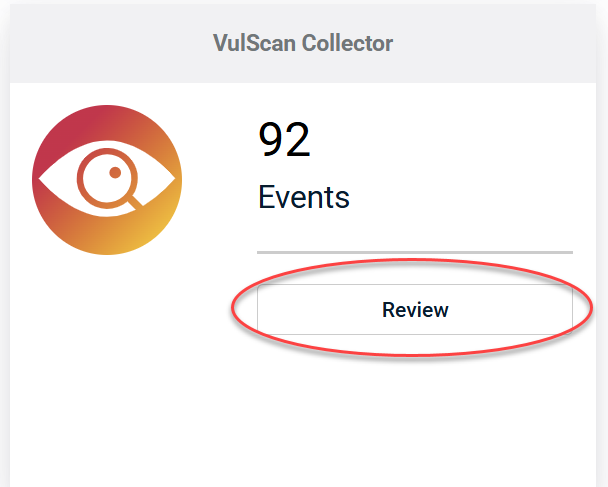
3. Scroll down to the VulScan Collector and click Review.
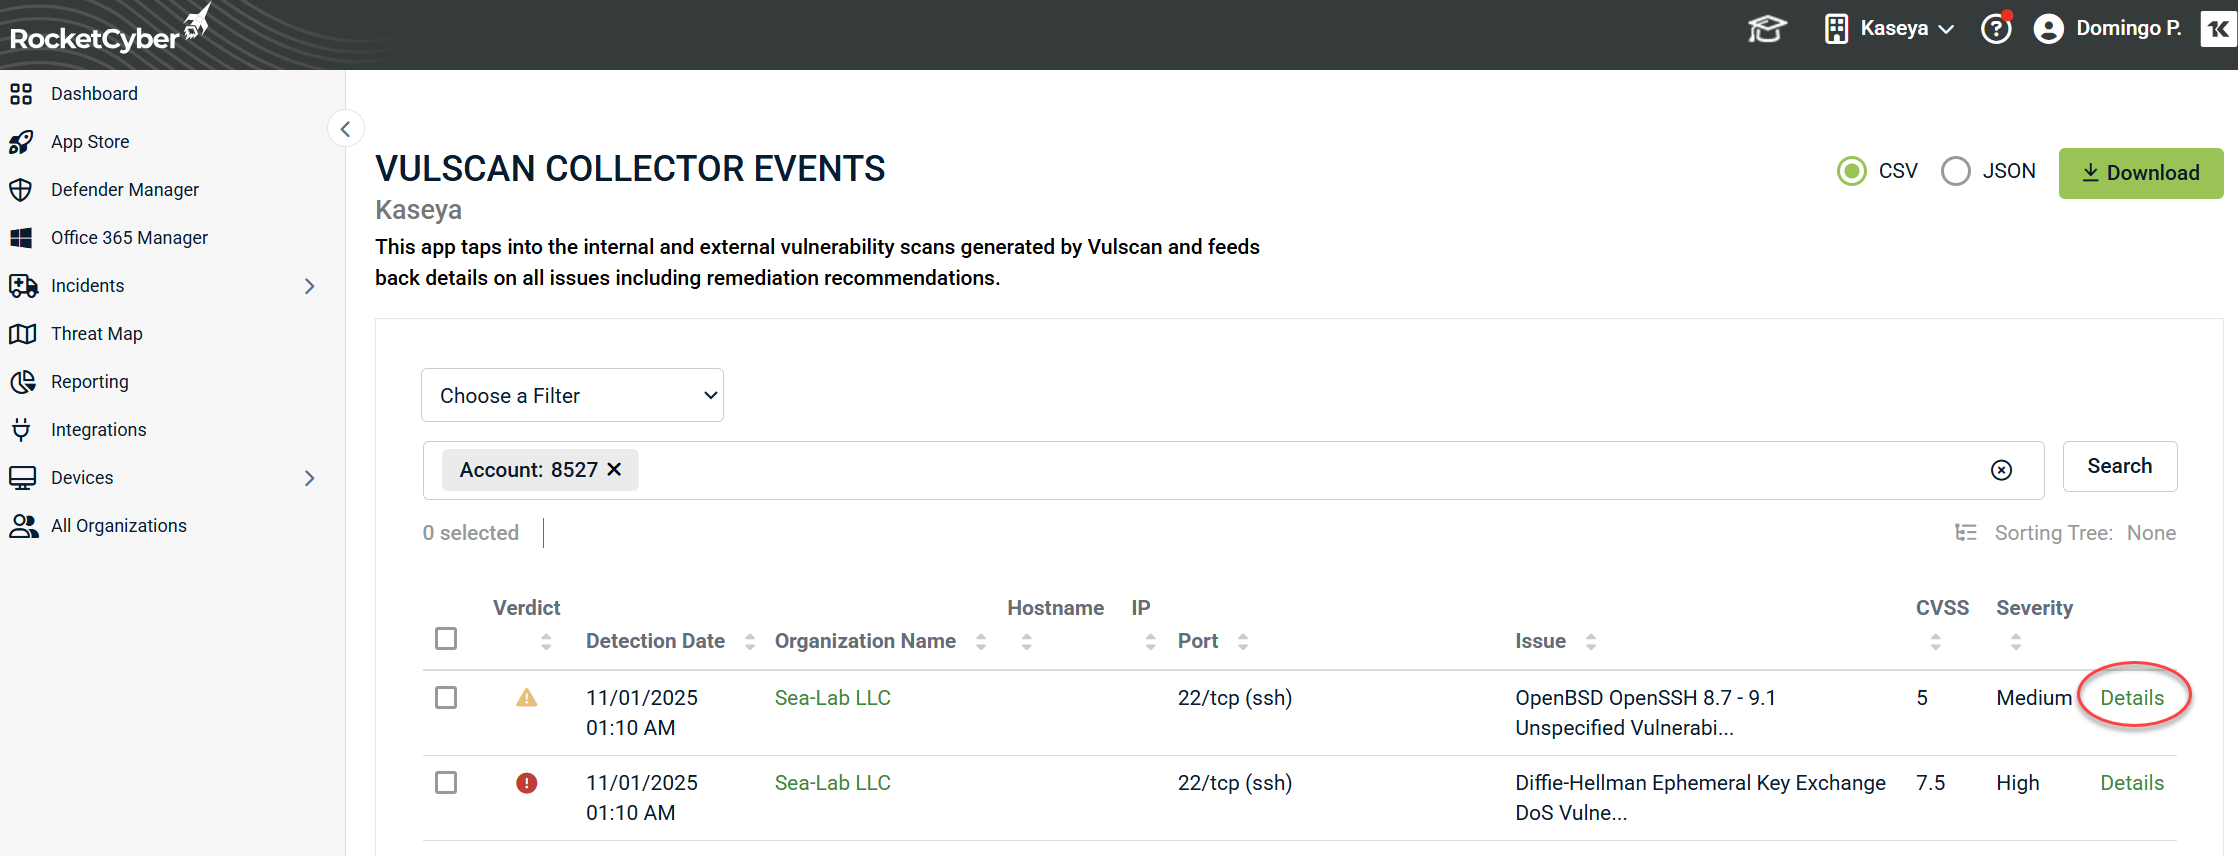
4. Here, you will find a list of VulScan issues. Click Details to see additional information for each issue, just as you would on the VulScan Scan Results page. You can also export these issues into various data formats.
Troubleshooting guide
In the event that you encounter issues while using our services, please refer to the following detailed troubleshooting steps to address common problems.
-
Issue: The verification process for the API fails unexpectedly. Solution: To resolve this situation, please take a moment to double-check that the API Key and Account ID you are utilizing are both accurate and correspond to your account. It is essential that these credentials are entered correctly to ensure successful verification.
-
Issue: There are no vulnerabilities appearing within the RocketCyber platform. Solution: If you find that vulnerabilities are not being displayed, it is important to confirm that the notification task is currently active and that a scan has been previously completed. Without an active notification task and a completed scan, vulnerability data may not be available.
-
Issue: There is a discrepancy or mismatch in the data presented. Solution: In cases of data inconsistency, it is advised to carefully verify the organization mapping settings within the VulScan configuration. Ensuring that these settings are correctly aligned with your organization's structure may help resolve any discrepancies.
Important security notes
As a reminder, it is crucial for the security and integrity of your account that API credentials are stored in a secure manner, employing best practices to protect sensitive information.
Moreover, to maintain a secure environment, it is highly recommended to limit access to integration settings strictly to authorized administrators. This helps prevent unauthorized changes and enhances the overall security of your system.


