Configuring Barracuda Firewall
This article will walk through the steps to configure Barracuda firewalls to send Syslog messages to the RocketAgent Syslog Server
The following steps are performed from the Barracuda Firewall Management Interface
Enable Audit Logs
Activate the generation of Firewall Audit data:
- Go to CONFIGURATION > Full Configuration > Box > Infrastructure Services > General Firewall Configuration.
- In the left menu, select Audit and Reporting.
- Expand the Configuration Mode menu and select Switch to Advanced View.
- Click Lock.
- In the Log Policy section enable Generate Audit Log.
- Click Set next to Audit Log Data.
- From the Audit, Delivery list select how to audit log data is stored or processed
- Select Syslog-Proxy from the Audit Delivery drop-down.
- Click OK.
- Click Send Changes and Activate.
Enable the Syslog Service
- Go to CONFIGURATION > Full Configuration > Box > Infrastructure Services > Syslog Streaming.
- Click Lock.
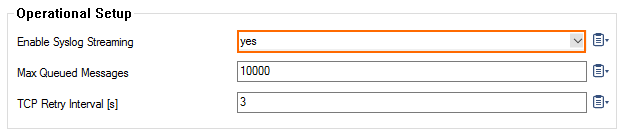
- Set Enable Syslog Streaming to yes.
- Click Send Changes and Activate.
Configure Logdata Filters
Define profiles specifying the log file types to be transferred/streamed to the RocketAgent.
- Go to CONFIGURATION > Full Configuration > Box > Infrastructure Services > Syslog Streaming.
- In the left menu, select Log data Filters.
- Expand the Configuration Mode menu and select Switch to Advanced View.
- Click Lock.
- Click the + icon to add a new entry.
- Enter RocketCyber in the Filters dialog and click OK.
- In the Data Selection table, add the log files to be streamed. Select:
- Firewall_Audit_Log – The log contents of the firewall's machine-readable audit data stream. Weather data is streamed into the Firewall_Audit_Log has to be configured in the General Firewall Configuration settings on box-level, section Audit Log Handling >Audit-Delivery: Syslog-Proxy (see: FW Audit). The log instance name corresponding to Syslog-Proxy selected will be trans7.
Panic_log – log contents of the panic log (log instance name: panic)
When Log-File is selected in the firewall's configuration, the data will go into a log file named Box->Firewall->audit (which means the instance is named box_Firewall_audit) and thus this filter setting is not applicable. The pertinent one then would be a selection of category Firewall within the box selection portion of the filter.
- In the Affected Box Log data section, define what kind of box logs are to be affected by the Syslog daemon from the Data Selection list.
- Choose Selection (default),
- Click the + icon next to Data Selection to add an entry.
- Enter a descriptive name for the group and click OK. The Data Selection window opens.
- Add the Log Groups table select Other and specify the following:
AuthEvent
Firewall
Network
SSH
virscan
proxy
sslprx
cofs
sslprx
spamfilter
sshprx
vpnserver - (Optional) Set a Log Message Filter. When choosing Selection,
- Add the explicit log type to the Selected Message Types table.
- Click OK.
- In the Affected Service Log data section, define what kind of logs created by services are to be sent by the Syslog daemon from the Data Selection list.
- Choose Selection (default),
- Click the + icon next to Data Selection to add an entry.
- Enter a descriptive name for the group and click OK. The Data Selection window opens.
- In the Log Groups table, select Other and specify the following:
virscan_cas
firewall_auth
firewall_Rule*
-
- (Optional) Set a Log Message Filter. When choosing Selection,
- Add the explicit log type to the Selected Message Types table.
- Click OK.
- (Optional) Set a Log Message Filter. When choosing Selection,
-
Click Send Changes and Activate.
Configure Logstream Destinations
- Go to CONFIGURATION > Full Configuration > Box > Infrastructure Services > Syslog Streaming.
- In the left menu, select Log stream Destinations.
- Expand the Configuration Mode menu and select Switch to Advanced View.
- Click Lock.
- Click the + icon to add a new entry.
- Enter RocketCyber in the upcoming dialog and click OK. The Destinations window opens.
- Select the Logtream Destination. When an external log host is used,
- Select Explicit IP.
- Enter the destination IP address in the Destination IP Address field. This is the IP address of the RocketAgent Syslog Server
-
Enter the Destination Port for delivering Syslog messages, enter 514. This is the default port that the RocketCyber Syslog Server listens on.
-
Select the Transmission ModeUDP
- Click OK.
- Click Send Changes and Activate.


