Getting started with reporting
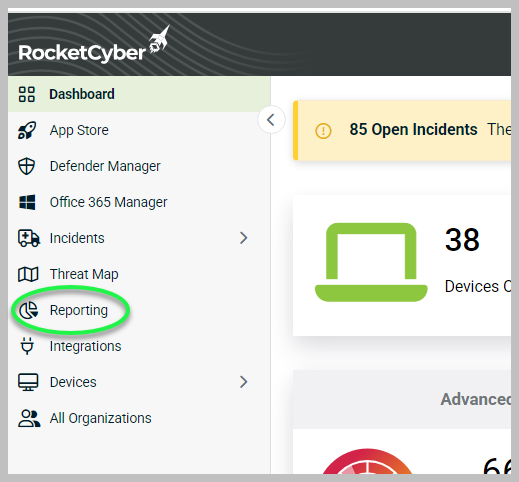
To begin using RocketCyber reporting, go to Reporting in the left pane.
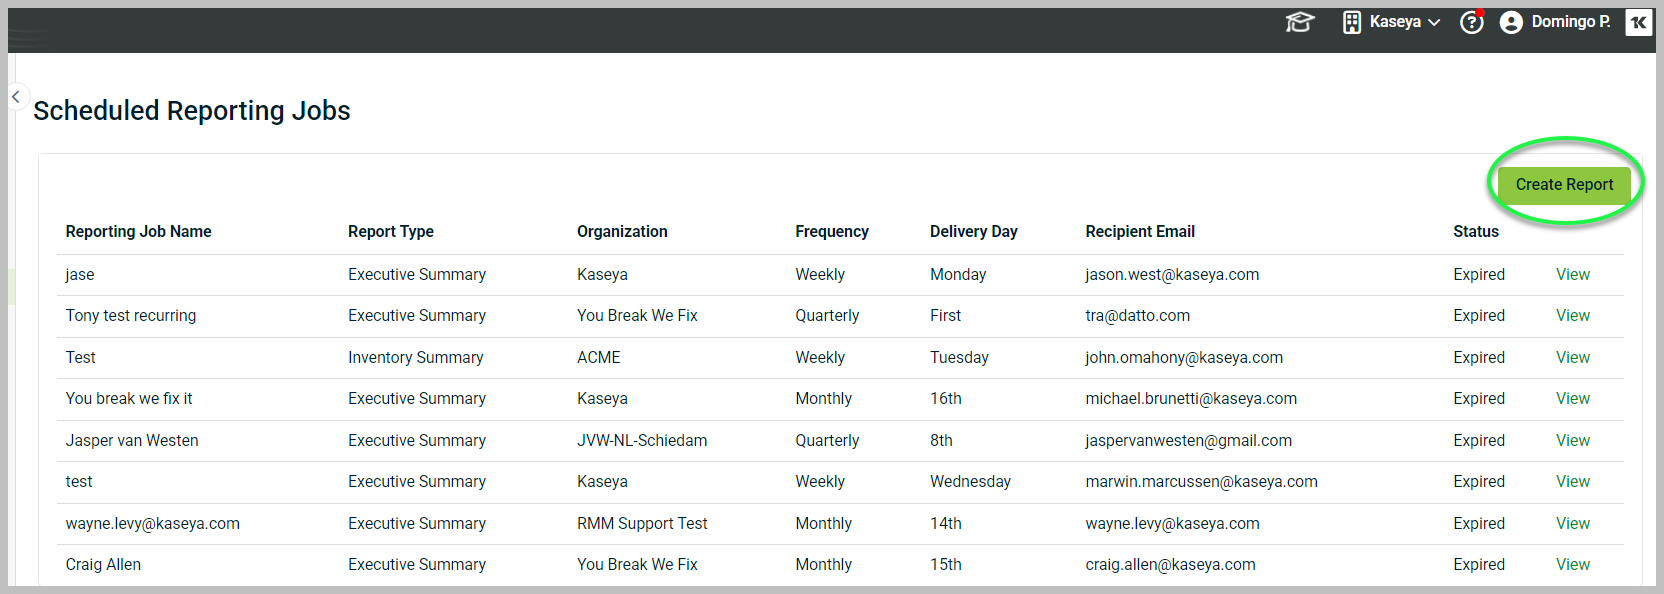
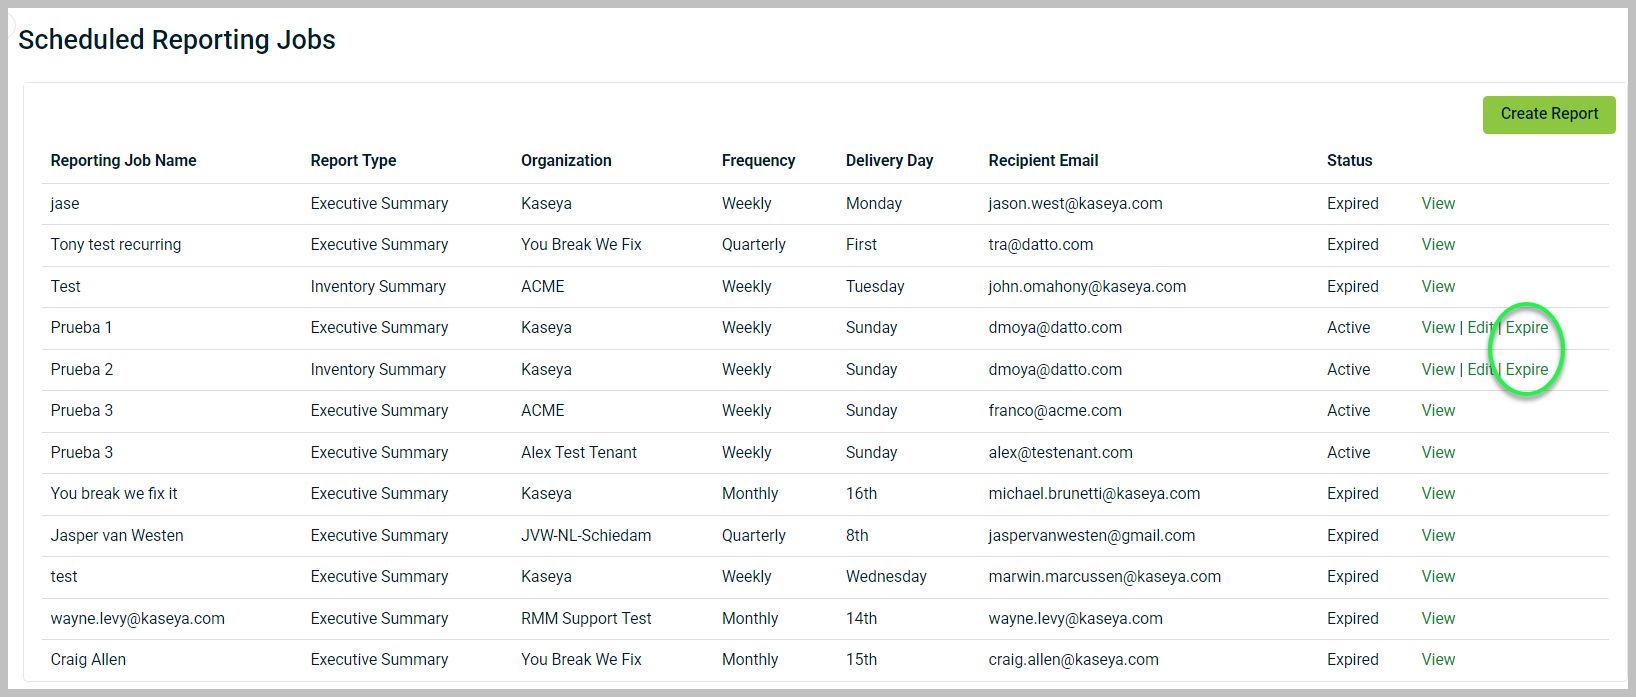
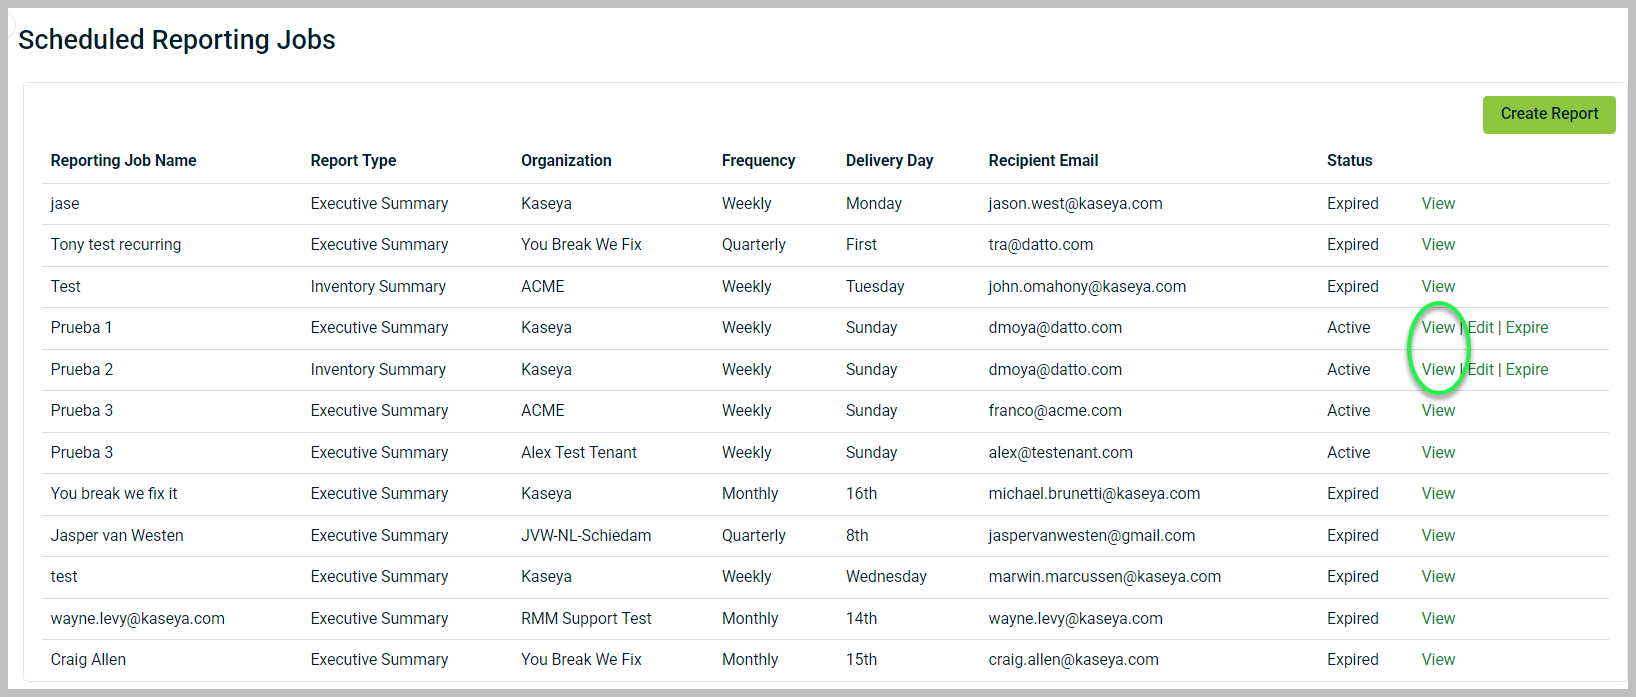
Upon selecting Reporting, you will be directed to the Scheduled Reporting Jobs page. Here, you will find a list of reporting jobs along with their corresponding Report Type, Organization, Frequency, Delivery Day, Recipient Email, and Status columns. To create a new reporting job, click the Create Report button located in the upper-right corner.
NOTE Only users with the Owner role within RocketCyber can create reports.
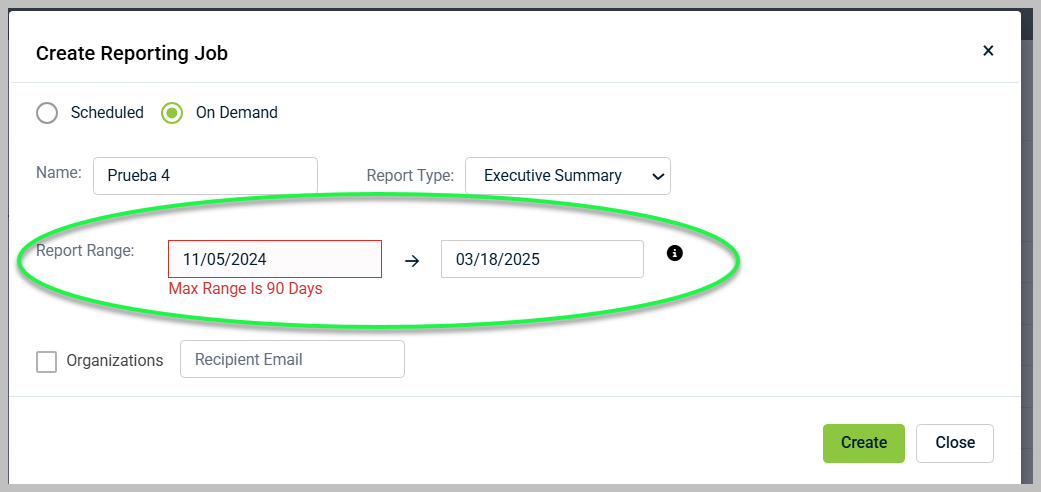
Once you click Create Report, the Create Reporting Job pop-up window will appear. You will need to choose between Scheduled and On Demand reports.
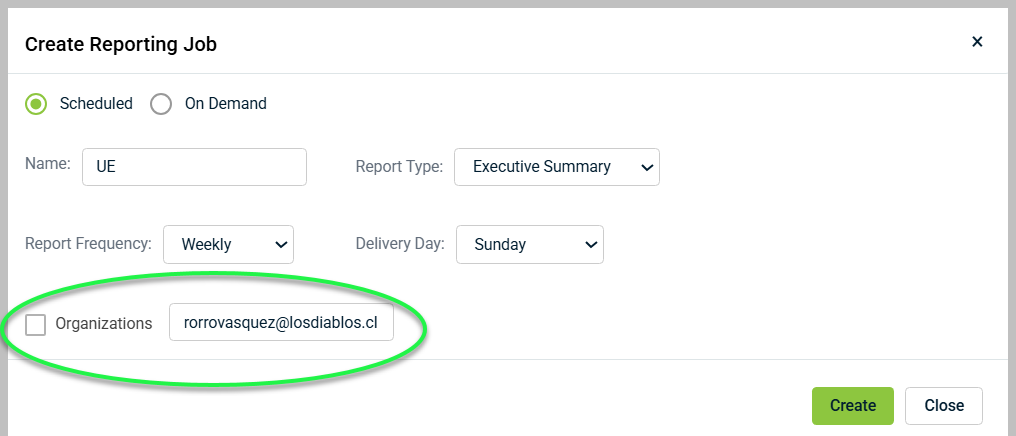
If you choose the Scheduled option, the following fields will be available:
-
Name: Please enter a unique name to identify your reporting job.
-
Report Type: Choose between Executive Summary or Inventory Report.
-
Report Frequency: Specify how often the report will be generated and delivered (weekly, monthly, quarterly).
-
Delivery Day: Indicate the day of the week or calendar date on which the report will be generated.
If you choose the On Demand option, you will see the following fields:
-
Name: Please enter a unique name to identify your On Demand reports.
-
Report Type: Choose between Executive Summary or Inventory Report.
-
Report Range: Event data for the specified range will be displayed in the report. Maximum range is 90 days.
NOTE Reporting jobs can be set up in the context of either a provider or an organization.
Provider Reports
To create a Provider report, follow these steps:
-
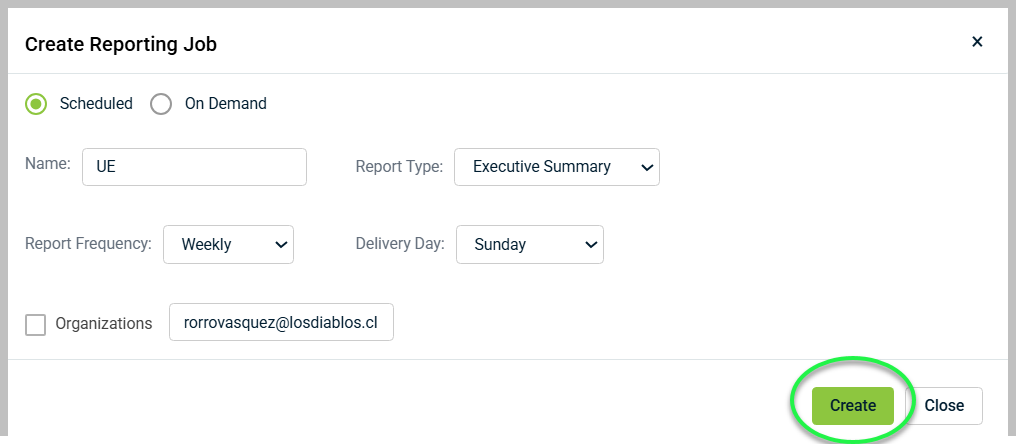
Leave the Organizations checkbox clear and enter your email in the Recipient Email text box.
-
Click Create to initiate your scheduled provider reporting job.
NOTE You can only enter one email address in the Recipient Email text box.
Organization Reports
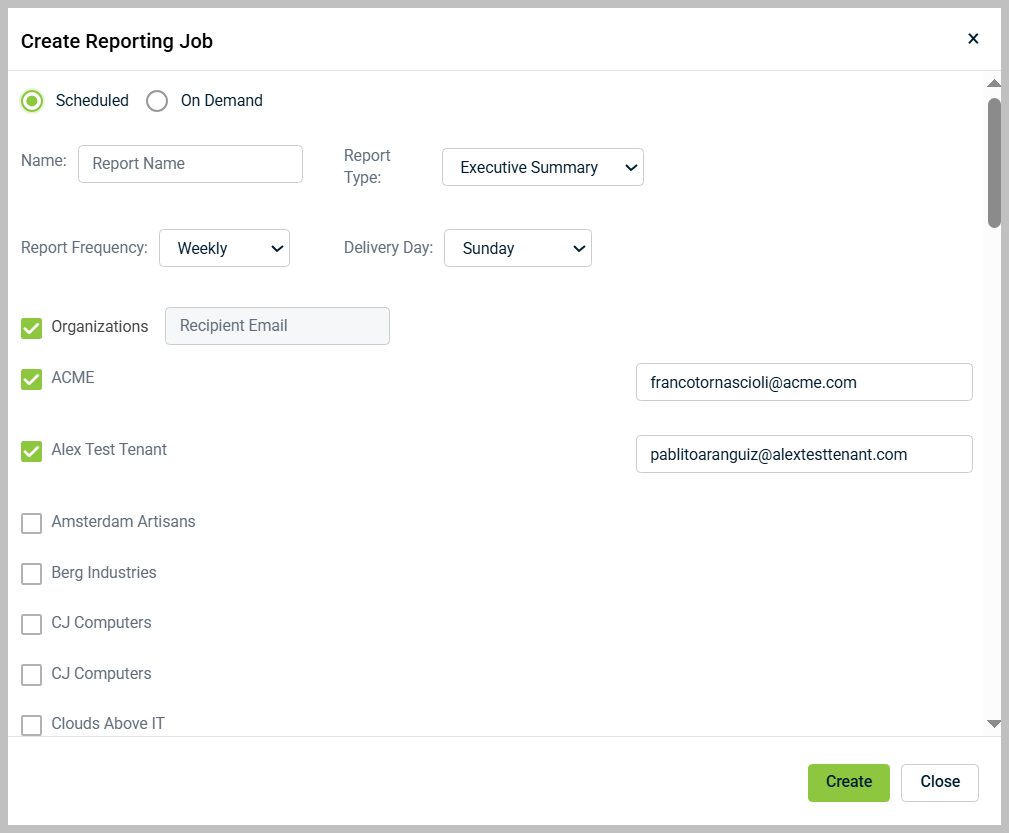
To create an Organization report, select the Organizations checkbox. A list of organizations will appear.
-
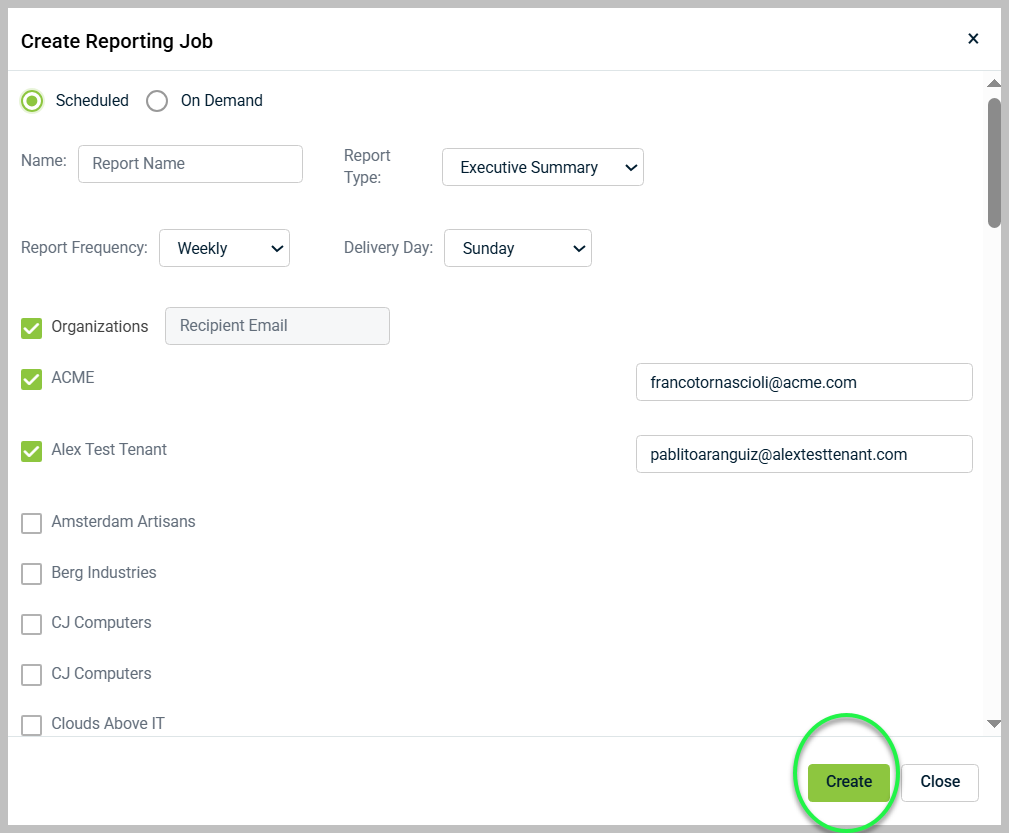
Select the organizations you'd like to generate the reports for and enter the email address in the corresponding field.
-
Click Create to create your scheduled provider reporting job.
NOTE You can only enter one email address in each Recipient Email text box.
Reporting Job Options
There are three options available to manage scheduled reports:
-
View: It allows you to see the report details.
-
Edit: You can modify the job name, recipient email, report frequency, and delivery date.
-
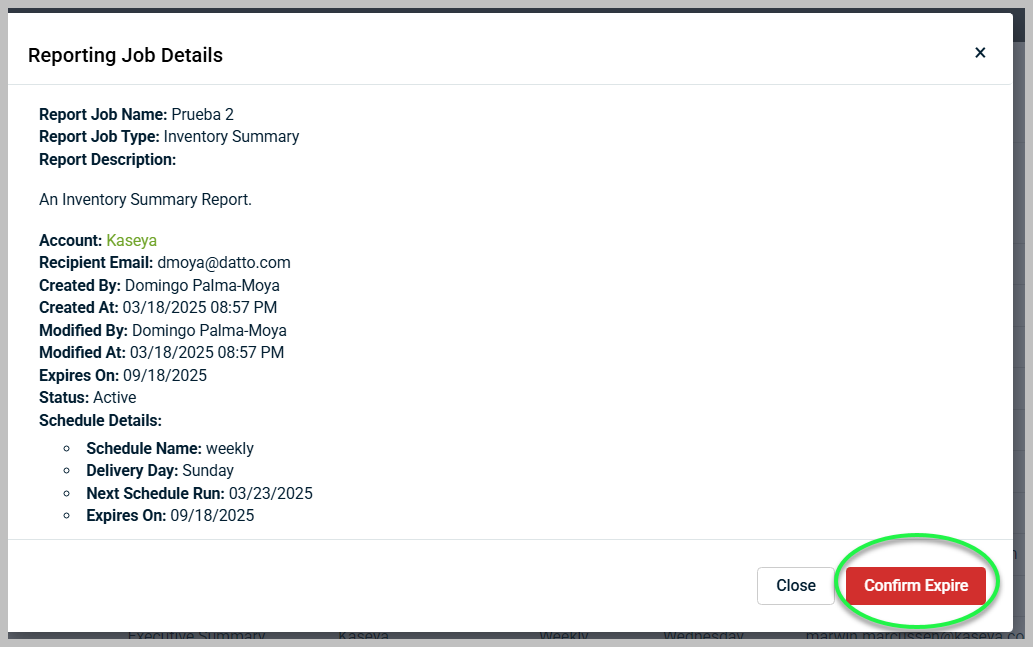
Expire: Click Expire.
This action will open pop-up window where you can deactivate the reporting job by clicking Confirm Expire.
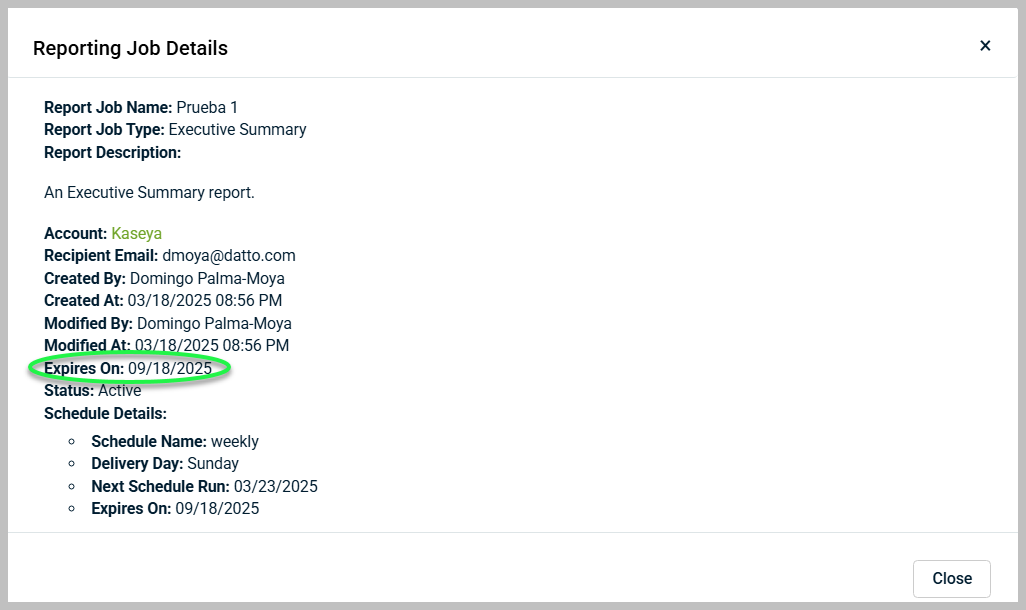
Scheduled jobs will automatically expire after 6 months. You can find the expiration dates by clicking View.
NOTE Scheduled reports can only be edited or marked to Expire at the account level from which they were created. For example, if you created a scheduled report at the organizational level, you can only edit that report or set it to expire by going to the Reporting section within that organization.
Report branding
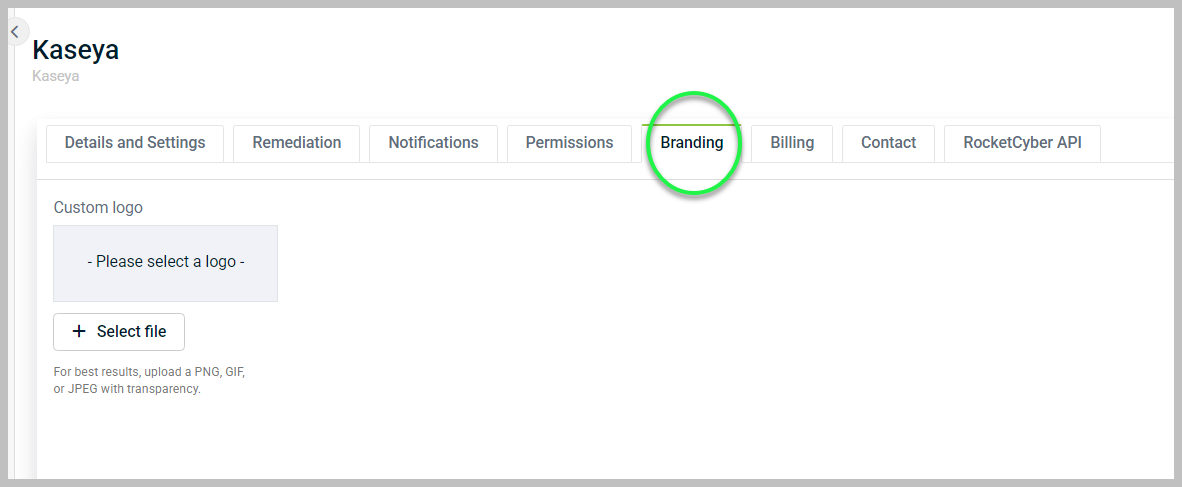
You can white label your RocketCyber reports by uploading your logo in the Provider Settings > Branding tab.
