Configuring provider settings
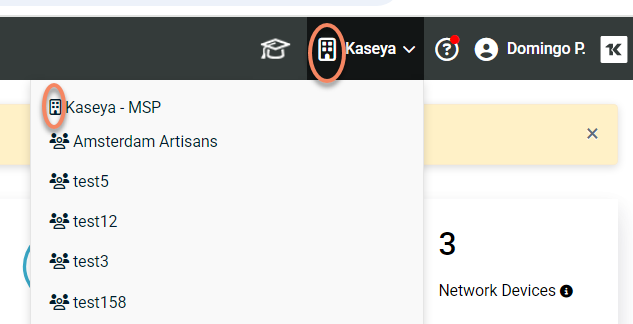
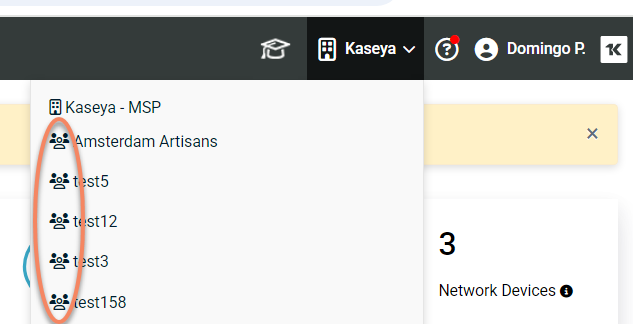
The current account drop-down menu provides quick access to all of the organizations you manage and also enables you to administer settings at the global level. It also surfaces the name of the organization you're currently managing.
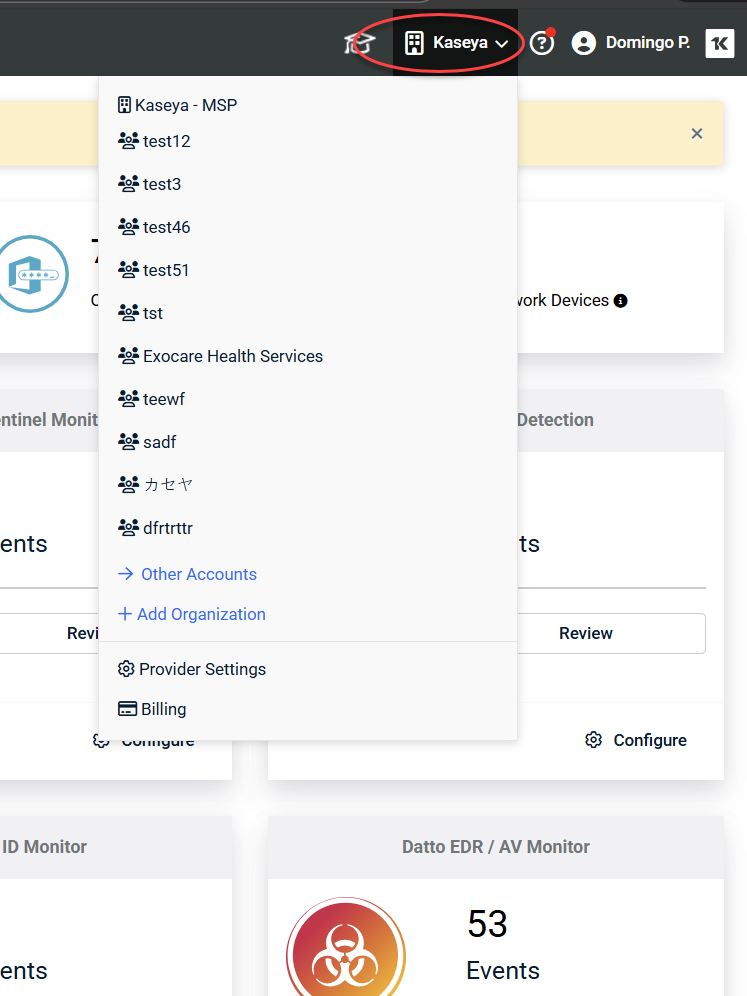
As you navigate between organizations, the data shown on the Dashboard page will change to reflect the current account. When you view the page at the provider level, you'll see an aggregation of information for all of your external accounts and your internal organization.
Provider and organizations
As the provider, your account is denoted by the building icon.
Your organizations are denoted by the three-person icon.
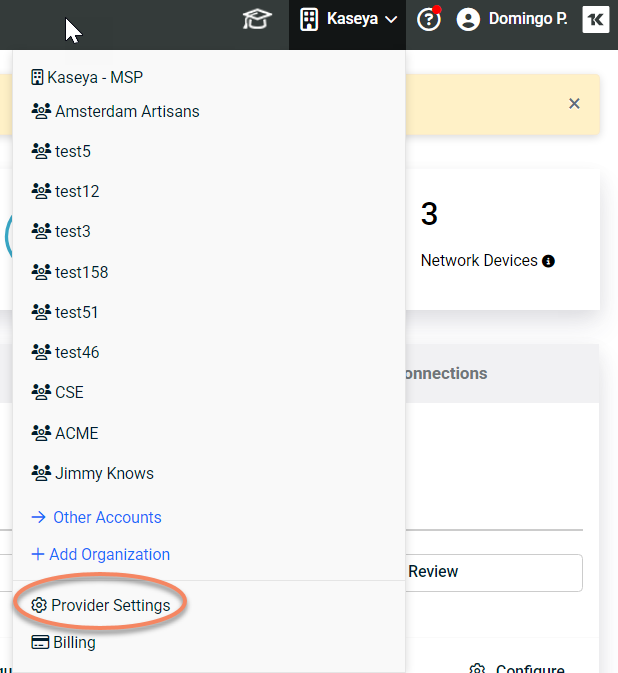
NOTE Changing settings on the provider account can affect all settings of your organizations. You can select an individual organization and change its settings for more granular control.
Provider Settings
To configure provider settings, ensure that the currently selected account is the provider and click Provider Settings.
In the next page, you will see the following tabs:
-
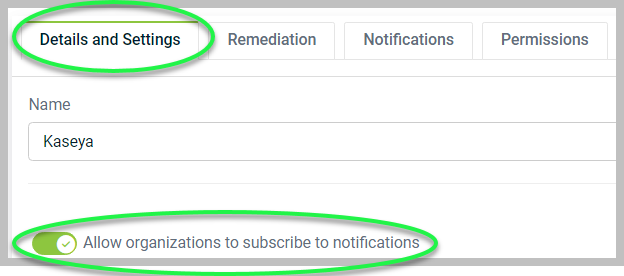
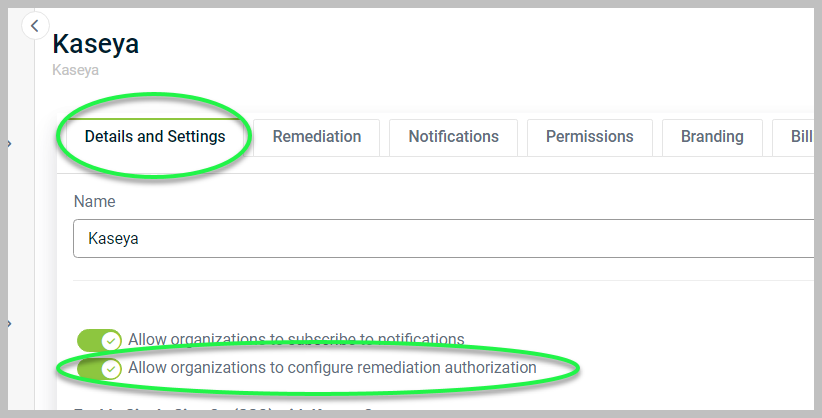
Details and Settings: Here, you can turn the following toggles:
-
Allow organizations to subscribe to notifications: This toggle enables organizations to sign up for notifications to stay informed about important updates and relevant changes.
-
Allow organizations to configure remediation authorization: This toggle enables organizations to manage custom remediation settings for actions taken to address issues or vulnerabilities within their systems or operations.
-
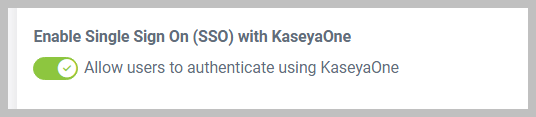
Allow users to authenticate using KaseyaOne: Located under Enable Single Sign-On (SSO) with KaseyaOne, this toggle allows you to enable SSO with KaseyaOne. With SSO, you can effortlessly log in to RocketCyber and all your other Kaseya products from a single platform.
-
Settings inheritance
-
Enable Automatic User Creation: This toggle allows new user accounts to be generated automatically when certain conditions are met. Your users in KaseyaOne who are granted access to RocketCyber will automatically have a RocketCyber user created. It is recommended to choose a lower level of access as the default role for security purposes.

-
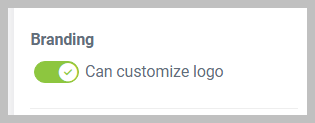
Can customize logo: Located under Branding, this toggle allows to personalize or tailor a logo design to fit specific preferences or requirements.
-
Require 2FA for all users of this organization and Require 2FA for all organizations: Part of the Authentication section, both require users to log in using two-factor authentication (2FA). Refer to Securing your account with Two-Factor Authentication for further information.

-
Agent Settings: This section allows you to configure various parameters that govern how the agent behaves and functions within your system. Here’s a detailed breakdown of the options available:
-
Verbosity: This setting determines the level of detail included in the agent logs stored locally on the device. The verbosity levels range from 0 to 5:
-
0 - Trace: Logs all information, including detailed debugging messages. Useful for diagnosing problems.
-
1 - Debug: Logs debugging information that can help in troubleshooting.
-
2 - Info: Logs standard operational messages that indicate the normal functioning of the agent.
-
3 - Warning: Logs warning messages indicating potential issues that may not necessarily cause failures.
-
4 - Error: Logs error messages that indicate something went wrong but doesn’t stop the application's function.
-
5 - Fatal: Logs critical errors that stop the agent from functioning. This helps in identifying severe issues.
-
-
Maximum CPU Usage (1-100): This parameter allows you to set a cap on the percentage of CPU resources that the agent can utilize. By adjusting this setting, you can balance the agent’s performance with the overall system performance, ensuring that other applications remain responsive.
-
Maximum Memory Usage (in bytes): This option lets you define the maximum amount of memory (in bytes) that the agent can use. Setting this limit helps prevent the agent from consuming excessive memory, which could otherwise affect system performance.
-
Maximum Sustained Memory Usage (in seconds): This specifies the maximum duration (in seconds) for which the agent can maintain its memory usage at the defined limit. If the agent exceeds this duration, it may indicate an issue that needs to be addressed.
-
Full Disk Scan Start (hrs after midnight): This setting allows you to schedule a full disk scan. You can specify an hour after midnight (using a 24-hour clock) when the scan will commence. For example, setting this to '1' will initiate the scan at 1:00 A.M. local time. Scheduling scans during non-peak times can help minimize disruptions.
-
Report Agent Errors Automatically: This option enables or disables automatic reporting of errors encountered by the agent. When enabled, the agent will send error reports to the relevant support team or logging system, aiding in quicker resolution of issues.
These settings collectively help customize the agent’s behavior to suit your system’s needs, manage resource usage effectively, and facilitate troubleshooting whenever necessary.
-
-
In the lower-right corner of the page, click Update.
-
-
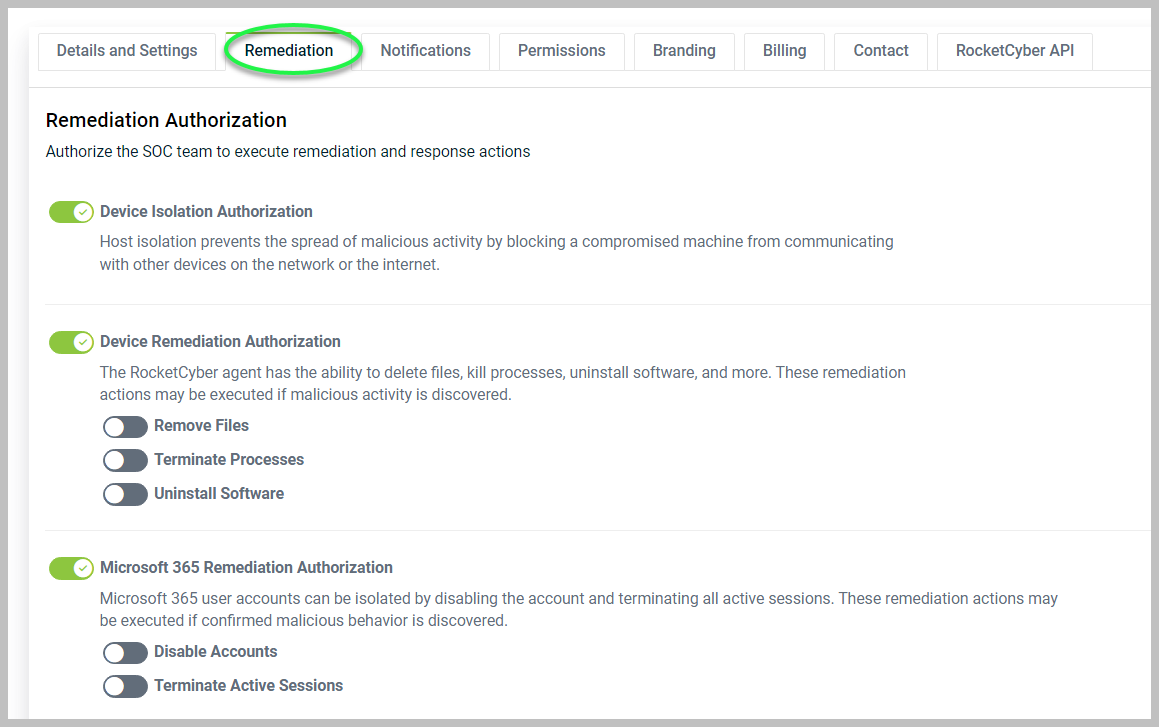
Remediation: Here, you can authorize the SOC team to take automated remediation actions, including isolation of devices during any critical events. In addition to device isolation, you can now provide authorization to the SOC to take the following actions:
-
Device Actions
-
Remove files
-
Terminate Processes
-
Uninstall Software
-
-
Microsoft 365 Actions
-
Disable Accounts
-
Terminate Active Sessions
-
-
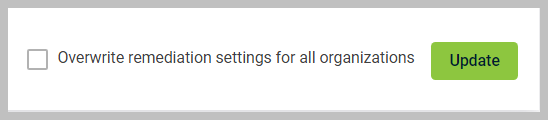
In the lower-right corner of the page, click Update. Select the checkbox if you wish to overwrite remediation settings for all organizations.
-
-
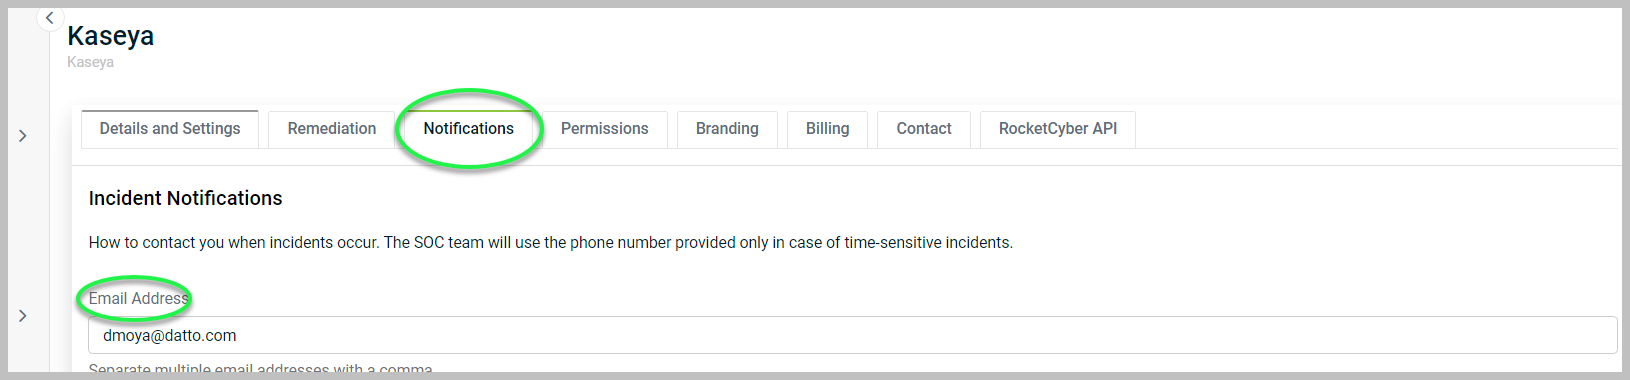
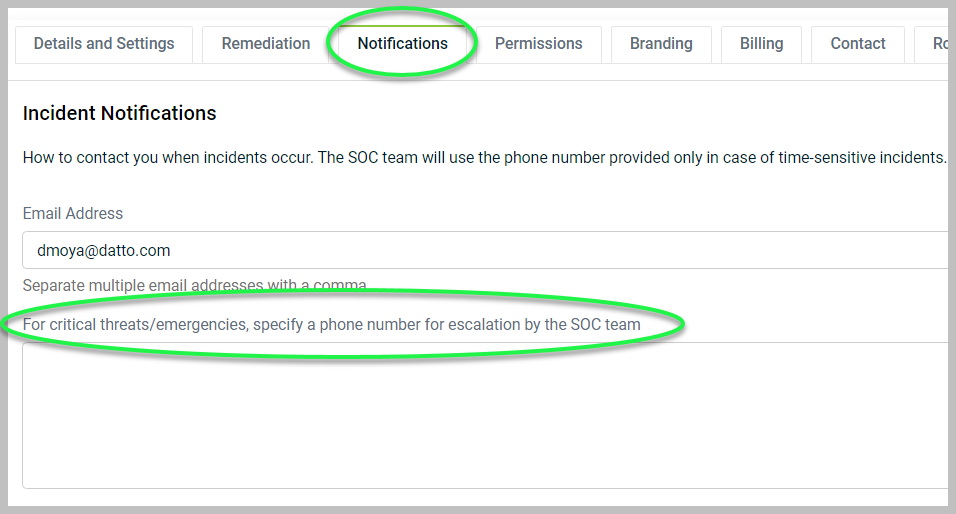
Notifications: This is where you will provide your contact information to the SOC Team. Should an incident occur, the SOC team will need designated emergency contact information to coordinate response actions. You can add email addresses and phone numbers for designated contacts here:
-
Email Address: You can add multiple email addresses separating them with a comma with no space between them.
-
For critical threats/emergencies, specify a phone number for escalation by the SOC team: For any critical threats or emergencies, specify a phone number for the SOC team to call. You can add your office number first and then any personal cell phone number as a backup. Just start a new line for each number. The SOC team will contact the phone numbers sequentially.
-
Special Instructions: This is your notepad to the SOC team. If there are special instructions that the SOC team should follow during an incident, such as when to call you or where to call you outside business hours.
-
Maintenance Windows: Here, you can specify the time frame for any scheduled maintenance. This helps provide the SOC team with additional context to recognize any expected anomalies during this period.
-
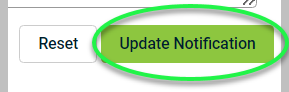
In the lower-right corner, click the Update Notification button.
-
- Permissions: This is where you can add, manage, and remove your users. RocketCyber gives you the ability to specify the tier of access and privilege that each user has in the platform. We have three different types of roles:
Owner: Full access to all data and configuration settings. This is the highest level of permission in RocketCyber. He can add your devices, set up your firewalls, and any of the integrations.
Incident Responder: Limited access to configuration settings and full access to data and events. They focus on responding and managing your tickets in RocketCyber.
Viewer: Read-only access to the dashboard. Can view everything but can't make changes to the site. This role will be given most likely to an end user within their organization.
For information about roles and access permissions, see the article Understanding roles and access permissions .
-
Branding: Here, you can upload your customized logo and add it to the RocketCyber platform, replacing the logo on the upper left.
- Billing: Information involving billing has been moved to the KaseyaOne platform so no need to worry about it in RocketCyber.
-
Contact: Here, you have the option to add more contact information. This includes fields for the contact's name and physical address.
-
RocketCyber API: Here is where you find and manage your RocketCyber API access token, which is essential for authorizing access to the RocketCyber API for integrations and data extraction. For more information, please refer to Finding the RocketCyber API token.


