Standalone: Getting started with RocketCyber
This article guides you through your first login and initial setup as a standalone RocketCyber user, including account activation, onboarding options, security requirements, and self‑guided help.
Not sure which guide you need? This article is for customers using RocketCyber as a standalone product. If RocketCyber is included in your Kaseya 365 subscription and you access products through KaseyaOne, refer to Kaseya 365 EndPoint Pro: Getting started with RocketCyber.
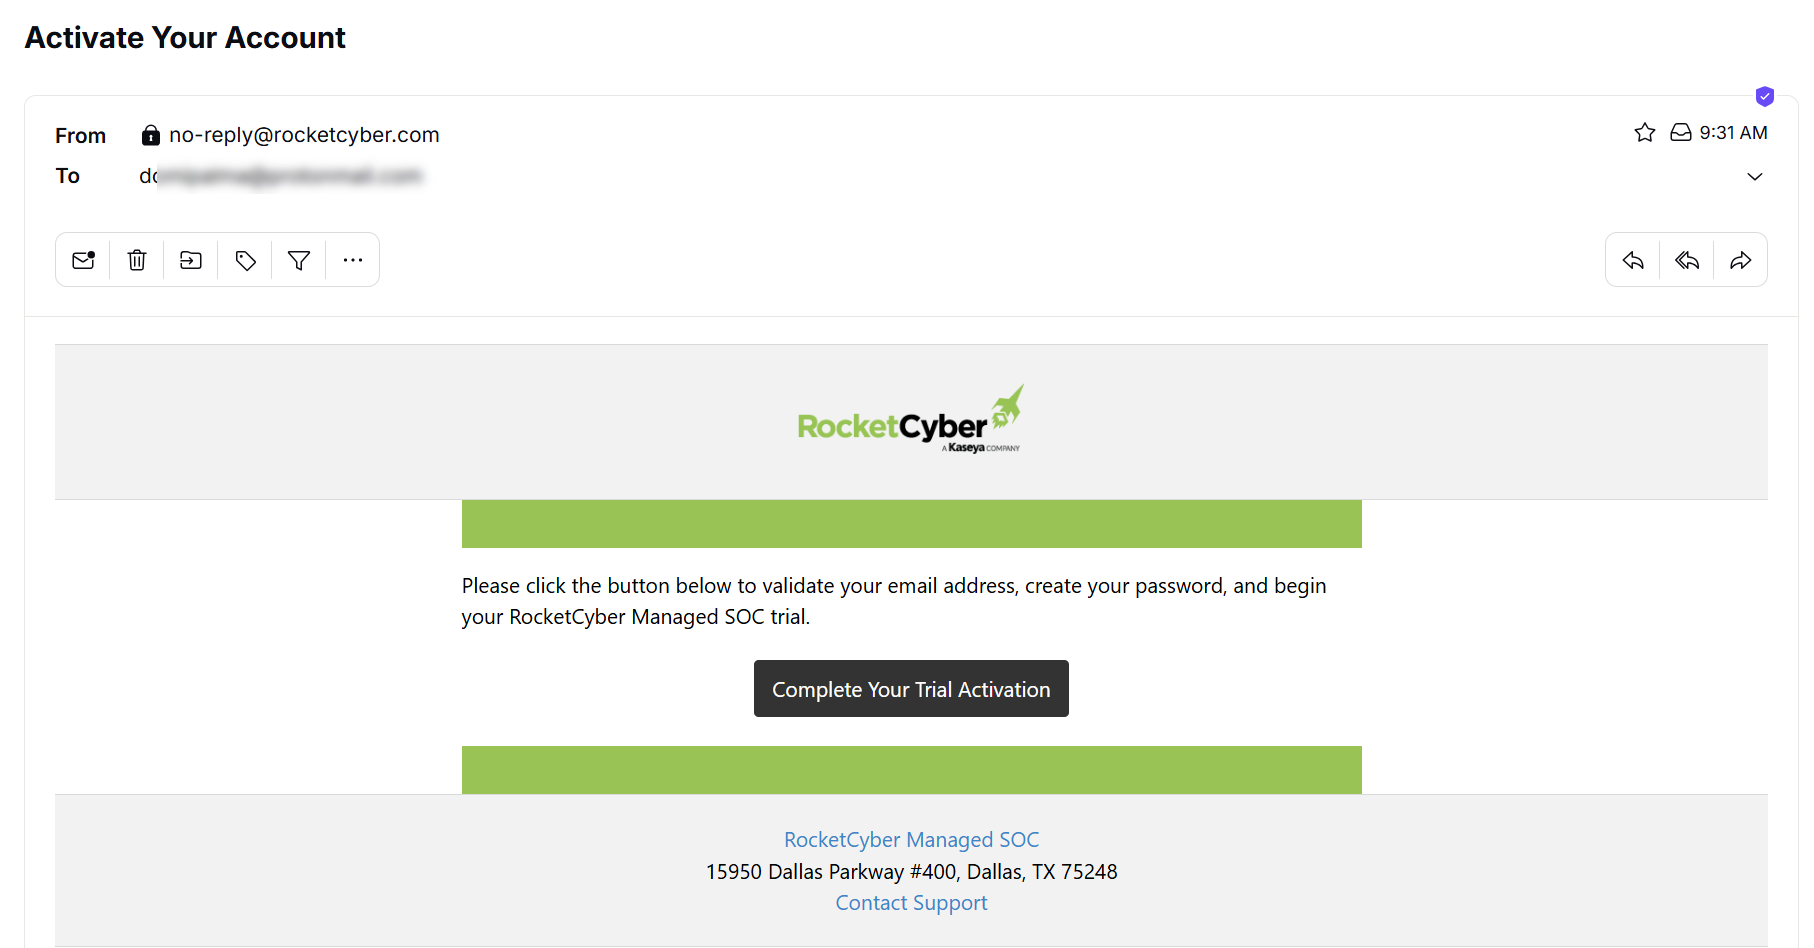
Step 1: Activate your RocketCyber account
To begin, open the Activate Your Account email and click Complete Your Trial Activation. This link opens RocketCyber and begins the account setup process.
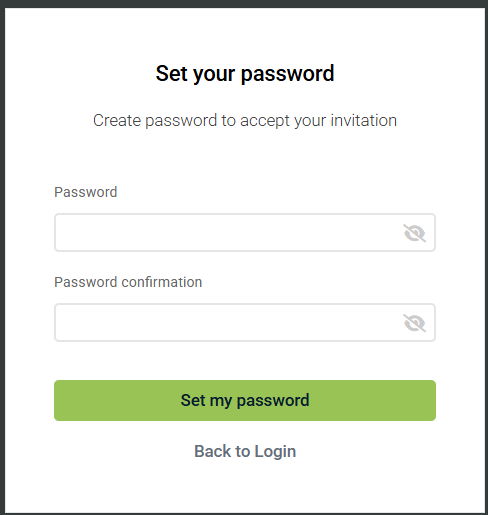
On the Set your password page:
-
Enter a password in the Password field.
-
Re‑enter it in the Password confirmation field.
-
Click Set my password.
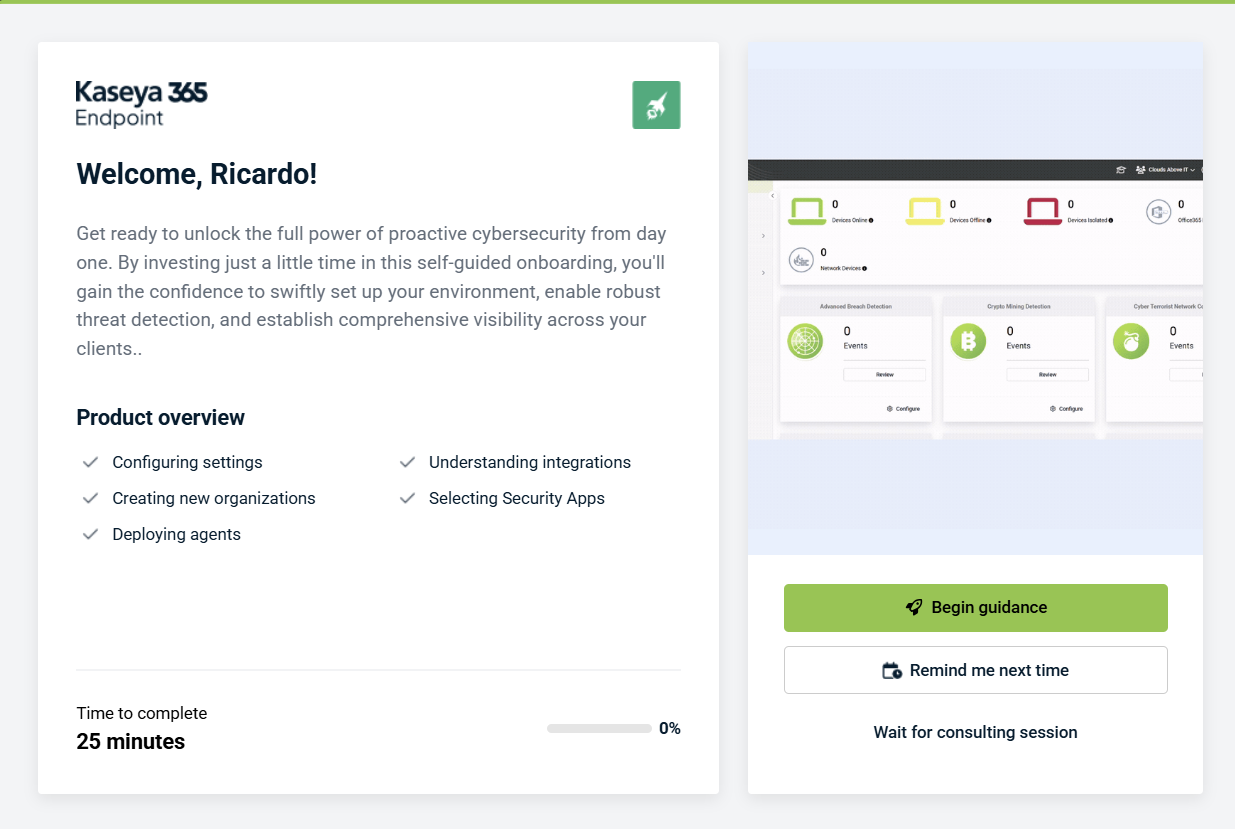
Step 2: Start guided onboarding (optional)
After setting your password, a Welcome window appears. This window introduces the Kaseya 365 Endpoint guided onboarding experience and outlines what you can accomplish, such as:
-
Configuring settings
-
Creating organizations
-
Deploying agents
-
Understanding integrations
-
Selecting security apps
The estimated time to complete onboarding is shown at the bottom of the screen.
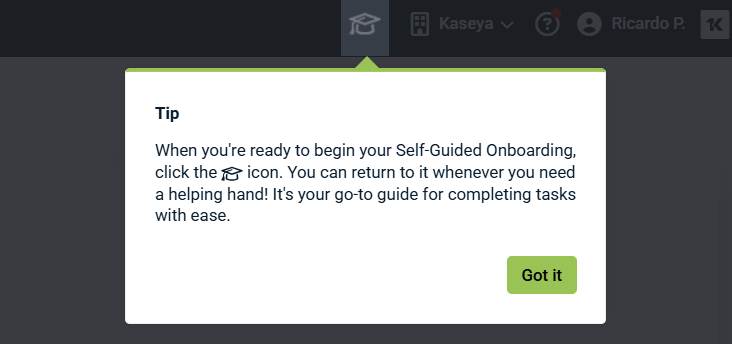
Choose one of the following options:
-
Begin guidance: Start the guided onboarding experience.
-
Remind me next time: Postpone onboarding. A tip window appears; click Got it to continue.
-
Wait for consulting session: Skip guided onboarding and wait for assistance.
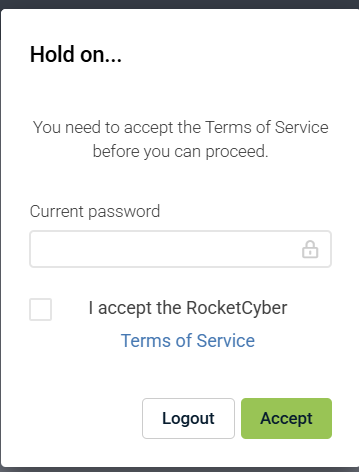
Step 3: Accept the RocketCyber Terms of Service
Before you can continue, you must accept the RocketCyber Terms of Service.
On the Terms of Service screen:
-
Enter your current password.
-
Select the checkbox to confirm that you accept the Terms of Service.
-
(Optional) Click the Terms of Service link to review the agreement.
-
Click Accept to continue.
Step 4: Enable two‑factor authentication (2FA)
RocketCyber requires two‑factor authentication (2FA) to secure your account.
On the Enable Two Factor Authentication screen:
-
Install an authenticator app such as Authy or Google Authenticator on your mobile device.
-
Open the app and scan the displayed QR code.
-
If you cannot scan the code, manually enter the setup key provided by the app.
-
-
Enter the generated authentication code in the Authentication Code field.
-
Click Submit.
This activates 2FA and generates recovery codes.
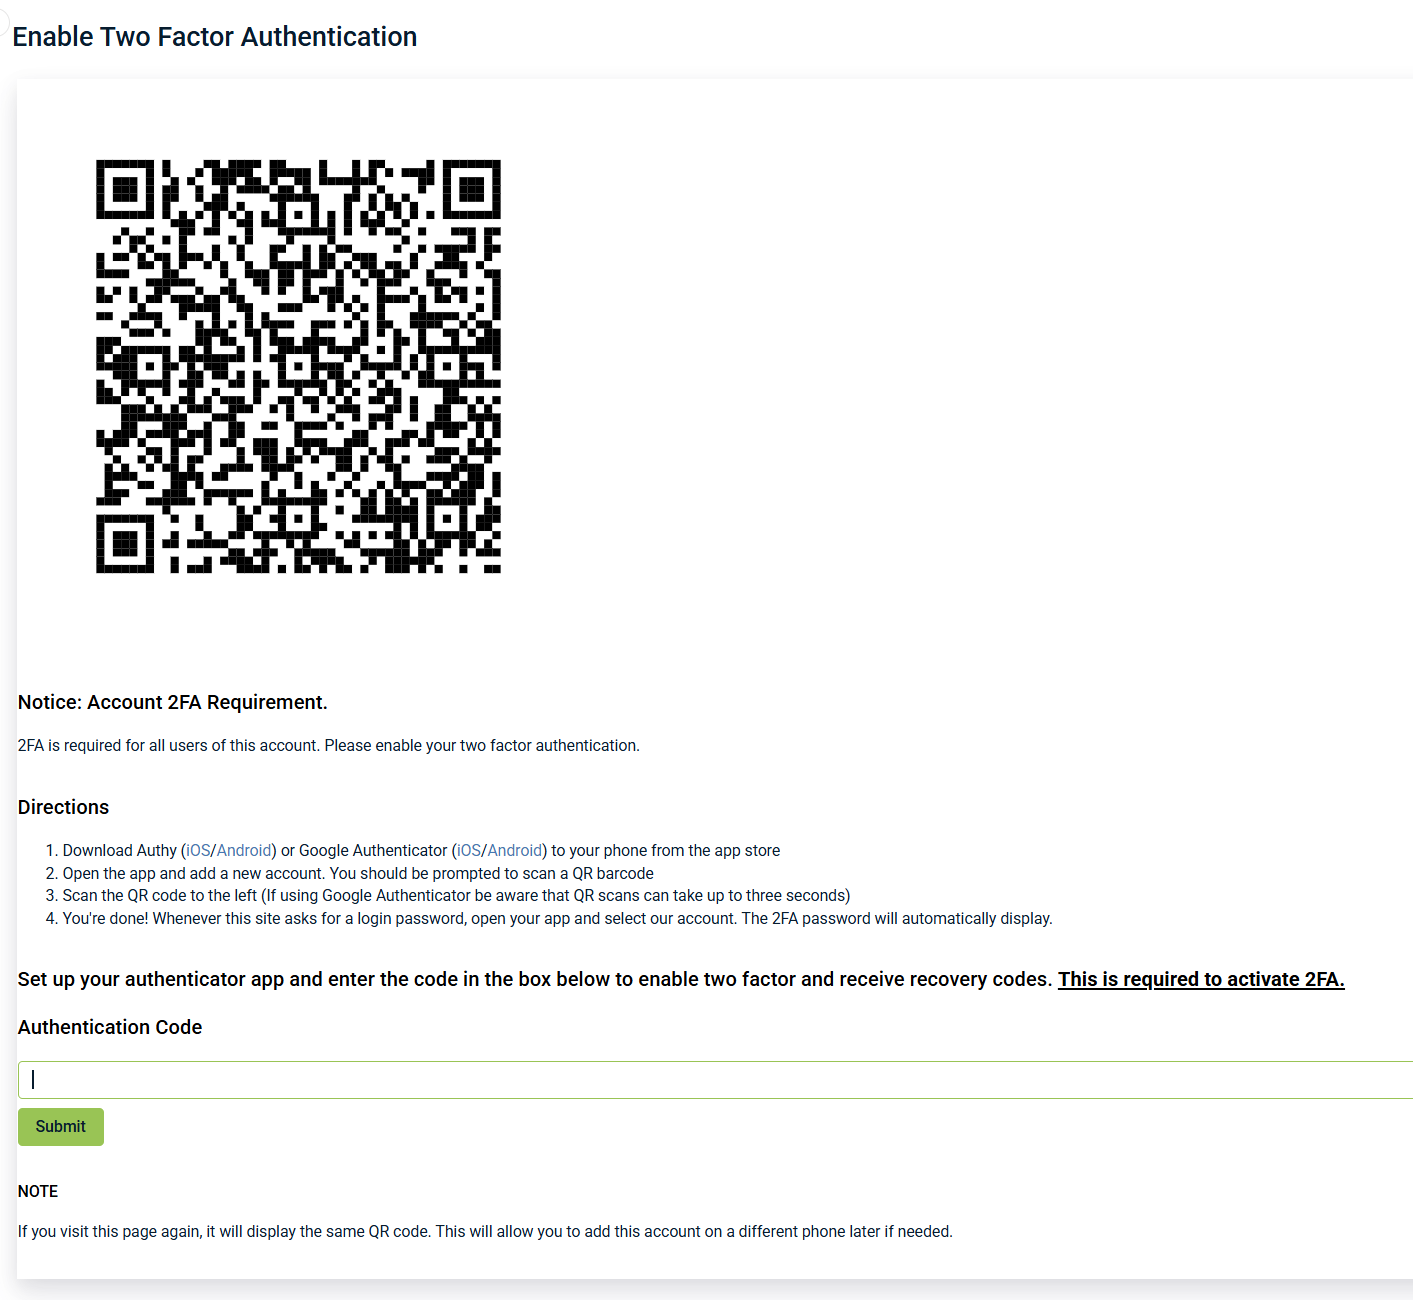
NOTE This step is required to secure your account. Refreshing the page displays the same QR code, allowing you to add the account to another device if needed.
Step 5: Save your recovery codes
The Recovery Codes screen displays one‑time use codes that allow access to your account if you lose your 2FA device.
-
Copy and store these codes in a secure location.
-
Each code can be used only once.
-
After saving your recovery codes, click Log Out to complete setup and begin using RocketCyber with 2FA enabled.
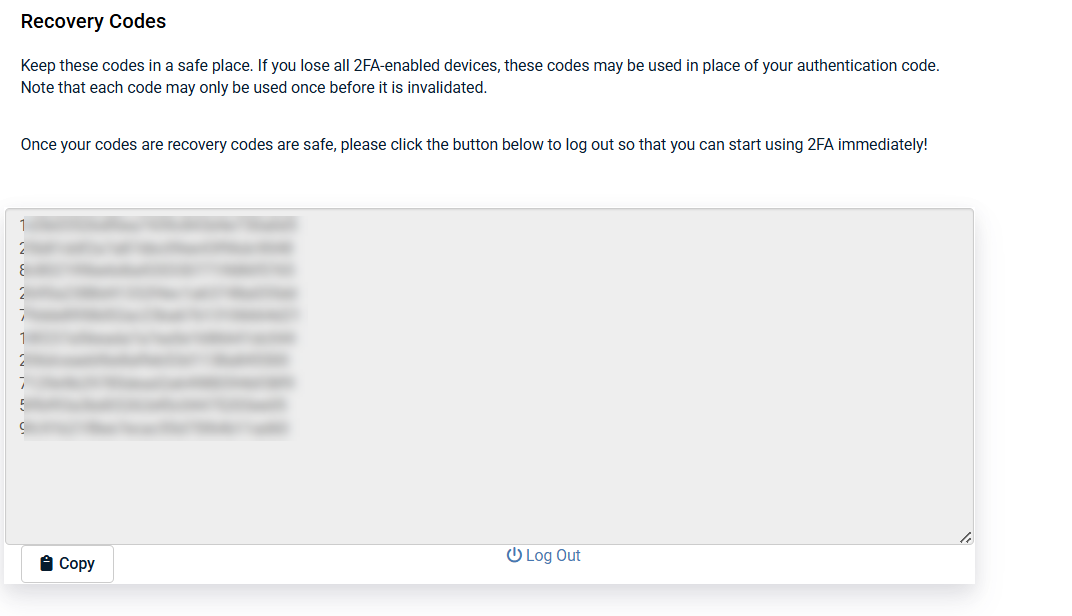
IMPORTANT If you lose access to your authenticator device and do not have your recovery codes, account recovery may require administrator assistance.
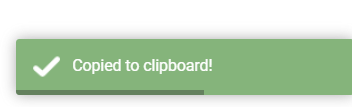
When you copy the codes, a Copied to clipboard message briefly appears to confirm the action.
Self-guided onboarding
You can access onboarding at any time after logging in by clicking the graduation cap icon in the upper‑right corner of the application. This opens the Onboarding panel, where you can track progress and continue setup tasks.
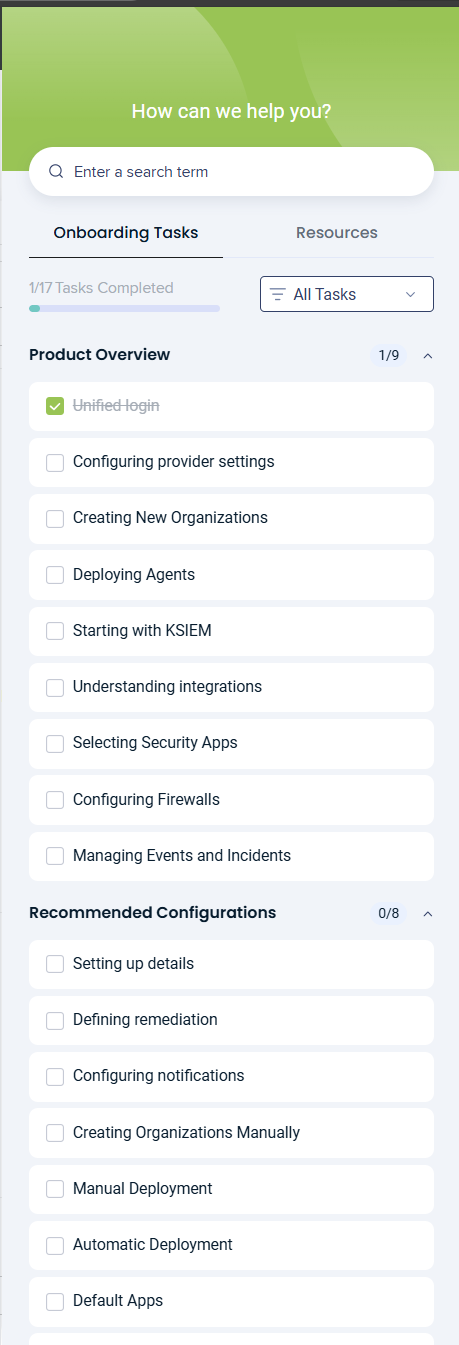
At the top of the panel, you can:
-
Use the search field to find onboarding tasks or resources.
-
View your overall progress (for example, 1 of 17 tasks completed).
-
Filter the list using the All Tasks drop‑down menu.
Onboarding tasks
The Onboarding Tasks section lists core setup activities grouped under Product Overview, such as:
-
Unified login
-
Configuring provider settings
-
Creating new organizations
-
Deploying agents
-
Starting with KSIEM
-
Understanding integrations
-
Selecting security apps
-
Configuring firewalls
-
Managing events and incidents
Completed tasks are marked with a checkmark. Click any task to launch its guided walkthrough.
Recommended Configurations
Below the core tasks, the Recommended Configurations section highlights optional but suggested setup steps, including:
-
Setting up details
-
Defining remediation
-
Configuring notifications
-
Creating organizations manually
-
Manual deployment
-
Automatic deployment
-
Default apps
These tasks help you further tailor RocketCyber to your environment but are not required to begin using the platform. You can complete onboarding tasks in any order and return to this panel at any time to resume, replay, or track your progress.
Walkthrough information windows
Walkthrough information windows provide contextual guidance as part of the self‑guided onboarding experience. Each window explains a specific feature or concept and highlights its key benefits.
These windows typically include:
-
A title identifying the topic of the walkthrough
-
A brief description explaining what the feature does and why it is useful
-
A list of benefits or key points to help you understand the value of the feature
-
A link to a related Knowledge Base article for more detailed information
To complete the walkthrough step, click Finish.
To close the window without completing the step, click the X in the upper‑right corner.
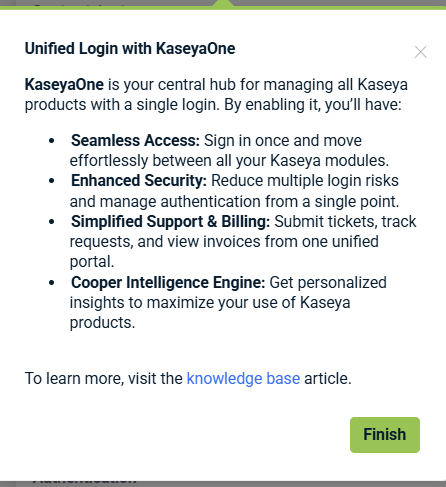
You can replay walkthroughs at any time from the onboarding panel if you want to review the information again.
Resources tab
The Resources tab provides quick access to learning materials that support your onboarding experience. It complements the guided tasks by offering videos and reference content you can review at your own pace.
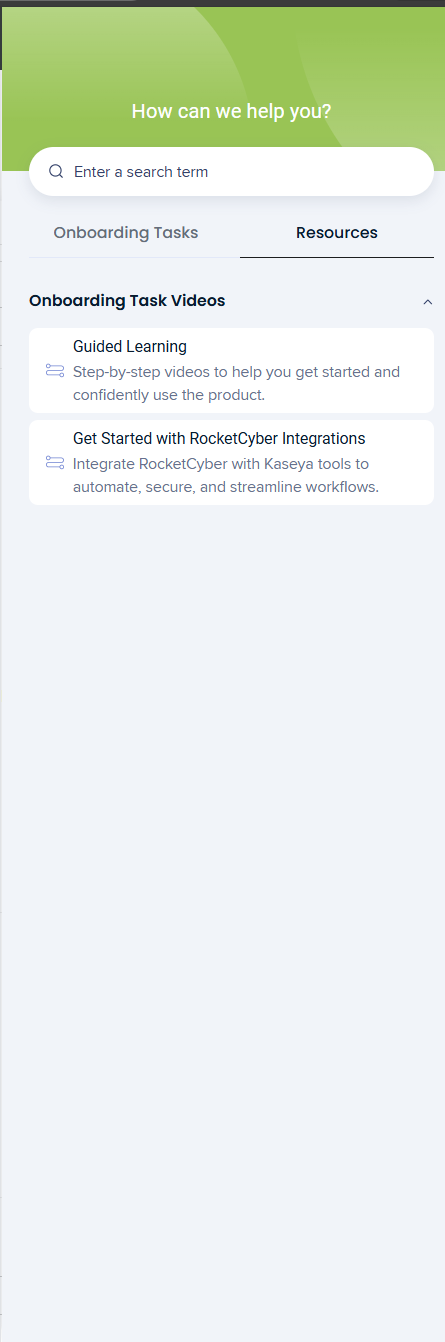
At the top of the tab, you can use the search field to quickly find relevant learning resources.
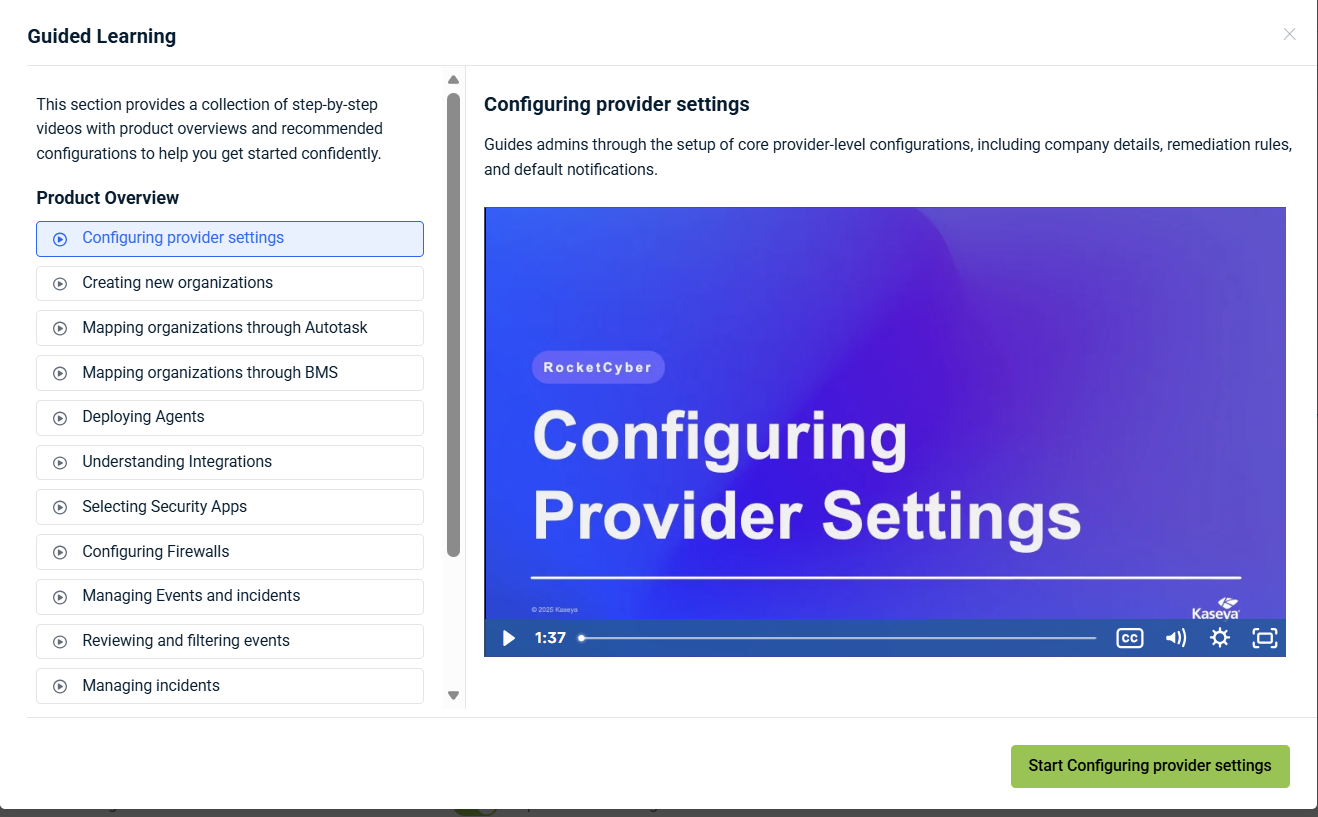
Onboarding task videos
The Onboarding Task Videos section includes curated video content designed to help you get started and better understand key features.
Available resources include:
-
Guided Learning: Step‑by‑step videos that walk you through core functionality and help you confidently use the product.
-
Getting Started with Integrations: Videos that explain how to integrate RocketCyber with Kaseya tools to automate, secure, and streamline workflows.

Click any resource to open and view the associated video. You can return to the Resources tab at any time to continue learning or revisit topics as needed.
Next steps
After completing onboarding, you can further customize your RocketCyber environment at any time:
-
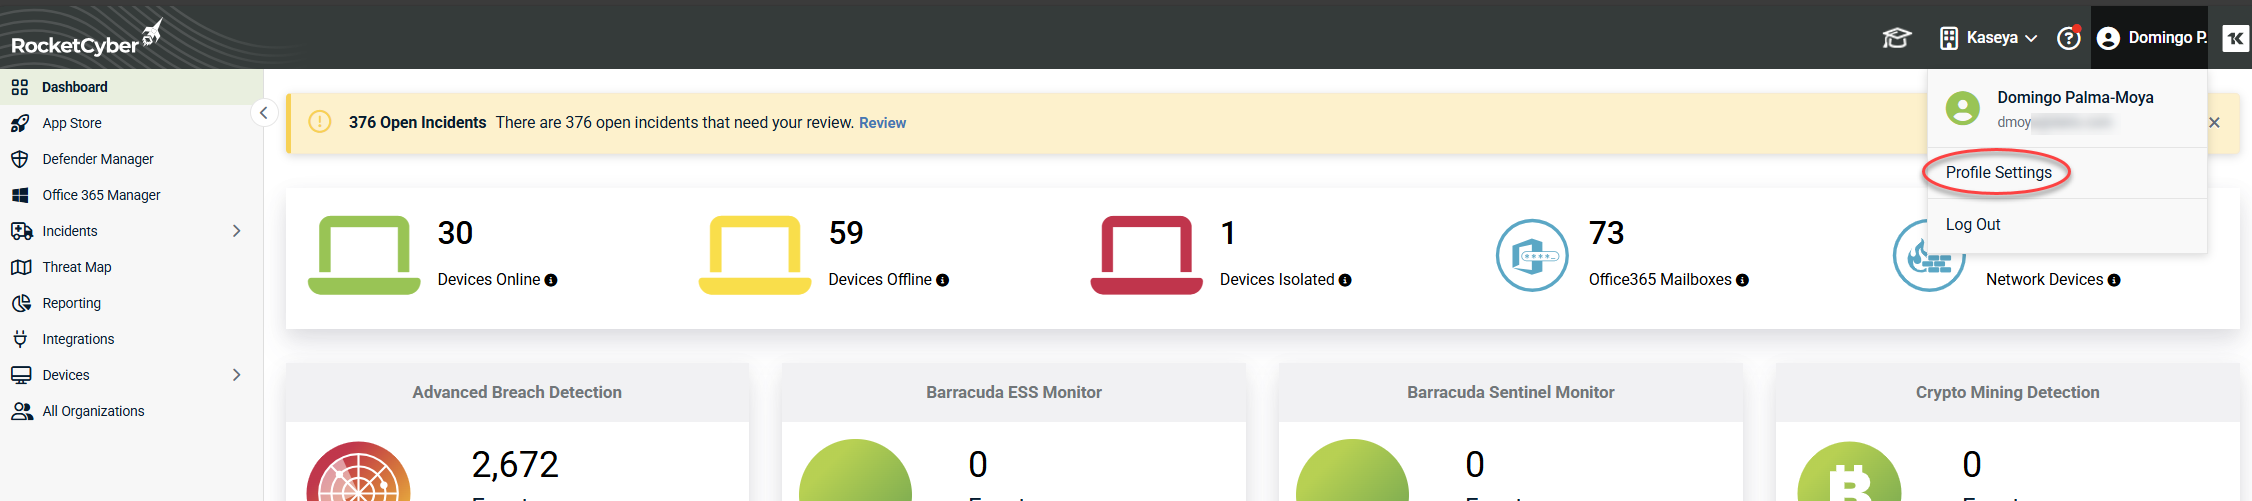
Profile settings: Update your personal information, password, time zone, and security options such as two‑factor authentication (2FA).
-
Provider and organization settings: Switch between provider‑level and organization‑level views, and manage settings that apply globally or to specific organizations.
RocketCyber operates primarily at the provider (MSP) and organization (customer) levels. These levels are used to configure settings and manage environments.
Access these options from the My Account menu and the current account selector in the upper‑right corner of the application. For detailed information, refer to Configuring provider settings.
NOTE Changes made at the provider level can affect all organizations. Select an individual organization if you want to apply settings more granularly.
-
Integrations: Connect RocketCyber with supported security tools and PSA systems. Refer to the RocketCyber Integrations Guide for more information.


