Configuring the Firewall Log Analyzer app
The Firewall Log Analyzer works similarly to an Intrusion Detection System, but it does not require the purchase and installation of an expensive device. If you already have an IDS/IPS, our app can help you interpret those logs as well.
You will configure the app to send firewall logs to your RocketCyber-connected computers, where our firewall analysis software will identify malicious traffic, data leaks, and various reconnaissance and attack vectors. Any detected events will trigger an immediate alert, which will appear on your RocketCyber dashboard.
To configure the Firewall Analyzer, follow these steps:
-
Go to an organization.
NOTE This app must be configured at the organization level. Configuring at this level allows you to send each organization's logs to its respective machines for processing, if necessary for business or compliance reasons.
-
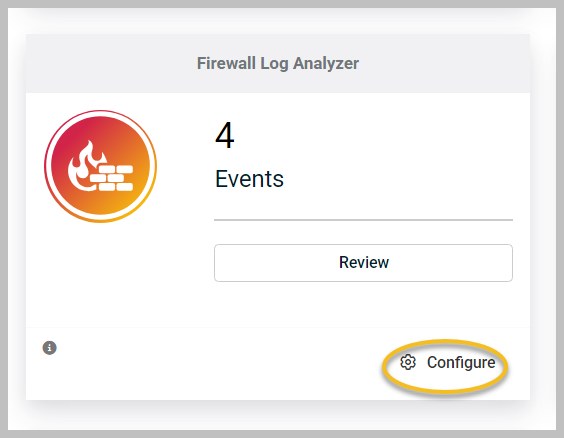
Click Configure at the bottom of the page to set up the Firewall Log Analyzer app.
-
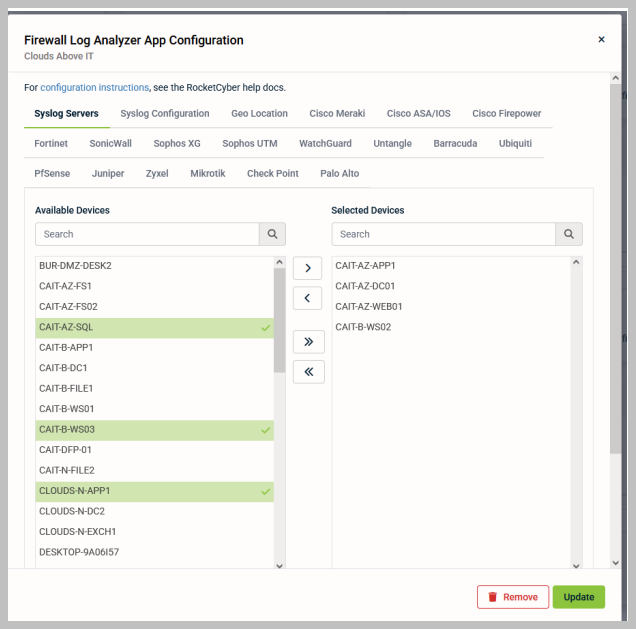
In the Firewall Log Analyzer App Configuration page, you'll find numerous tabs for detailed configuration:
-
Syslog Servers: This tab allows you to select one or more devices to designate as syslog servers. Previously limited to a single collector per organization, the new update supports up to 100 syslog collectors, facilitating comprehensive monitoring across all firewalls and network devices. After selecting the desired devices, click Update to save your changes
NOTE Only Windows devices will appear in this list, as we do not currently support syslog servers for Mac/Linux.
-
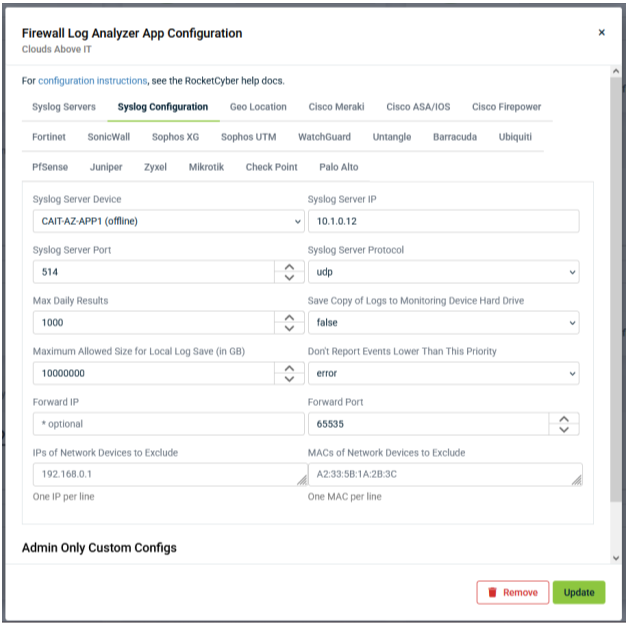
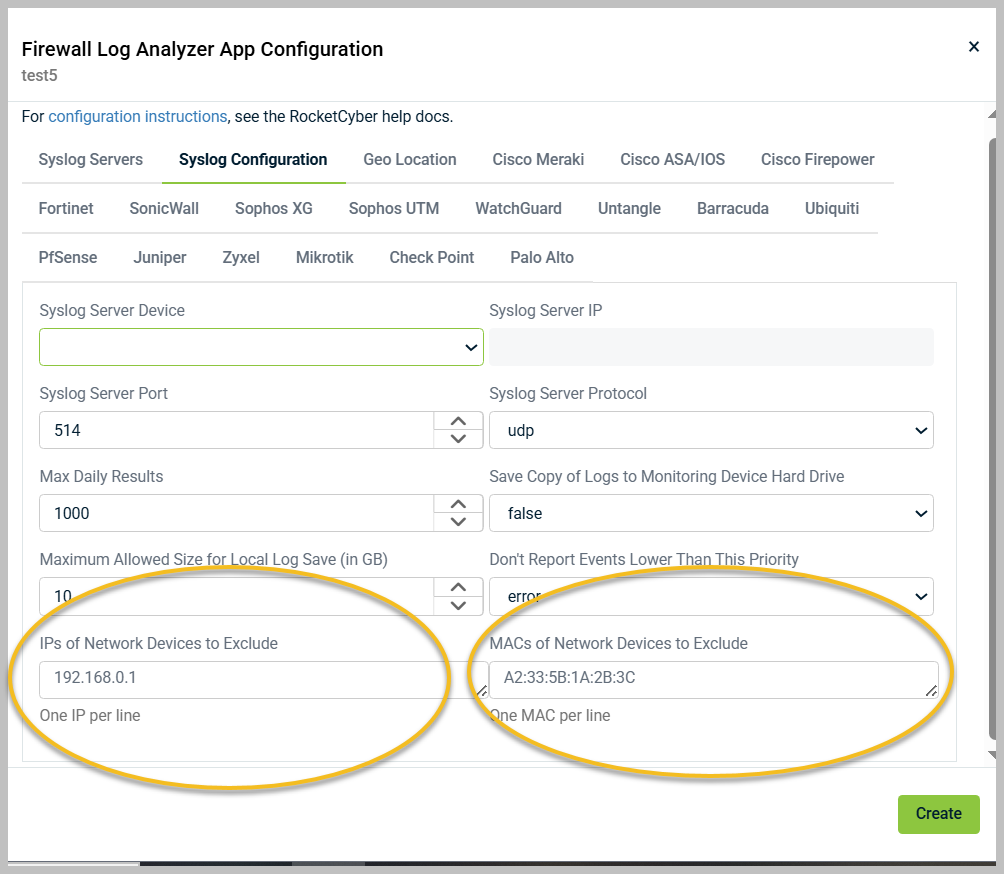
Syslog Configuration: This tab accommodates multiple configurations, including:
-
| Setting | Action |
|---|---|
| Syslog Server Device |
Previously, the Syslog Server Device drop-down menu allowed you to select only one device to act as the syslog server. Now, all selected devices will be available in this drop-down menu, with each device functioning as its own syslog server and having a unique configuration. Selecting a device from the drop-down menu will load the syslog server configuration associated with that device. After making changes to a syslog server configuration, be sure to click Update before switching the selected device in the Syslog Server Device drop-down menu; otherwise, you will lose any unsaved changes. |
| Syslog Server IP |
This drop-down menu denotes the IP address of the designated syslog server. Copy this IP address to configure syslog forwarding on your firewall.
|
| Syslog Server Port | Specify the port that a Syslog Server Device will listen to for receiving firewall logs. We recommend using the default port 514. |
| Syslog Server Protocol | Choose whether to receive logs via tcp or udp. We recommend using the default option, udp. |
| Max Daily Results | If you're concerned about an overwhelming amount of data in your RocketCyber account, this setting allows you to limit the number of results reported per day. |
| Save Copy of Logs to Monitoring Device Hard Drive and Maximum Allowed Size for Local Log Save (in GB) | These options allow you to save a copy of your logs to the local hard drive and manage the file size. Note: Saving logs may impact system performance, and files will stop saving when the limit is reached, rather than overwriting. |
| Don't Report Events Lower Than This Priority |
To avoid being overwhelmed by low-priority notifications (e.g., blocked malicious email attachments), you can use this setting to filter out less critical alerts. You can change this setting to info or debug during an active attack or to verify functionality; the default is set to error. Events related to reputation IP lookups are exceptions and will still report regardless of this filtering option. |
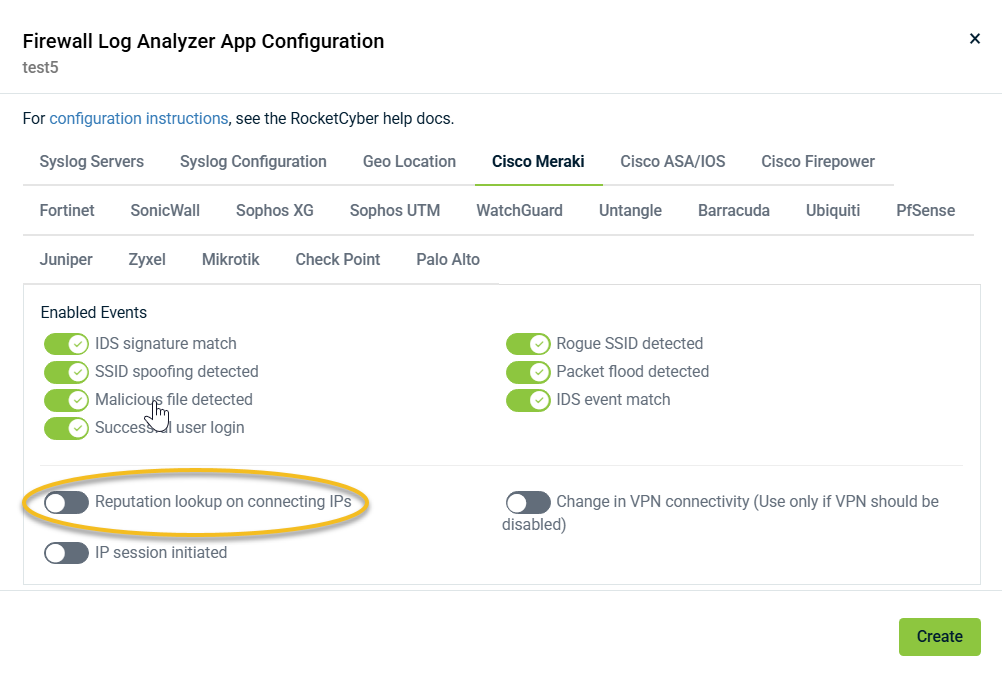
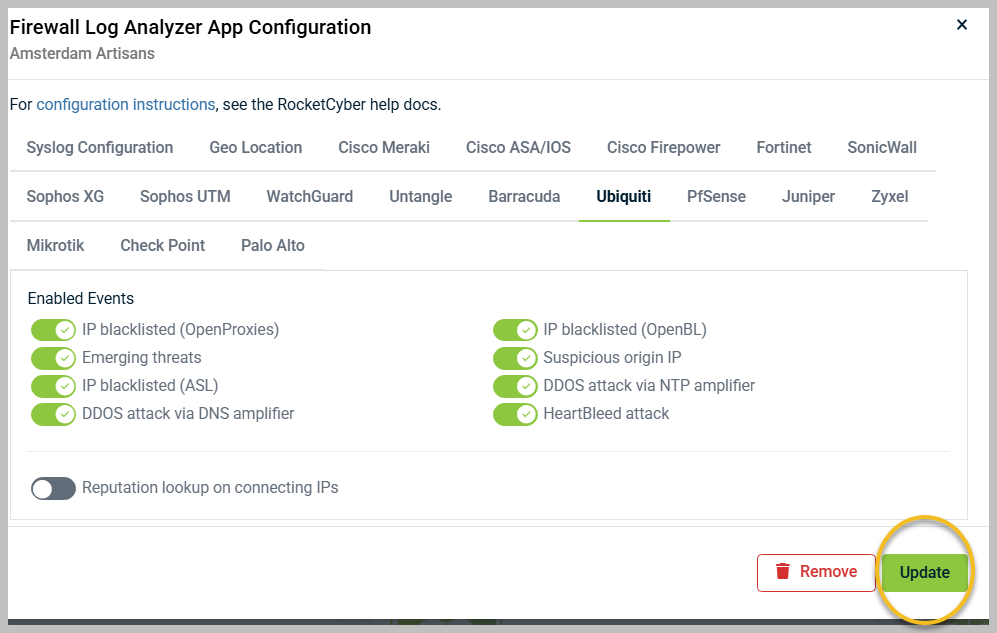
All connections are informational by nature. If you have lookups enabled, it is assumed you want a warning of attacks, so these alerts are allowed even though they are informational. If desired, the Reputation lookup on connecting IPs toggle can be turned off under the firewall brand tab.
Non-firewall devices such as switches, routers, or access points may register as being a firewall and can be excluded.
The non-firewall devices can then be deleted from the firewall registration list.
-
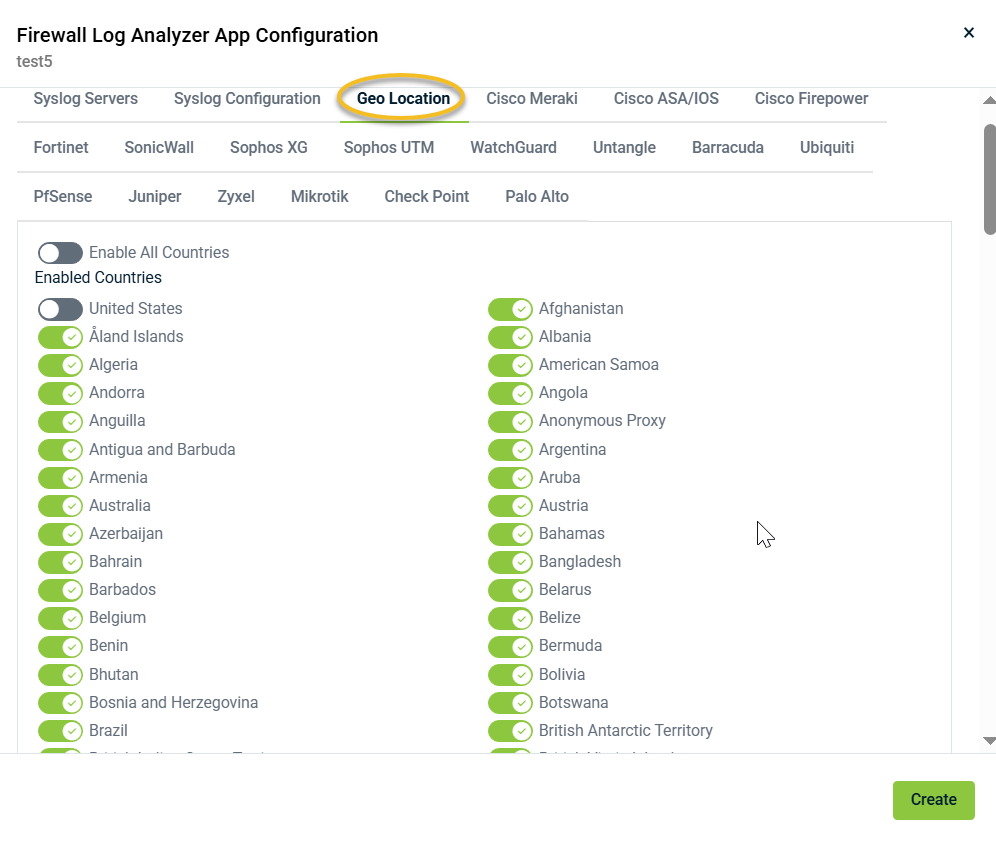
Geo Location: In this tab, you can enable or disable specific countries for traffic monitoring. By default, all countries except the US are selected. To quickly find a specific country in the Enabled Countries list, use Ctrl + f.
-
After selecting and configuring all devices, you can point any supported firewall syslog events to these devices. They will then populate under the same organization within the Firewall Log Analyzer app. To configure firewall specific items, select the tab that corresponds to your firewall brand. We have established reasonable default rules to help keep you protected while minimizing false positives. However, each network is unique, so feel free to modify the selected events as needed:
-
When you finish, remember to click Create or Update in the lower-right corner to save your configuration settings.
Troubleshooting articles
- https://help.rocketcyber.kaseya.com/help/Content/troubleshooting-faq-s/firewall-log-analyzer-agent-failed-to-bind-port.html
- https://help.rocketcyber.kaseya.com/help/Content/troubleshooting-faq-s/how-can-i-tell-if-firewall-is-connected-to-the-firewall-log-analyzer-app.html
- https://help.rocketcyber.kaseya.com/help/Content/troubleshooting-faq-s/firewall-analyzer-troubleshooting.html
- https://helpdesk.kaseya.com/hc/en-gb/sections/4406091575185-Troubleshooting-FAQ-s


